
How to Use Microsoft Word’s Advanced References Tool?
Microsoft Word is a powerful tool for creating professional documents, and one of its standout features is the References tool. This feature allows you to efficiently manage citations, footnotes, endnotes, a table of contents, and more. For students, researchers, and professionals alike, using Word’s advanced references tool can save time and help you maintain a polished, well-organized document.
In this blog, we’ll dive into the ins and outs of Microsoft Word’s advanced references tool, showing you how to effectively use it for your projects.
1. Inserting and Managing Citations
One of the primary uses of the References tool is managing citations. Whether you’re writing a research paper or an academic article, correctly citing your sources is crucial. Word allows you to insert citations from a built-in list of sources or manually input them.
How to Insert a Citation:
- Go to the References tab on the Ribbon.
- In the Citations & Bibliography group, click Insert Citation.
- If you’ve already added sources to your document, you can select one from the dropdown list. To add a new source, click Add New Source.
- Choose the type of source (e.g., book, journal article, website), and enter the necessary details (author, title, year, etc.).
- After adding your source, Word will automatically insert the citation in the text, formatted according to the citation style (APA, MLA, Chicago, etc.) you’ve chosen.
Word makes it easy to manage multiple sources and automatically formats them in the correct citation style.
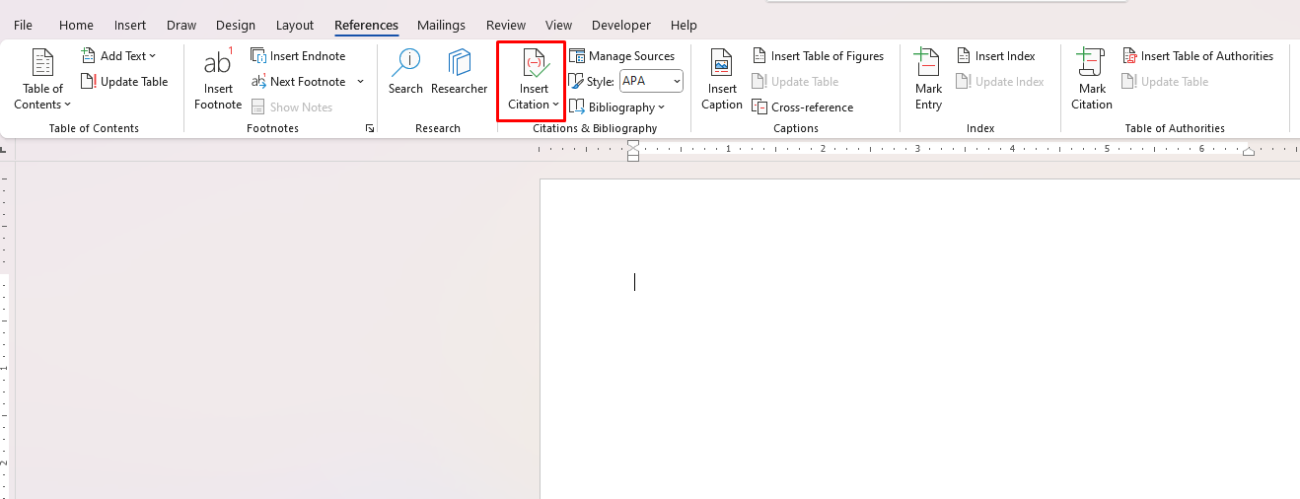
Editing or Removing Citations:
If you need to edit or remove a citation, simply click on the citation in the document. You can either update it by selecting Edit Citation or delete it by choosing Remove Citation.
2. Creating a Bibliography or Works Cited List
After adding citations to your document, you can generate a Bibliography or Works Cited list with just a few clicks.
How to Create a Bibliography:
- Place your cursor where you want the bibliography to appear (usually at the end of the document).
- Go to the References tab and click Bibliography.
- Choose a format (e.g., Bibliography, Works Cited, References) from the dropdown.
- Word will automatically generate a list of all the sources you’ve cited in the document, formatted according to the selected citation style.
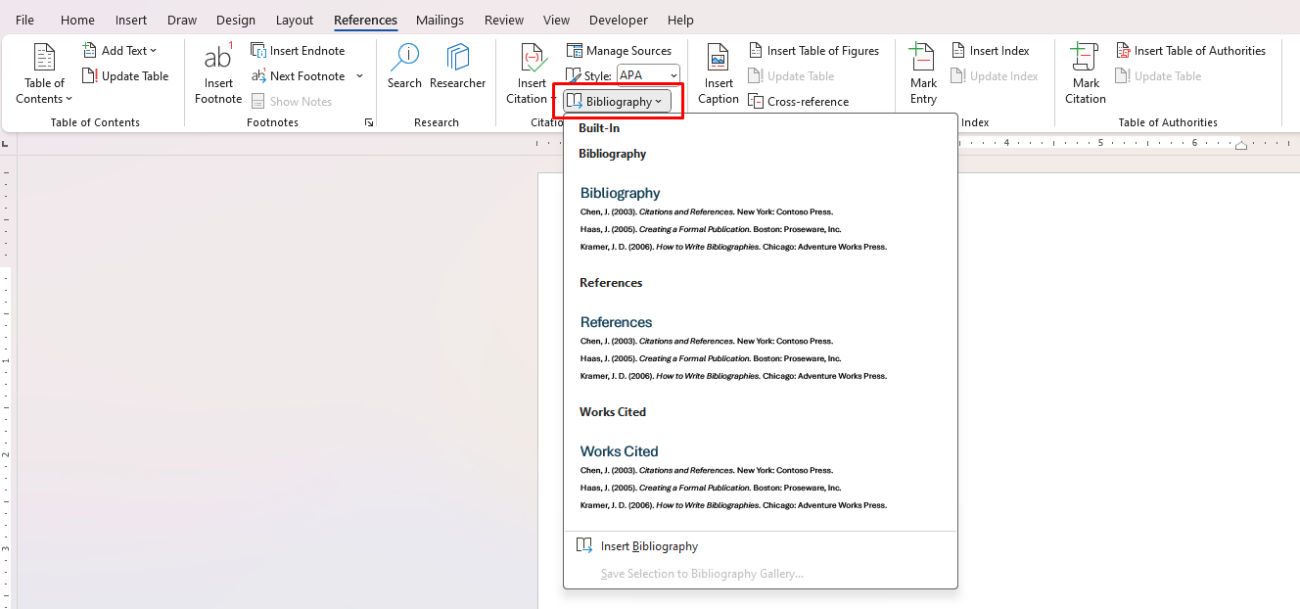
This tool is incredibly helpful for saving time and ensuring that your references are formatted correctly. If you add or remove citations, you can update the bibliography with a click of a button by selecting Update Citations and Bibliography.
3. Adding Footnotes and Endnotes
Footnotes and endnotes are essential for providing additional information or citing sources without interrupting the flow of your text. Microsoft Word allows you to insert and manage footnotes and endnotes with ease.
How to Insert a Footnote or Endnote:
- Place your cursor where you want to insert the footnote or endnote.
- Go to the References tab and select either Insert Footnote or Insert Endnote from the Footnotes group.
- Word will automatically insert a reference mark (like a superscript number) in the document and open a space at the bottom of the page (for footnotes) or at the end of the document (for endnotes).
- Type your footnote or endnote content.
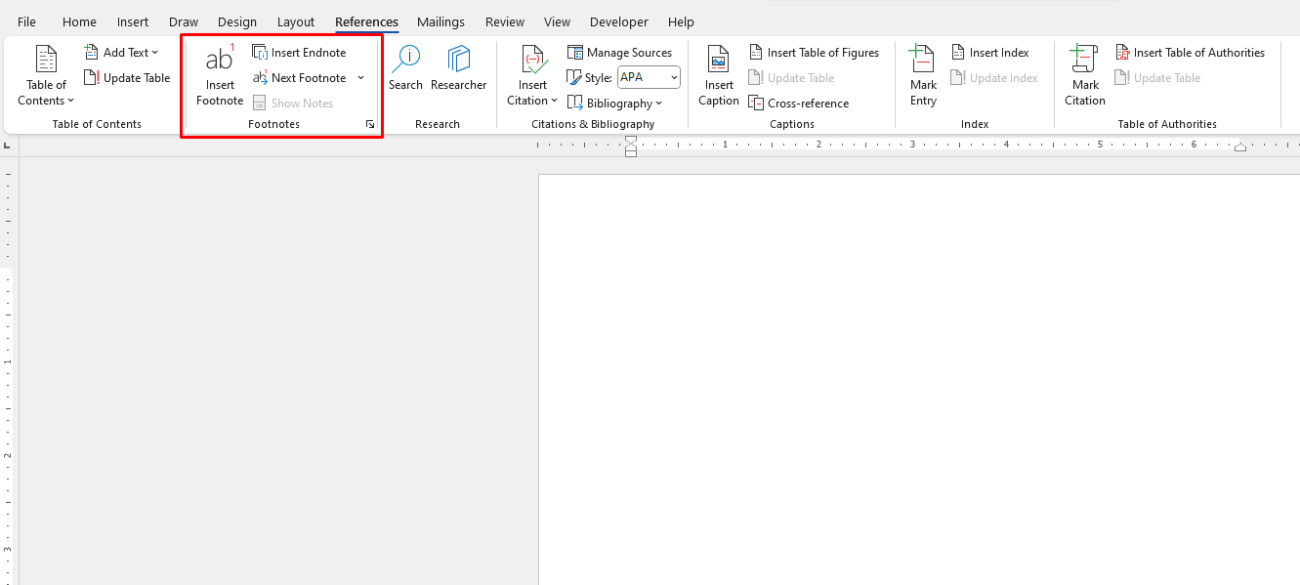
Managing Footnotes and Endnotes:
You can also customize the numbering system for footnotes and endnotes (e.g., use Roman numerals, letters, or continue numbering throughout the document) by selecting Footnote & Endnote in the References tab.
4. Creating a Table of Contents
A table of contents (TOC) is a critical organizational tool for longer documents, such as reports or academic papers. Word’s advanced references tool allows you to create a dynamic TOC that updates automatically as you make changes to your document.
How to Create a Table of Contents:
- First, use the Heading Styles (Heading 1, Heading 2, etc.) in the Home tab to format the headings and subheadings in your document.
- Once your document is structured with headings, go to the References tab.
- Click on Table of Contents and choose from one of the available automatic TOC styles.
- Word will generate a table of contents based on the heading styles you’ve applied.
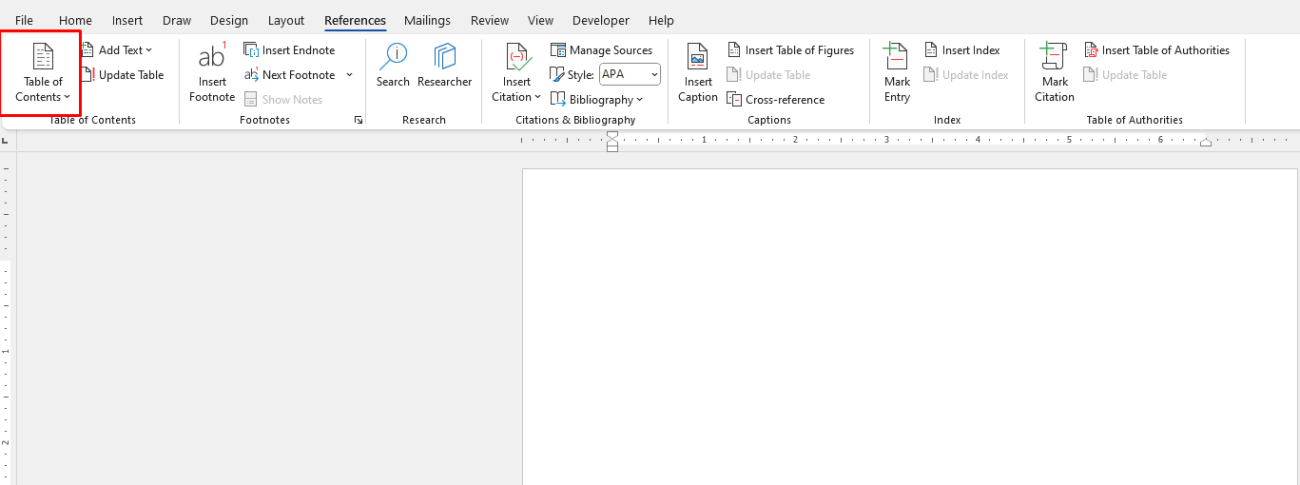
Updating the Table of Contents:
Whenever you add or remove content from your document, you can easily update the TOC by right-clicking on it and selecting Update Field. You can choose to update only the page numbers or the entire table to reflect any changes in headings.
5. Cross-Referencing
Cross-references are helpful when you need to refer to other sections, figures, tables, or references within your document. Word’s cross-referencing tool ensures that your references remain accurate and update automatically if you make changes.
How to Insert a Cross-Reference:
- Place your cursor where you want to insert the cross-reference.
- Go to the References tab and click Cross-reference in the Captions group.
- Choose the type of item you want to reference (e.g., heading, figure, table, footnote).
- Select the specific reference you want to insert and choose the format (e.g., hyperlink, page number, or paragraph).
- Click Insert to add the cross-reference.
If you move or delete sections within your document, cross-references update automatically when you update the fields.
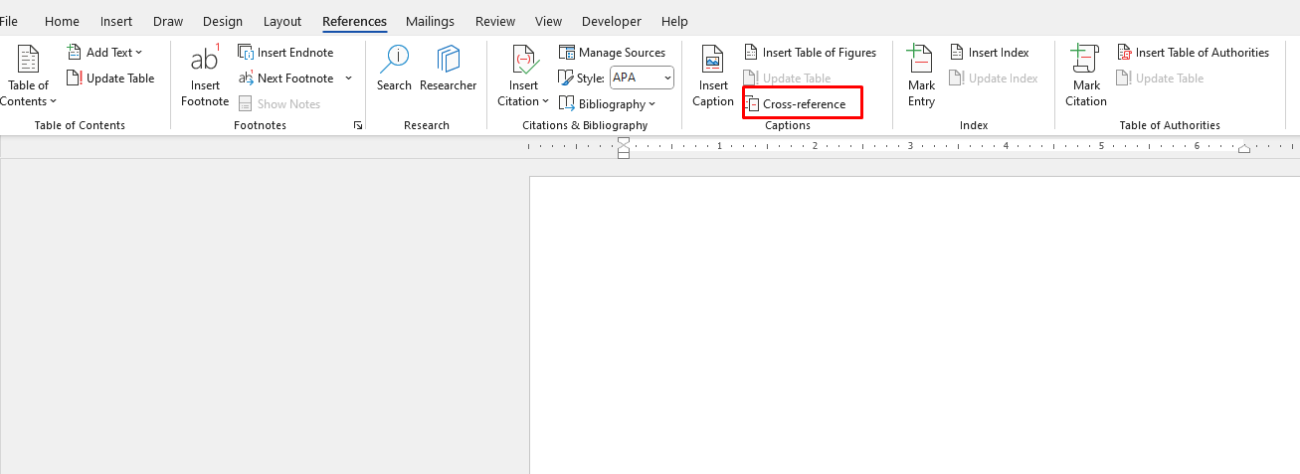
6. Captions for Figures and Tables
For documents that contain images, charts, or tables, adding captions can be helpful for reference and clarity. Word’s references tool makes it easy to add and manage captions for figures and tables.
How to Add Captions:
- Select the figure, table, or image you want to caption.
- Go to the References tab and click Insert Caption in the Captions group.
- Type your caption text and choose the numbering format.
- Word will insert the caption and update the numbering automatically as you add or remove items.
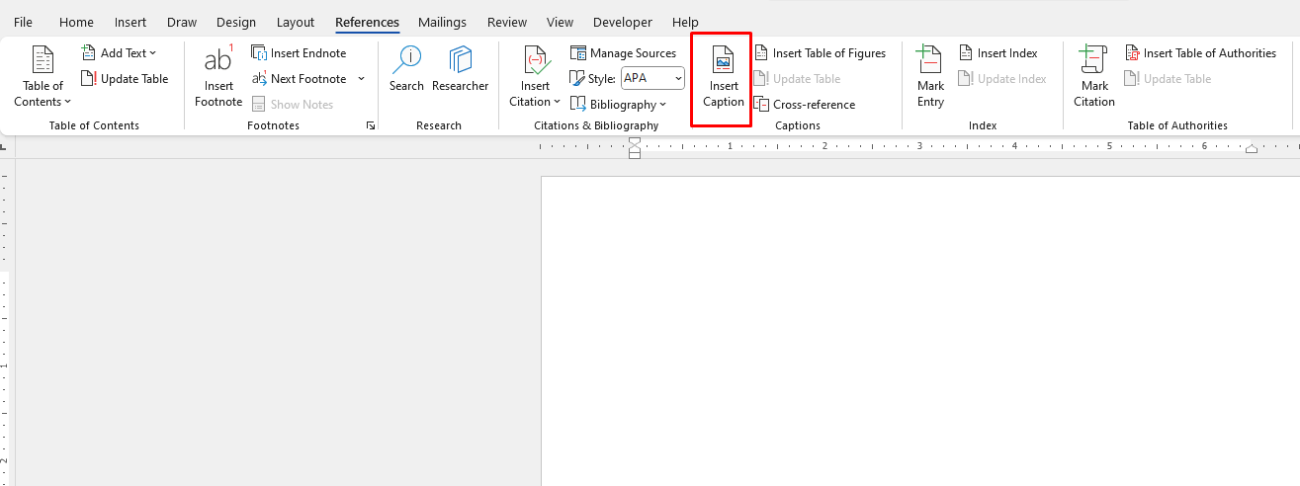
You can also create a List of Figures or List of Tables by following similar steps to creating a table of contents, allowing you to quickly navigate between different sections in a large document.
Get cheap Office Keys at unbeatable prices—quality and affordability in one simple solution!
