Effective Data Sorting and Filtering in Excel
Microsoft Excel is a powerful tool for organizing, analyzing, and managing data. Among its most useful features are sorting and filtering, which allow you to organize large datasets, focus on specific data points, and make informed decisions quickly. Here’s a comprehensive guide to effective data sorting and filtering in Excel to optimize your workflow.
1. Understanding Data Sorting in Excel
Sorting helps you organize data in ascending or descending order, making it easier to analyze and identify patterns. You can sort by text, numbers, dates, or even cell colors.
Steps to Sort Data:
- Select the Data: Highlight the range of data you want to sort, including headers for clarity.
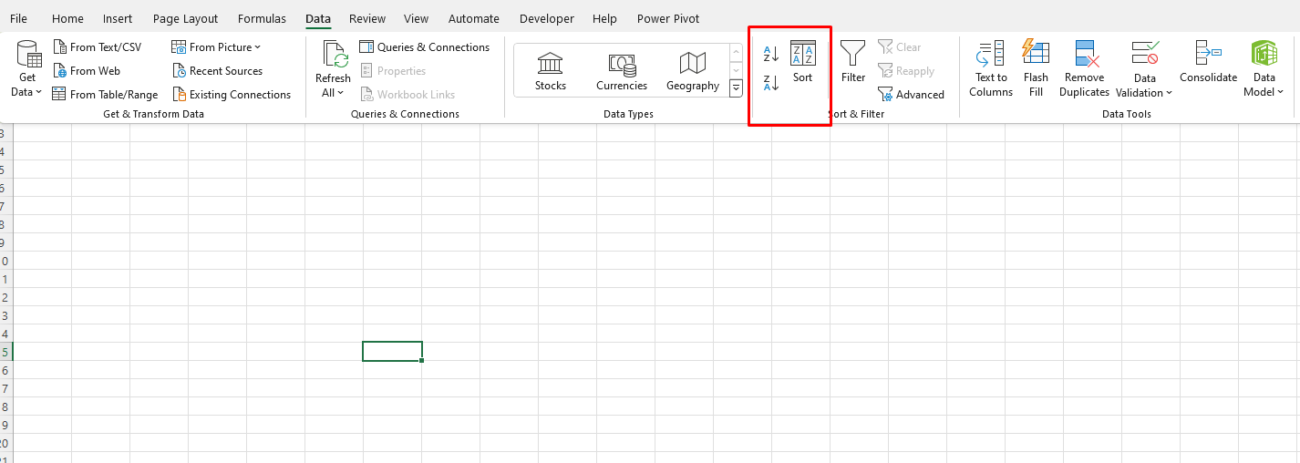
- Go to the Data Tab: Click on the ‘Data’ tab in the ribbon.
- Choose Sort Options:
- Use ‘Sort A to Z’ or ‘Sort Z to A’ for text.
- Use ‘Sort Smallest to Largest’ or ‘Largest to Smallest’ for numbers.
- Sort by ‘Oldest to Newest’ or ‘Newest to Oldest’ for dates.

Tips:
- Use the ‘Custom Sort’ option for multi-level sorting (e.g., sort by department, then by employee names).
- Ensure that the entire dataset is selected to avoid misalignment.
2. Filtering Data for Targeted Analysis
Filters allow you to display only the rows that meet specific criteria while hiding others. This is particularly useful for analyzing subsets of data in large spreadsheets.
Steps to Filter Data:
- Select the Dataset: Highlight the data range or table you want to filter.
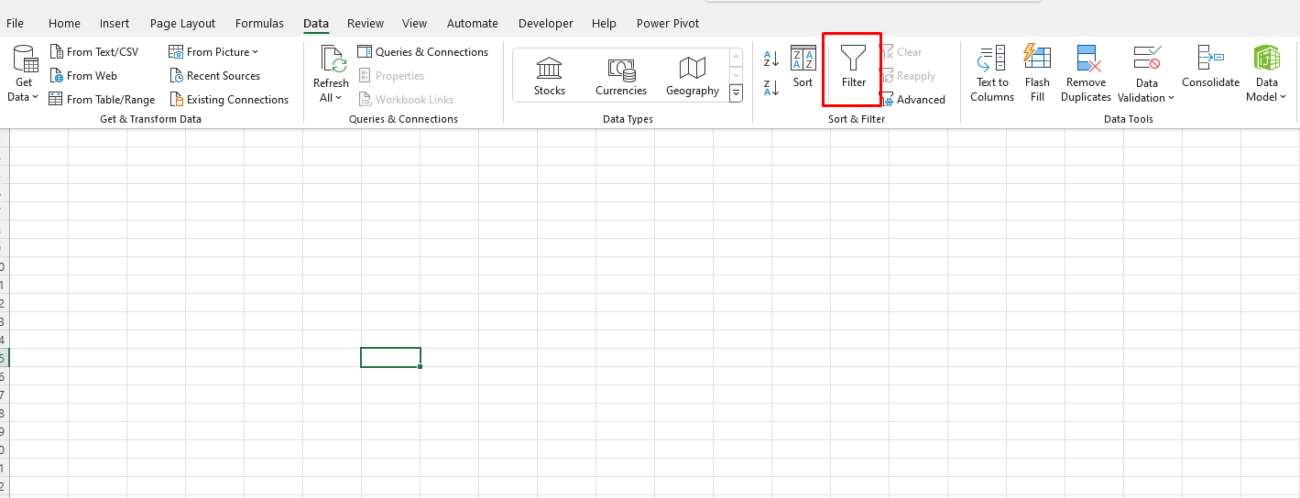
- Apply Filter: Click on ‘Filter’ in the ‘Data’ tab. Dropdown arrows will appear in the header row.
- Set Criteria: Click on the dropdown arrow of the column you want to filter and choose:
- Specific values or conditions.
- Number filters (e.g., greater than, less than).
- Date filters (e.g., before, after, between).

Tips:
- Use search functionality within the filter dropdown to quickly locate specific items.
- Combine filters across multiple columns for advanced analysis.
3. Combining Sorting and Filtering
Sorting and filtering can be used together to pinpoint and organize data effectively. For example, filter data by a specific region and then sort the results by sales figures to identify top-performing areas.
4. Using Advanced Filtering
Excel’s advanced filtering options provide more complex filtering capabilities, such as using formulas or copying filtered results to a new location.
Steps for Advanced Filtering:
- Prepare Criteria Range: Set up criteria in a separate section of your worksheet.
- Go to Advanced Filter: Navigate to ‘Data’ > ‘Advanced’.
- Set Options: Specify the list range, criteria range, and whether to filter in place or copy results elsewhere.
5. Sorting and Filtering with Conditional Formatting
Conditional formatting can be combined with sorting and filtering to highlight data based on specific conditions, such as highlighting cells with values above a threshold.
Steps:
- Apply conditional formatting (e.g., color cells with sales above $10,000).
- Filter or sort data based on the formatting, such as sorting by color.
6. Best Practices for Sorting and Filtering
- Use Excel Tables: Converting your data into a table automatically adds filter options and ensures dynamic range adjustments.
- Remove Duplicates: Before sorting or filtering, eliminate duplicates to clean your data.
- Save a Backup: Always save a copy of your data before performing extensive sorting or filtering to avoid accidental loss or misalignment.
Unlock the best deals on genuine Office keys at unbeatable prices—boost your productivity without overspending!

