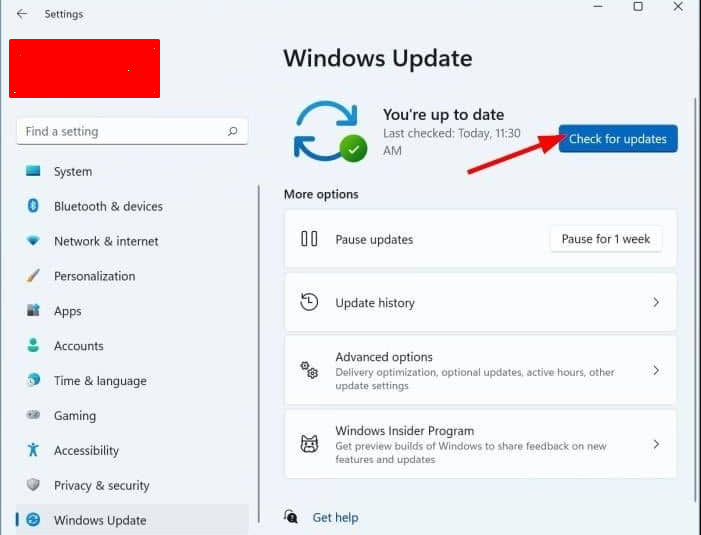
How do I Check For Updates in Windows 11 Home?
Keeping your Windows 11 Home system up-to-date is crucial for ensuring your device stays secure, performs optimally, and has access to the latest features and improvements. Microsoft regularly releases updates that include security patches, performance enhancements, and new features. In this guide, we’ll walk you through the steps to check for updates in Windows 11 Home.
Step 1: Open the Settings App
To begin, you’ll need to access the Settings app, which is where you’ll find the update options. You can open Settings by clicking the Start button and selecting the gear icon (or press Windows + I on your keyboard).
Step 2: Navigate to Windows Update
Once in the Settings app, scroll down the left-hand menu and click on Windows Update. This is where all update-related information is located, including whether your system is up-to-date or if updates are pending.
Step 3: Check for Available Updates
Under the Windows Update section, you will see a button labeled Check for updates. Click this button to begin searching for any available updates. Windows will scan its servers for updates that are applicable to your system.

Step 4: Download and Install Updates
If any updates are available, Windows will automatically start downloading them. After the download completes, you’ll be prompted to Install the updates. You can either install them immediately or schedule a more convenient time.
Step 5: Restart Your PC if Necessary
Some updates require a system restart to take effect. If this is the case, you’ll see an option to Restart Now or Schedule the Restart. Choose the option that works best for you.
Step 6: Verify Updates are Installed
After the restart (if required), go back to Windows Update in Settings to verify that all updates were installed successfully. You should see a message that says You’re up to date if your system is running the latest version.
Get the best deals on cheap Windows 11 Home keys and enjoy all the latest features without breaking the bank!

