How do I Configure Privacy Settings in Windows 11 Home?
With increasing concerns about privacy in the digital age, configuring privacy settings on your operating system is essential. Windows 11 Home offers a variety of privacy options that allow you to control what data is shared with Microsoft and other apps. In this guide, we’ll walk you through the steps to configure your privacy settings effectively.
Step 1: Open Settings
- Click on the Start menu (the Windows icon) in the taskbar.
- Select the Settings gear icon or press Windows + I on your keyboard.
Step 2: Access Privacy & Security
- In the Settings window, click on Privacy & security from the left sidebar.
- You will see various privacy-related options grouped under different categories.
Step 3: Review Activity History
- Under the Windows permissions section, click on Activity history.
- Here, you can choose to allow Windows to collect your activity data and send it to Microsoft.
- You can also manage whether to let your activity history be synced across devices. Uncheck any boxes if you prefer to keep your activity private.
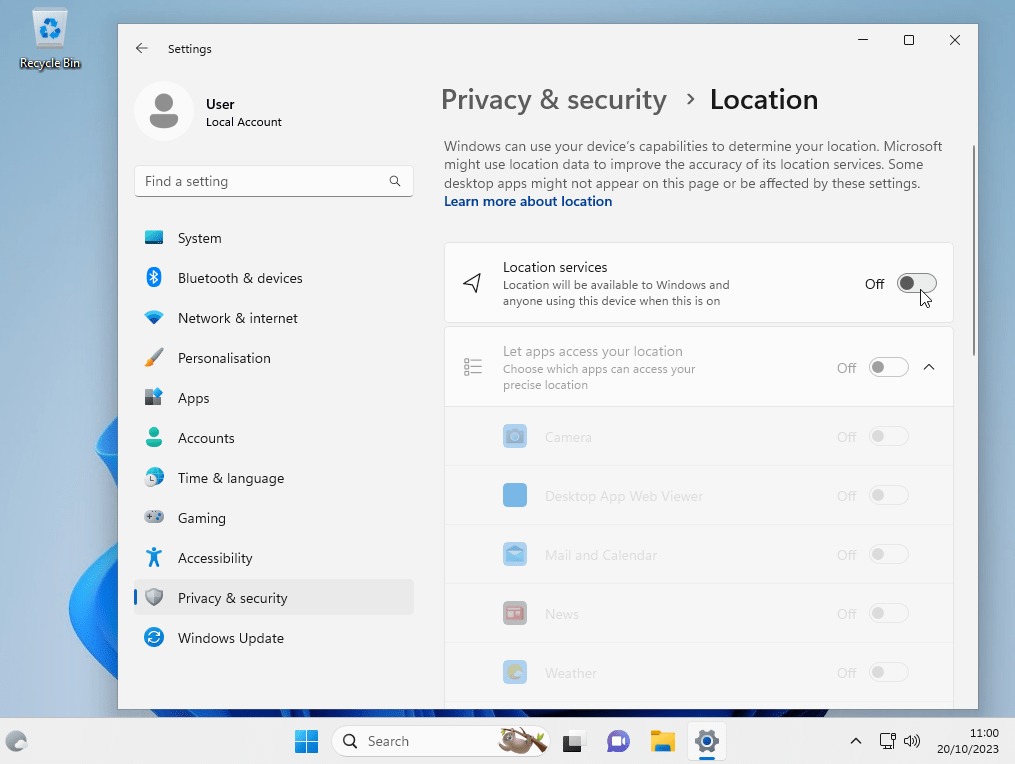
Step 4: Adjust Location Settings
- In the Windows permissions section, select Location.
- You can toggle the location service on or off entirely.
- If you want to control location access for individual apps, scroll down to Choose which apps can access your location and toggle them accordingly.

Step 5: Manage Camera and Microphone Access
- Return to the Privacy & security section and select Camera and Microphone.
- You can enable or disable camera and microphone access for all apps or manage access on an app-by-app basis.
- Review the list and turn off access for apps that you do not want using these features.
Step 6: Control App Permissions
- Navigate to the App permissions section in the Privacy & security settings.
- Here, you’ll find various categories, such as Contacts, Calendar, Call history, Email, Tasks, and Messaging.
- Click on each category to manage which apps can access that specific information.
Step 7: Configure Diagnostic Data
- Still in the Privacy & security section, select Diagnostics & feedback.
- Here, you can choose how much diagnostic data you want to send to Microsoft. Select either Required diagnostic data or Optional diagnostic data.
- You can also enable or disable the Improve inking and typing option.
Step 8: Review Advertising ID
- In the Privacy & security settings, click on General.
- Here, you will find options related to advertising. You can choose to turn off the Let apps use advertising ID option to limit personalized ads.
Get the best deals on cheap Windows 11 Home keys and enjoy all the latest features without breaking the bank!

