How do I Create and use a Macro to Automate Repetitive Tasks in Excel?
Creating macro in Excel can help automate repetitive tasks, significantly boosting productivity and efficiency. Follow this comprehensive guide to learn how to create and use macros in Excel.
Step 1: Open Excel
Begin by launching the Excel application on your computer.
Step 2: Open a Workbook
Open an existing workbook or create a new one where you want to create a macro.
Step 3: Enable the Developer Tab
Macros are created and managed from the Developer tab. If it’s not already visible, you’ll need to enable it.
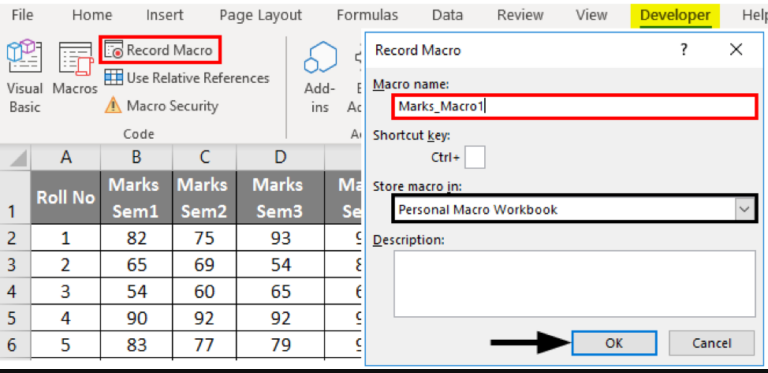
Step 4: Start Recording a Macro
Recording a macro allows Excel to record your actions and turn them into a script.

Step 5: Name Your Macro
Provide a meaningful name for your macro and optionally, a shortcut key.
Step 6: Perform the Task
Execute the series of actions you want to automate. For example, apply formatting to a range of cells.
Step 7: Stop Recording the Macro
Once you’ve performed the desired operations, stop recording.
Step 8: Run the Macro
Test the created macro to ensure it performs the expected actions.
Step 9: Assign Macro to a Button
For easier access, you can assign your macro to a button.
Step 10: Save Your Workbook with Macros
To save your workbook with the macro, you need to save it as a macro-enabled workbook.
Unlock the full potential of your productivity with genuine Office keys available for purchase directly on our website.

