How do I manage Widgets in Windows 11 Home?
Widgets in Windows 11 provide quick access to personalized information such as news, weather, calendar events, and more, all from a convenient panel. If you’re looking to manage and customize your widgets, follow these steps:
Step 1: Open the Widgets Panel
- Action: Click on the Widgets icon (two overlapping rectangles) located on the taskbar. If you don’t see it, right-click the taskbar, select Taskbar settings, and ensure Widgets is toggled on.

Step 2: Explore Available Widgets
- Action: Once the Widgets panel opens, scroll through the list of available widgets. You can find widgets for weather, news, calendar, photos, and more.
Step 3: Add a New Widget
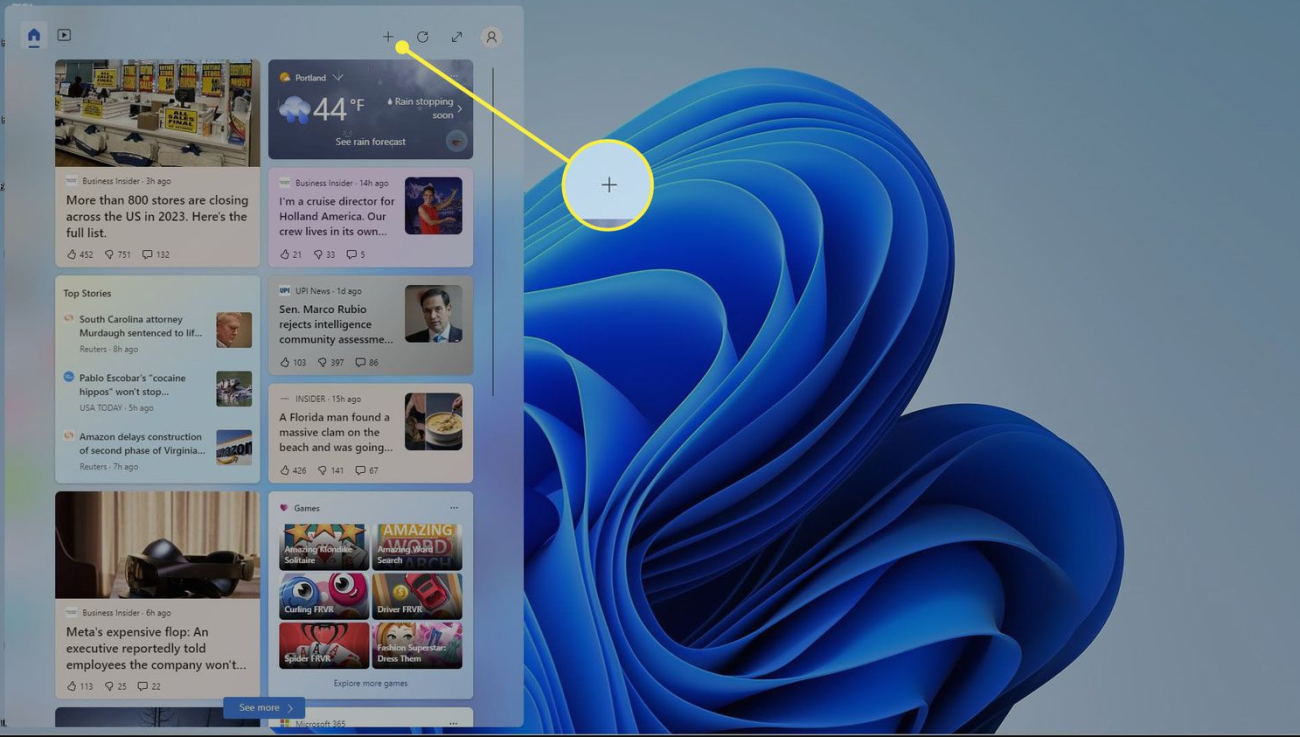
- Action: To add a new widget, click the Add widgets button (usually a plus sign) at the top right corner of the panel. A list of available widgets will appear.
- Tip: Select the widget you want to add by clicking on it.
Step 4: Rearrange Widgets
- Action: To rearrange your widgets, click and hold the widget you want to move, then drag it to your desired location in the panel. Release the mouse button to drop it in place.
Step 5: Resize Widgets
- Action: Some widgets can be resized. Hover over the edges of the widget until the resize icon appears (usually a double-headed arrow). Click and drag to adjust its size.
Step 6: Customize Widget Settings
- Action: Click on the three-dot menu (ellipsis) in the upper-right corner of a widget to access its settings. Here, you can often choose to customize how information is displayed or update preferences.
Step 7: Remove a Widget
- Action: To remove a widget you no longer want, click on the three-dot menu on the widget and select Remove widget. Confirm your choice if prompted.
Step 8: Close the Widgets Panel
- Action: Once you’re finished managing your widgets, you can close the panel by clicking the X in the upper right corner or simply clicking on the taskbar again.
Get your genuine Windows 11 Home Key at an unbeatable price and enjoy the latest features today!


