How to Create Dynamic Drop-down Lists in Excel?
Dynamic drop-down lists in Excel are powerful tools that update automatically when changes are made to the source data. This feature is ideal for managing data that evolves frequently, such as product lists, employee names, or categories.
Here’s a step-by-step guide to creating dynamic drop-down lists in Excel.
Step 1: Prepare Your Source Data
First, ensure that the list of items you want to appear in the drop-down is organized in a single column without any blank cells. It’s best to place this data on a separate sheet for easy management.
- Example: List items in Sheet2, Column A.
Step 2: Create a Table from Your Source Data
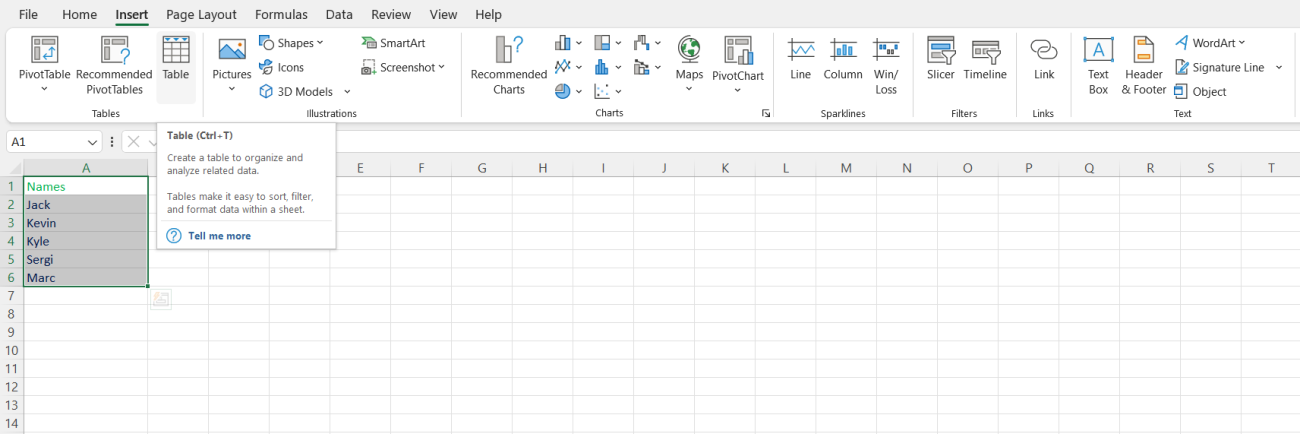
To make your list dynamic, convert the range into a table. Excel tables automatically expand or contract as data is added or removed, making them ideal for dynamic lists.
- Select the data range you want to use for your drop-down (e.g., Sheet2!A2).
- Go to the Insert tab and click Table.
- Ensure the Create Table window includes the correct range, then click OK.

Step 3: Name Your Table
Giving your table a meaningful name makes it easier to reference later.
- With your table selected, go to the Table Design tab.
- In the top-left corner, you’ll see a box labeled Table Name. Enter a name for your table, such as “ProductList” or “CategoryTable,” and press Enter.
Step 4: Define a Named Range for the Drop-down
To ensure the drop-down list updates dynamically as new data is added, create a named range that refers to the table.
- Go to the Formulas tab and click on Name Manager.
- Click New and give the range a name (e.g., “DynamicList”).
- In the Refers to box, enter the following formula:
=INDIRECT("TableName[ColumnName]")Step 5: Create the Drop-down List
Now that your dynamic list is ready, create the drop-down in your desired location.
- Select the cell or range of cells where you want the drop-down list to appear.
- Go to the Data tab and click Data Validation.
- In the Allow dropdown, choose List.
- In the Source box, enter
=DynamicList(or the name of your defined range). - Click OK to apply the dynamic drop-down list.

Step 6: Test Your Dynamic Drop-down List
Now that your drop-down list is set up, test it by adding or removing items from the source data (the table). The drop-down should automatically reflect any changes without needing manual updates.
Get genuine Office Keys at the best prices, guaranteed!

