How do you Change the Working Language in Word?
Changing the working language in Microsoft Word is essential for multilingual users, as it allows for accurate spell check, grammar correction, and thesaurus features specific to the chosen language. This step-by-step guide will walk you through the process of changing the working language in Word.
Step 1: Open Microsoft Word
- Launch Microsoft Word: Open the Microsoft Word application on your computer.
- Open a Document or Create a New One: Click on
Filein the top-left corner, selectOpento choose an existing document, or clickNewto start a new document.
Step 2: Navigate to Language Settings
- Click on “File”: In the top-left corner of the screen, click on the
Filetab to open the backstage view. - Select “Options”: Scroll down and click on
Optionsat the bottom of the menu.
Step 3: Access Language Settings
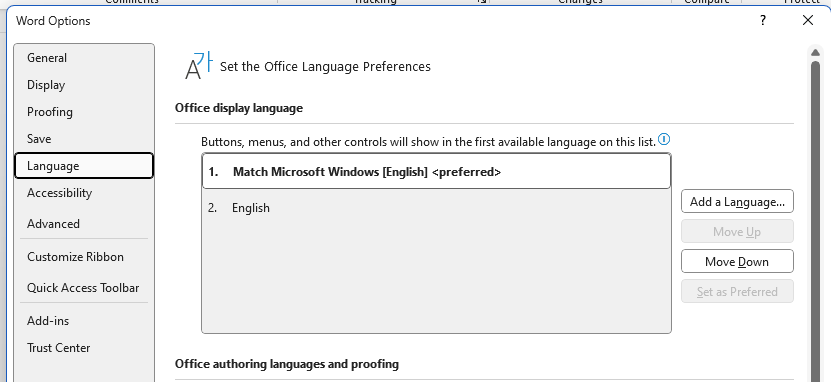
- Open the Word Options Dialog: A dialog box named “Word Options” will appear.
- Select “Language”: In the left-hand menu of the Word Options dialog, click on the
Languagetab.
Step 4: Set the Editing Languages
- Look for “Office Authoring Languages and Proofing”: Under this section, you will see a list of languages currently installed.
- Add a New Language:
- Click on the
Add additional editing languagesdropdown menu. - Scroll through the list or type in the search bar to find your desired language.
- Select the language and click
Add.
- Click on the

Step 5: Set the Default Language
- Set Default Language: After adding the new language, it will appear in the list.
- Locate the newly added language.
- Click on it to highlight it, then click on the
Set as Defaultbutton.
- Restart Word for Changes to Take Effect: A message will appear indicating that Word must be restarted for the changes to take effect. Close and reopen Microsoft Word to apply the new default language settings.
Step 6: Confirm the Proofing Tools
- Check the Status: Look under the “Proofing” column to see if the language tools (spell check, grammar check, etc.) are installed.
- Install Proofing Tools if Necessary:
- If the status reads “Not enabled,” click on the language, then the
Not enabledlink. - You will be directed to download the compatible proofing tools from the Microsoft Office website.
- If the status reads “Not enabled,” click on the language, then the
Step 7: Apply Language to Specific Sections (Optional)
- Highlight the Text: Select the text whose language you wish to change.
- Open the “Review” Tab: Go to the
Reviewtab in the ribbon at the top of the screen. - Click on “Language”: In the “Language” group, click on
Language, thenSet Proofing Language…. - Choose Your Language:
- In the Language dialog box, scroll to find the desired language.
- Select the language and click
OK.
Step 8: Verify the Change
- Spell and Grammar Check: Type text in the newly set language and use the spell checker to ensure it recognizes and checks the text correctly.
- Language Indicator: Observe the bottom status bar of Word; it should now indicate the new default language.
Looking for a budget-friendly way to get Microsoft Office? Check out our affordable Office keys and save big on premium software!

