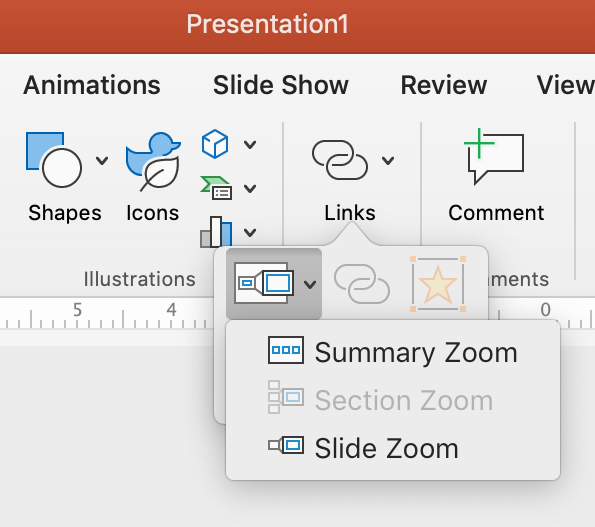
The Section Zoom feature in Microsoft PowerPoint is a powerful tool designed to make your presentations more dynamic and interactive. This tool allows you to create a menu-like interface within your PowerPoint presentation, enabling you to jump between different sections easily. In this blog post, we’ll explore the purpose of the Section Zoom feature and provide a step-by-step guide on how to use it effectively.
What is Section Zoom in PowerPoint?
Section Zoom is a feature that allows you to link different sections of your PowerPoint presentation, enabling non-linear navigation. This means you can move from one section to another seamlessly, providing a more engaging and flexible experience for your audience.
Purpose of the Section Zoom Feature
- Enhanced Navigation:
- Easily navigate to different sections of your presentation without scrolling through slides.
- Interactive Presentations:
- Make your presentations more interactive by allowing the audience to choose the order of sections.
- Improved Focus:
- Highlight specific sections and keep your audience focused on the current topic.
- Professional Touch:
- Give your presentations a professional look with smooth transitions and a clear structure.
How to Use the Section Zoom Feature
Step 1: Open Your PowerPoint Presentation
- Launch Microsoft PowerPoint.
- Open the presentation where you want to add the Section Zoom.
Step 2: Create Sections in Your Presentation
- Go to the slide where you want to start a new section.
- Right-click on the slide thumbnail in the left pane.
- Select Add Section from the context menu.
- Name the section and press Enter.
- Repeat this process for all the sections you want to create.
Step 3: Insert Section Zoom
- Go to the slide where you want to insert the Section Zoom.
- Go to the Insert tab on the ribbon.
- Click on Zoom in the Links group.
- Choose Section Zoom from the dropdown menu.

Step 4: Select the Sections
- In the Insert Section Zoom dialog box, select the sections you want to include.
- Click Insert to add the Section Zoom to your slide.
Step 5: Customize the Section Zoom
- Once the Section Zoom is inserted, you can customize it:
- Resize: Click and drag the corners to resize the zoom thumbnail.
- Move: Click and drag the zoom thumbnail to reposition it.
- Go to the Format tab under Zoom Tools to access more customization options:
- Zoom Styles: Choose from various styles to change the appearance.
- Zoom Border: Add or remove borders.
- Back to Zoom: Enable or disable the feature to return to the Section Zoom slide after viewing a section.
Step 6: Preview and Test Your Presentation
- Go to the Slide Show tab on the ribbon.
- Click on From Beginning or From Current Slide to start the presentation.
- Click on the Section Zoom thumbnails to navigate between sections.
Unlock the full potential of your productivity by purchasing the cheapest Office Keys available, offering all the features you need at an unbeatable price.


