Microsoft Word is a powerful tool for creating documents, but the key to making them professional and easy to read lies in proper formatting. Whether you’re preparing a resume, a report, or an academic paper, formatting ensures your content is organized and visually appealing. Follow this step-by-step guide to master formatting in Word.
1. Start with a Clean Template
A template provides a structured starting point for your document.
- Open Word and click File > New.
- Browse the available templates or search for a specific type (e.g., “Resume” or “Report”).
- Select a template that suits your needs and customize it as required.
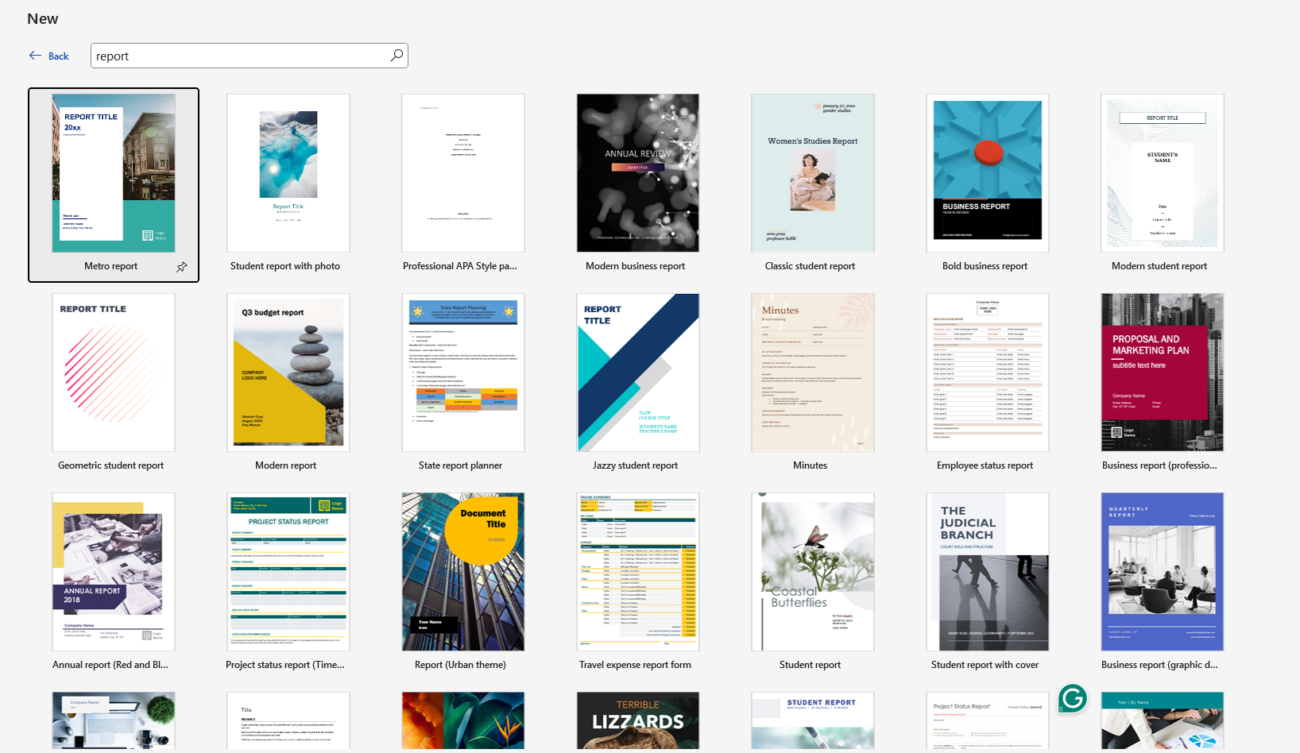
Templates include pre-applied styles and layouts, saving you time and effort.
2. Set Up the Page Layout
The page layout defines the structure of your document. Adjust these settings before adding content:
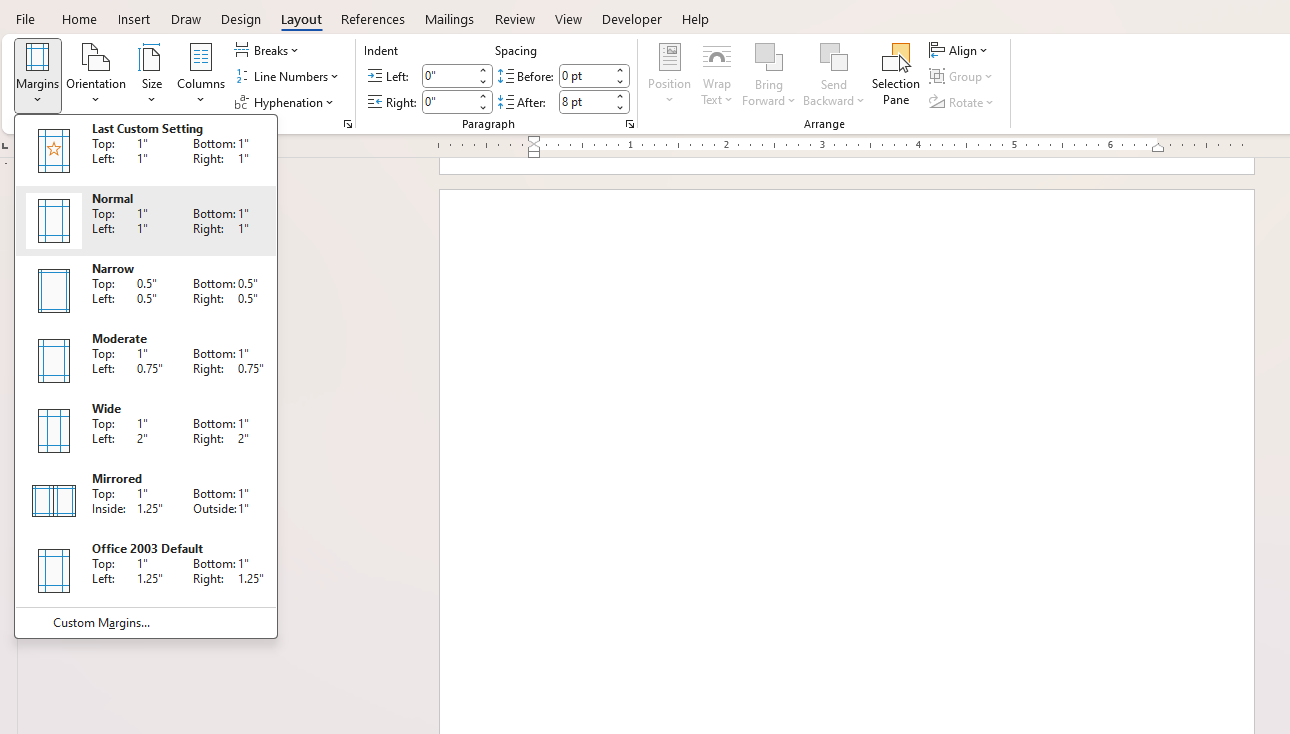
- Margins: Go to Layout > Margins and choose a predefined option or set custom margins.
- Orientation: Choose between Portrait or Landscape in Layout > Orientation.
- Page Size: Use Layout > Size to select the appropriate page dimensions.
3. Apply Styles for Consistency
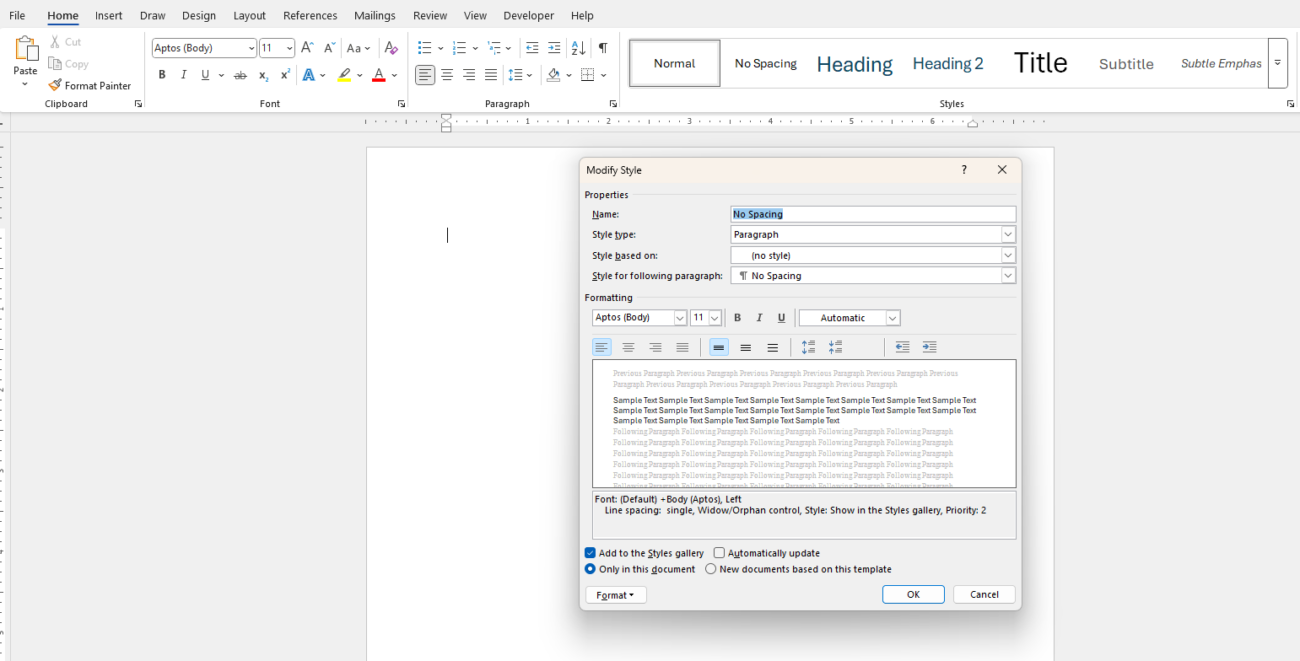
Styles allow you to format text quickly and maintain a consistent look throughout your document.
- Highlight the text you want to format.
- Go to the Home tab and choose a style from the Styles gallery (e.g., Heading 1, Heading 2, or Normal).
- To modify a style, right-click it and select Modify. You can adjust the font, size, color, and other properties.
4. Format Text
Text formatting improves readability and emphasis. Use these tools in the Home tab:
- Font: Select the desired font style and size.
- Bold, Italics, Underline: Highlight important text.
- Color: Change the text color to match your theme.
- Alignment: Align text left, right, center, or justify.
5. Use Paragraph Formatting
Paragraph formatting enhances the flow and organization of your document.
- Line Spacing: Go to Home > Line and Paragraph Spacing to adjust the space between lines.
- Indentation: Use Layout > Indent to add space before the first line of a paragraph.
- Spacing Before and After: Adjust the space between paragraphs in Layout > Spacing.
6. Add Headers and Footers
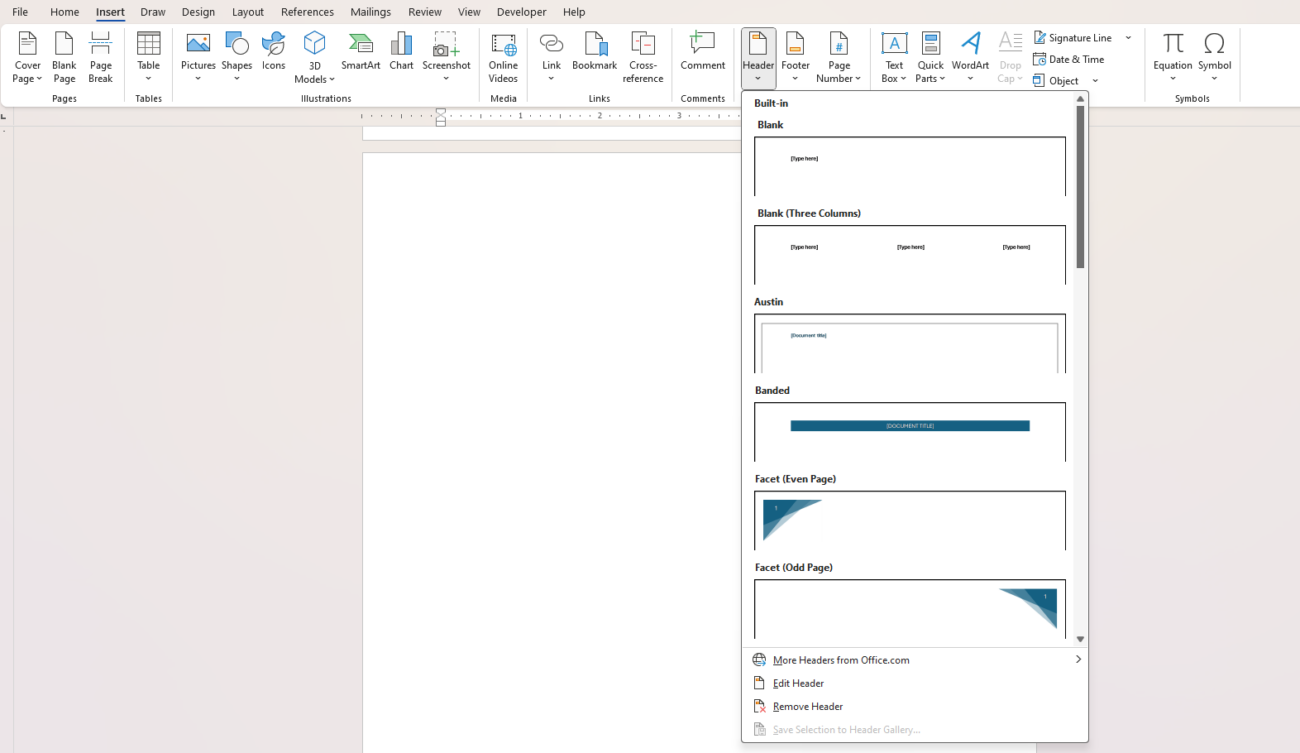
Headers and footers provide essential information, such as page numbers, titles, or dates.
- Go to Insert > Header & Footer.
- Select a predefined style or customize your own.
- Use Insert > Page Number to add numbering.
7. Insert Tables and Lists
Organize information with tables and lists:
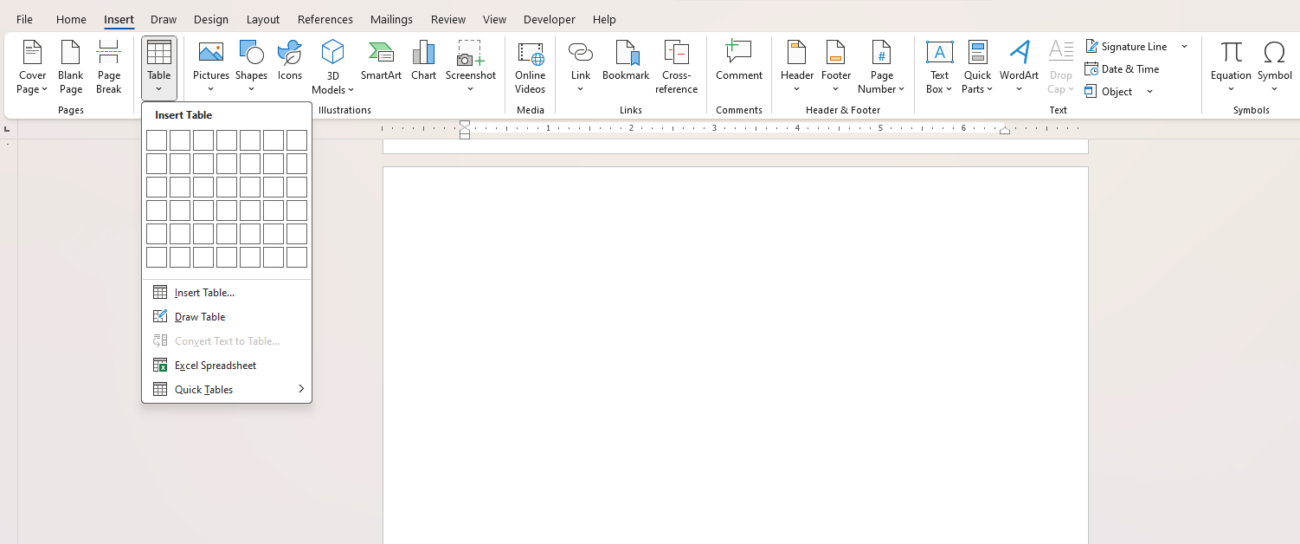
- Tables: Go to Insert > Table, then choose the number of rows and columns. Format the table using the Table Design tab.
- Bullet and Numbered Lists: Highlight text and click the Bullets or Numbering icons in the Home tab.
8. Incorporate Visual Elements
Visual elements like images and charts enhance the document’s appearance:
- Images: Insert images using Insert > Pictures and adjust their size and position.
- SmartArt: Use Insert > SmartArt to create professional diagrams.
- Charts: Add charts via Insert > Chart and customize them with your data.
9. Create a Table of Contents
A Table of Contents (TOC) makes your document easy to navigate.
- Use heading styles (e.g., Heading 1, Heading 2) for section titles.
- Place the cursor where you want the TOC.
- Go to References > Table of Contents and select a style.
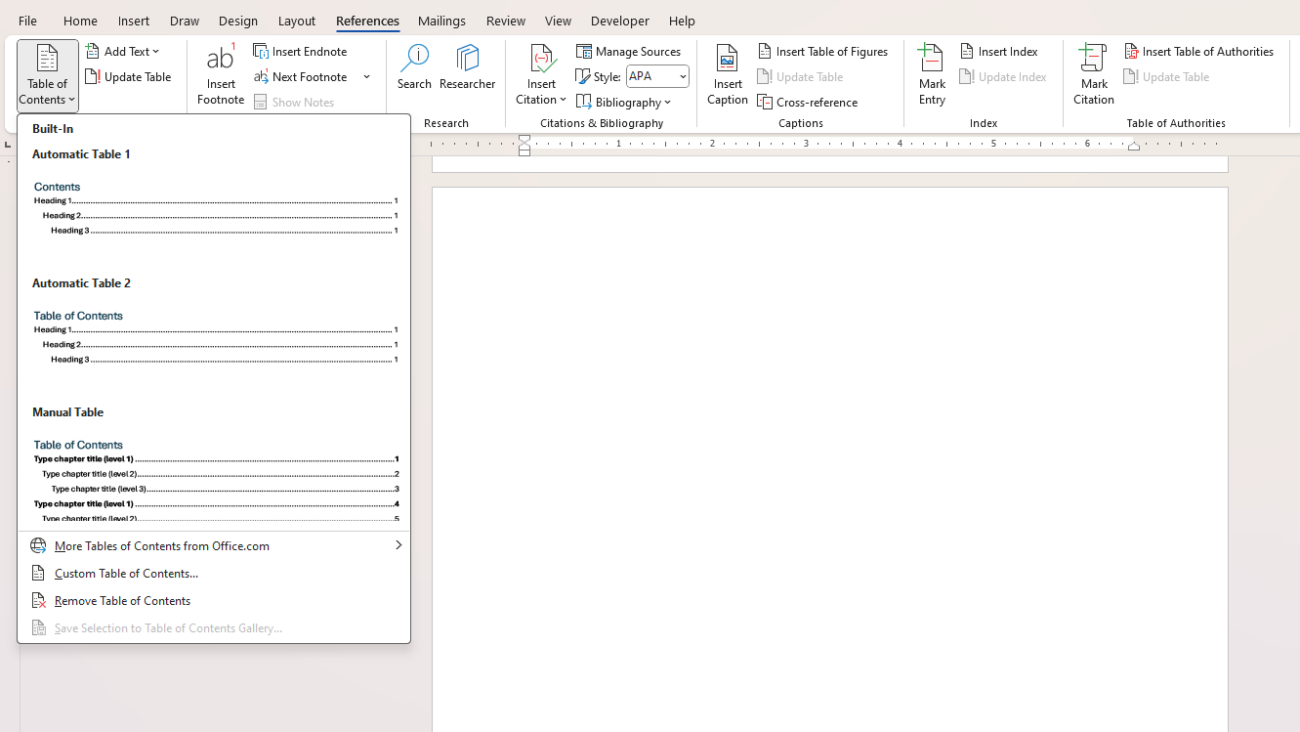
Word will automatically generate the TOC based on your headings.
10. Review and Save
Before finalizing your document:
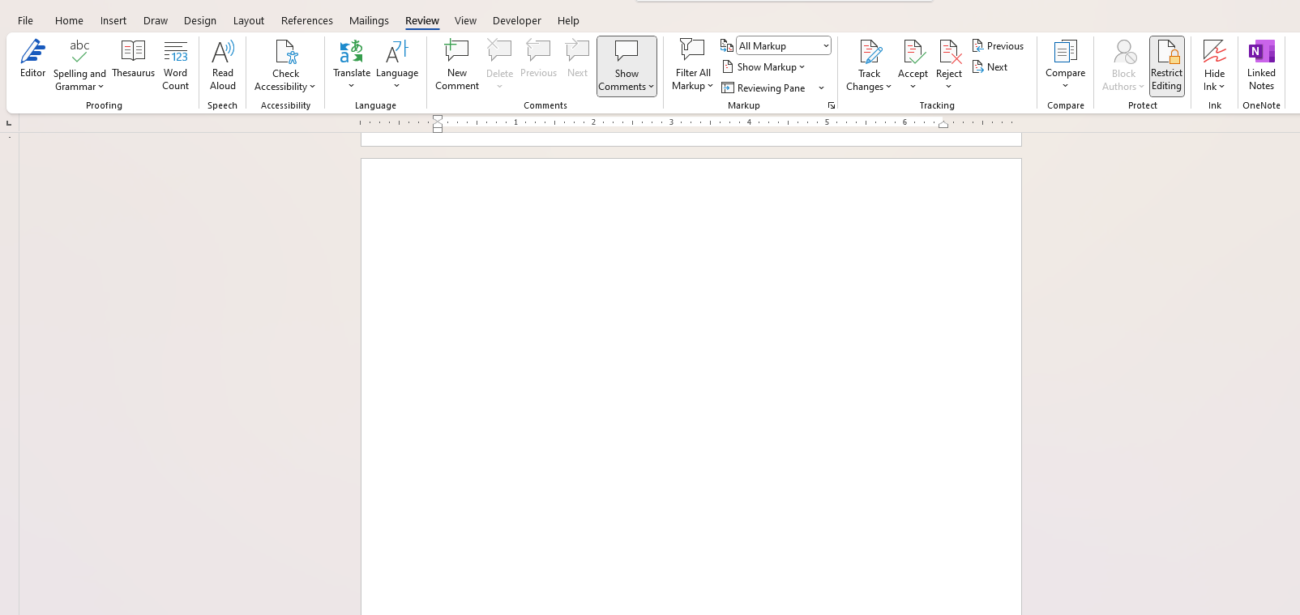
- Spell Check: Use Review > Spelling & Grammar to catch errors.
- Track Changes: Collaborate by enabling Track Changes in the Review tab.
- Save: Save your document as a Word file or PDF for easy sharing.
Get the cheapest Office Keys delivered instantly via email—secure, reliable, and budget-friendly!


