How to Add GIFs & Videos to PowerPoint Slides?
Static slides can only hold an audience’s attention for so long. A short GIF that illustrates a process or a video clip that drives home a key point instantly makes your deck more engaging. The good news: PowerPoint makes it simple – if you know where to look and what settings to tweak. Follow the steps below to insert and control GIFs and video files like a pro, along with best-practice tips to keep file sizes low and playback smooth.
1 – Prepare Your Media
- Choose the right format
- GIFs: Loop automatically and keep file sizes small, perfect for quick demos or reactions.
- Videos: Use MP4/H.264 for maximum compatibility across Windows and macOS.
- Keep dimensions realistic
Full-screen 4K clips look great—but they also balloon your deck’s size. Resize to match the space you’ll actually use on the slide. - Store files locally
Place videos in the same folder as your presentation before inserting; this prevents broken links when you move or share the deck.
2 – Insert a GIF
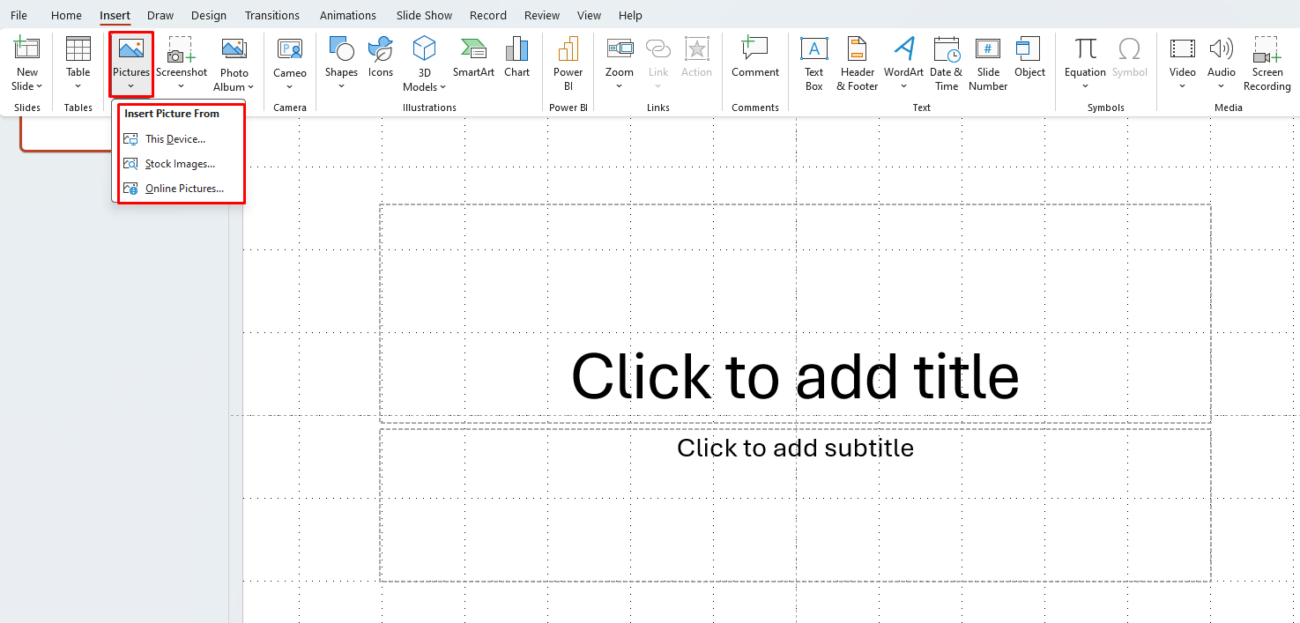
- Go to Insert ▶ Pictures ▶ This Device (or Online Pictures).
- Select your .gif and click Insert.
- Resize & position it like any normal image.
- Preview playback: Start Slide Show mode (F5). The GIF should autoplay and loop.
Troubleshooting tip:
If the animation doesn’t play, verify the image really is a GIF (not a JPG renamed as .gif) and that “Play” isn’t paused in Picture Format ▶ Playback (Microsoft 365).

3 – Insert an Online Video (e.g., YouTube)
- Copy the video’s share URL (YouTube, Vimeo, Stream).
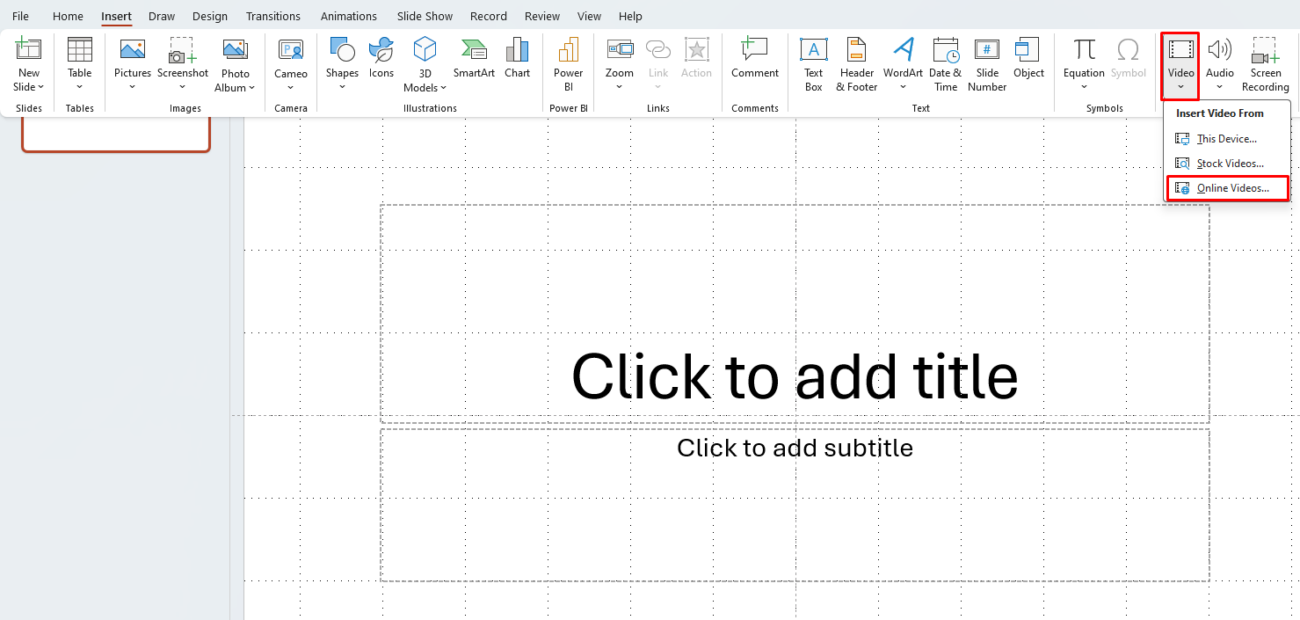
- In PowerPoint choose Insert ▶ Video ▶ Online Video.
- Paste the URL and click Insert.
- Resize the placeholder frame.
- In Slide Show the clip streams directly from the source with working play/pause controls.
Pros: no file-size increase, always up to date.
Cons: internet required during the presentation; ads or recommended videos may appear at the end.

4 – Embed a Video Stored on Your PC
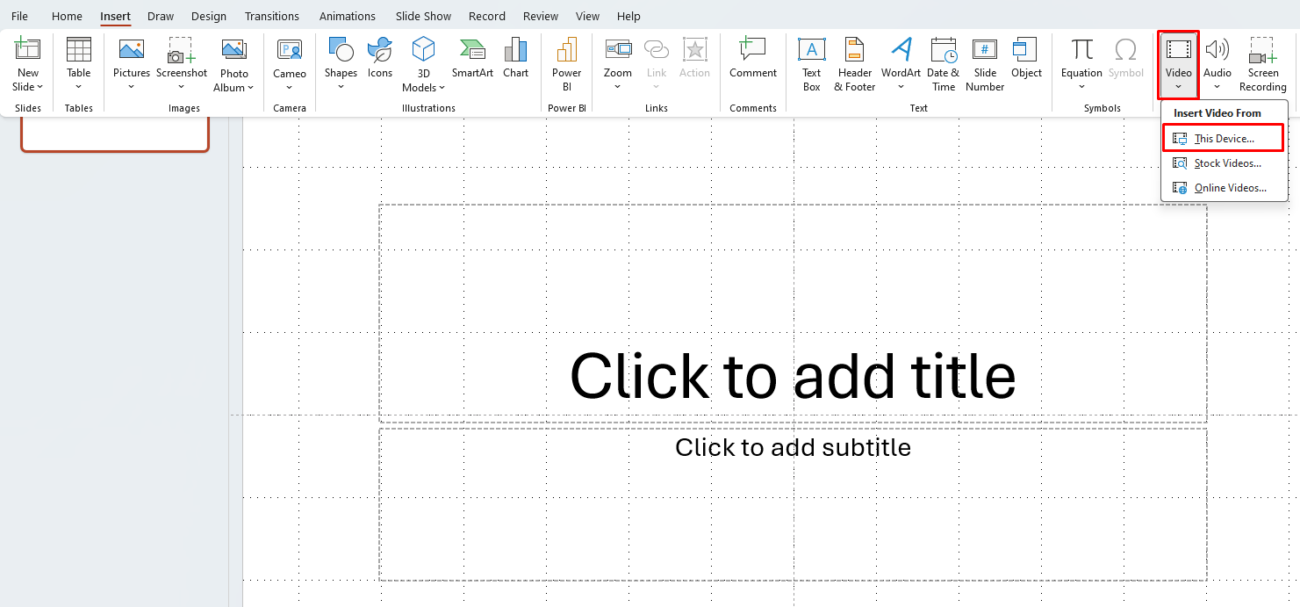
- Insert ▶ Video ▶ This Device.
- Browse to your MP4 or MOV file and click Insert.
- With the video selected, open the Playback tab:
- Start: Automatically (hands-free) or On Click (manual control).
- Loop until Stopped: Ideal for background ambience or lobby loops.
- Trim Video: Cut dead air from the start/end without external editors.
- Hide While Not Playing: Keeps the slide clean until playback begins.
- Drag the timeline scrubber in Normal view to test the clip without entering Slide Show mode.

5 – Optimize Media for Smooth Playback
- Compress Media (File ▶ Info ▶ Compress Media). PowerPoint re-encodes all embedded videos to a lower bitrate/size while keeping HD quality.
- Use Hardware Graphics Acceleration (File ▶ Options ▶ Advanced ▶ Display). Speeds decoding on supported GPUs.
- Disable compatibility mode by saving as .pptx if the file was originally .ppt.
6 – Best Practices at a Glance
| Do | Don’t |
|---|---|
| Use MP4/H.264 videos | Rely on rare formats like WMV or AVI |
| Store media in the same folder as the .pptx | Link to files on external drives you might forget |
| Keep total deck size under ~200 MB | Email gigabyte-sized slides that bounce back |
| Test on the actual presentation machine | Assume a GIF will loop or a codec will exist |
Need the latest version of PowerPoint to unlock every media feature? Grab a genuine Office 2021 or Office 2024 license at a discount from CheapKeys and start creating more dynamic presentations today.

