How to Automatically Number Pages in Word?
Adding page numbers to your document is a simple yet essential step to ensure organization and readability. Whether you’re working on a report, thesis, or booklet, Microsoft Word makes it easy to automatically number pages. Here’s a step-by-step guide to help you add page numbers and customize them to suit your needs.
1. Inserting Basic Page Numbers
To add basic page numbers to your document, follow these steps:
- Open your Word document.
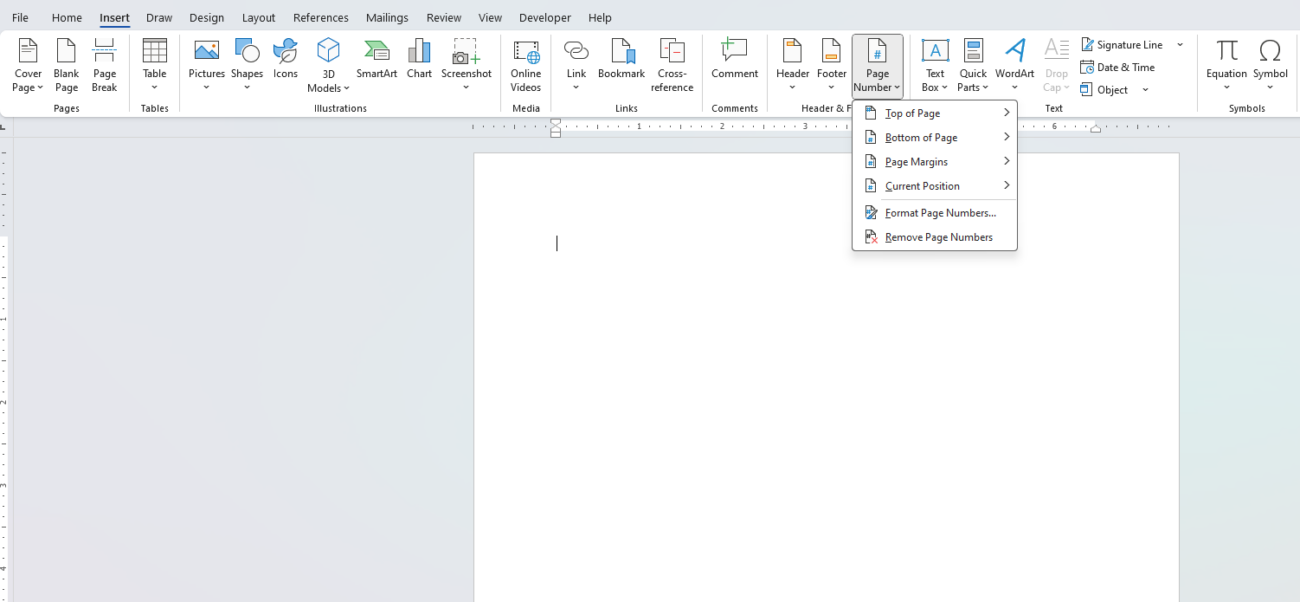
- Go to the Insert tab on the ribbon.
- Click on Page Number in the Header & Footer group.
- Choose a location for the page numbers:
- Top of Page: Adds the page number in the header.
- Bottom of Page: Adds the page number in the footer.
- Page Margins: Places the number on the side margins.
- Current Position: Adds the number where your cursor is located.

Once selected, Word will automatically insert page numbers throughout your document.
2. Customizing Page Number Styles
Word provides various formatting options to customize how your page numbers appear:
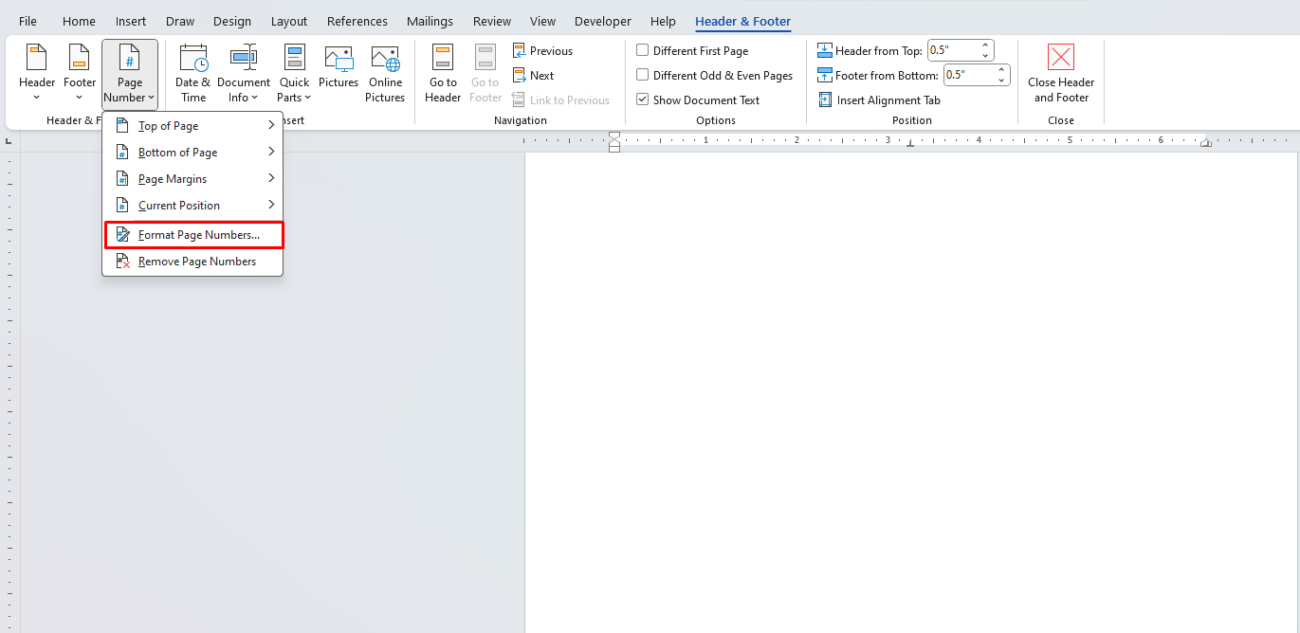
- After selecting a page number location, click Format Page Numbers in the Page Number dropdown menu.
- Choose a number format, such as Arabic numerals (1, 2, 3), Roman numerals (i, ii, iii), or letters (a, b, c).
- You can also set the numbering to start at a specific number instead of 1 by entering the desired starting number under Start at.

3. Using Different Page Numbering Styles for Different Sections
If your document requires different numbering styles (e.g., Roman numerals for the introduction and Arabic numerals for the main content), you can achieve this using section breaks:
- Place your cursor where you want the new section to begin.
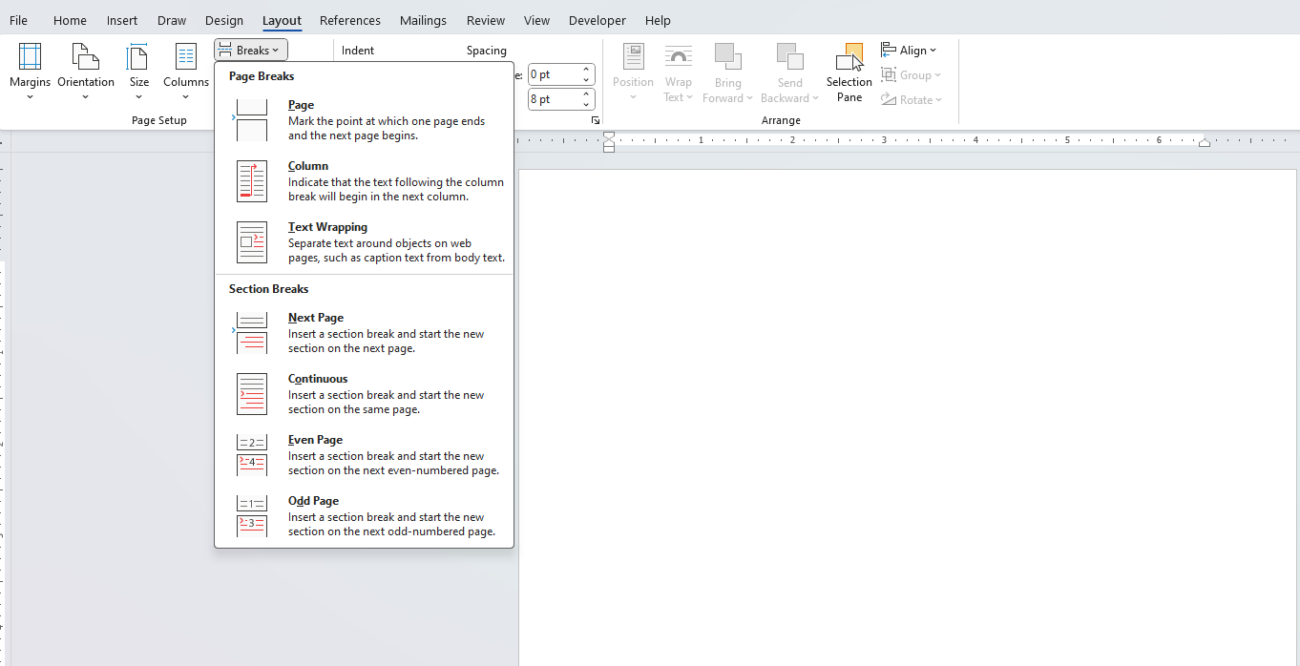
- Go to the Layout tab, click on Breaks, and select Next Page under Section Breaks.
- Insert page numbers for each section and customize the styles individually.
- To avoid linking the sections, go to the Header & Footer tab and click Link to Previous to turn it off.

4. Excluding the First Page from Numbering
To exclude the page number from the first page (e.g., a title or cover page):
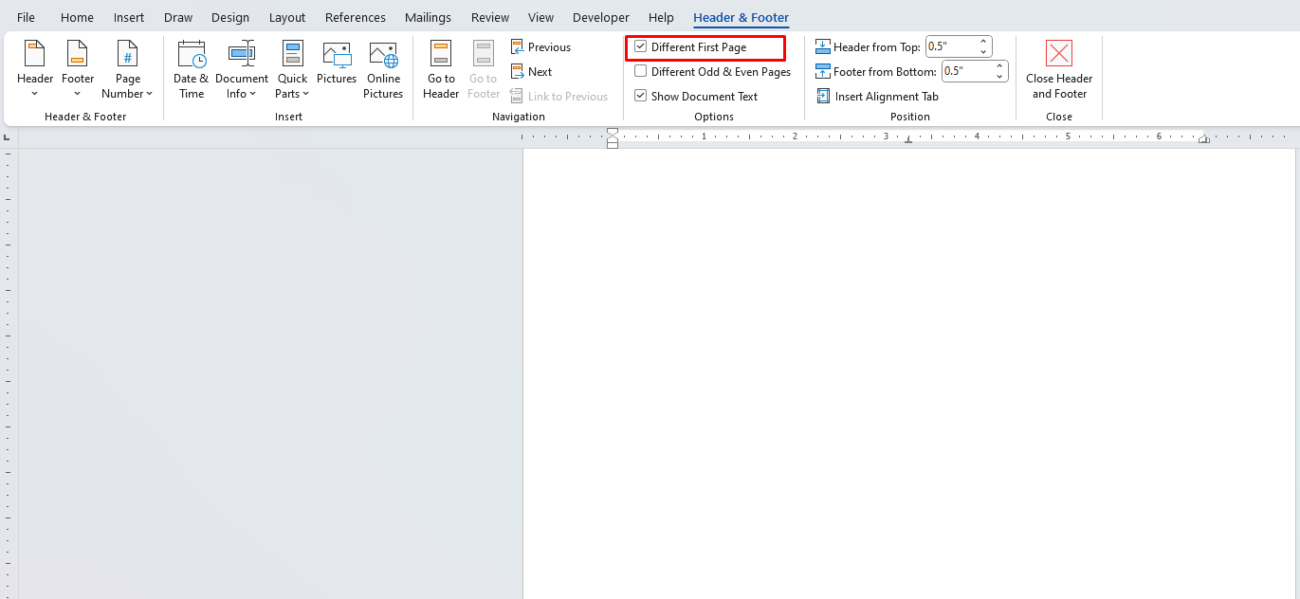
- Double-click in the header or footer area to activate it.
- Go to the Header & Footer tab and check the box for Different First Page.
- The first page will now have a blank header or footer, while the numbering starts on the second page.

5. Adding Page Numbers to a Specific Section
If you only want to number a specific section of your document:
- Use section breaks to isolate the part of the document you want numbered.
- Follow the steps to insert page numbers, but ensure the numbering applies only to the current section.
6. Aligning and Formatting Page Numbers
To adjust the alignment or appearance of your page numbers:
- Double-click the header or footer containing the page number to enter edit mode.
- Use the formatting tools in the Home tab to change the font, size, and alignment.
- For advanced positioning, use the Header & Footer tab to adjust the margins or layout.
7. Removing Page Numbers
If you need to remove page numbers from your document:
- Go to the Insert tab and click on Page Number.
- Select Remove Page Numbers from the dropdown menu. This will remove page numbers from the entire document.
Buy the cheapest office keys online—affordable, reliable, and perfect for all your workplace needs!

