
How to Create Booklets in Microsoft Word?
Creating a booklets in Microsoft Word is a straightforward process that can help you design professional-looking materials such as brochures, event programs, or small books. Word’s built-in features make it easy to format pages, adjust layouts, and create foldable booklets that are ready to print. Here’s a step-by-step guide to help you create a booklet in Microsoft Word.
Step 1: Set Up the Page Layout
The first step in creating a booklet is to adjust the page layout to match the booklet format.
- Open Microsoft Word and create a new blank document.
- Go to the Layout tab on the ribbon.
- Click on Margins and select Custom Margins at the bottom of the dropdown menu.
- In the Page Setup window:
- Set the Multiple pages option to Book fold under the Pages section. This will automatically adjust the layout for a booklet.
- Adjust the Gutter setting to allow extra space for binding (typically 0.5 to 1 inch is sufficient).
- Set the paper size to your desired dimensions, such as Letter (8.5 x 11 inches) or A4.
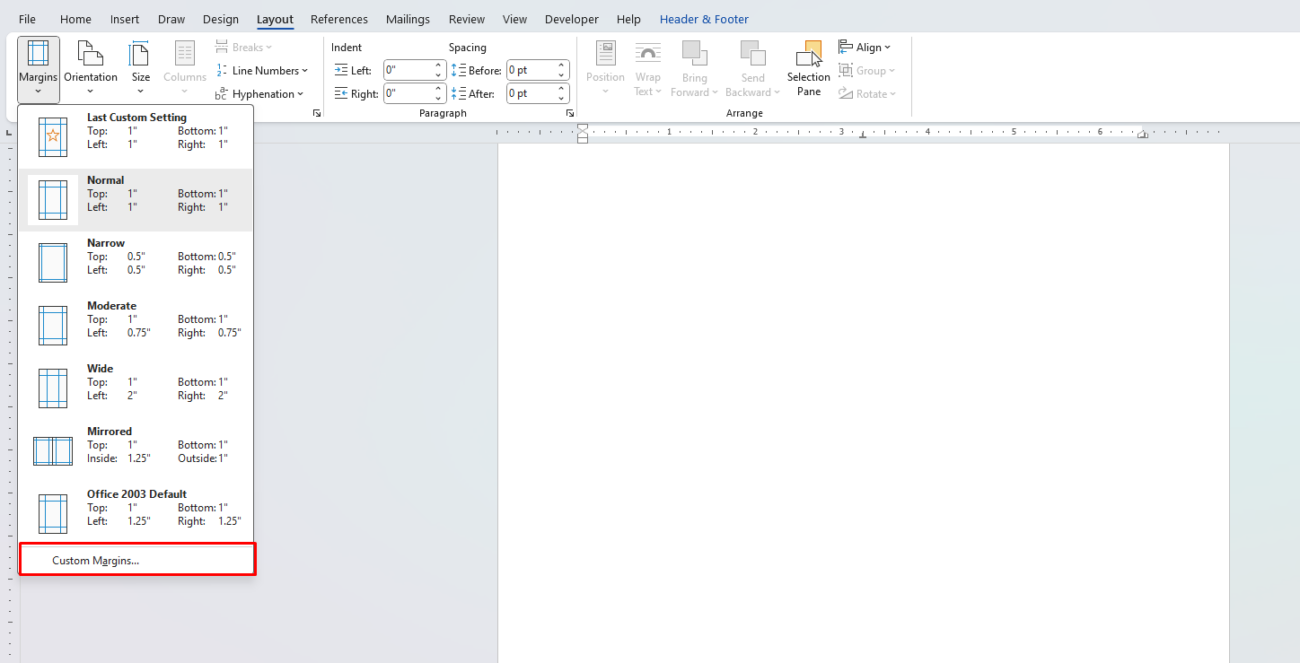
Click OK to apply these settings. Word will now arrange your document for booklet formatting.
Step 2: Add Content to Your Booklet
Once the page layout is set, you can start adding content to your booklet.
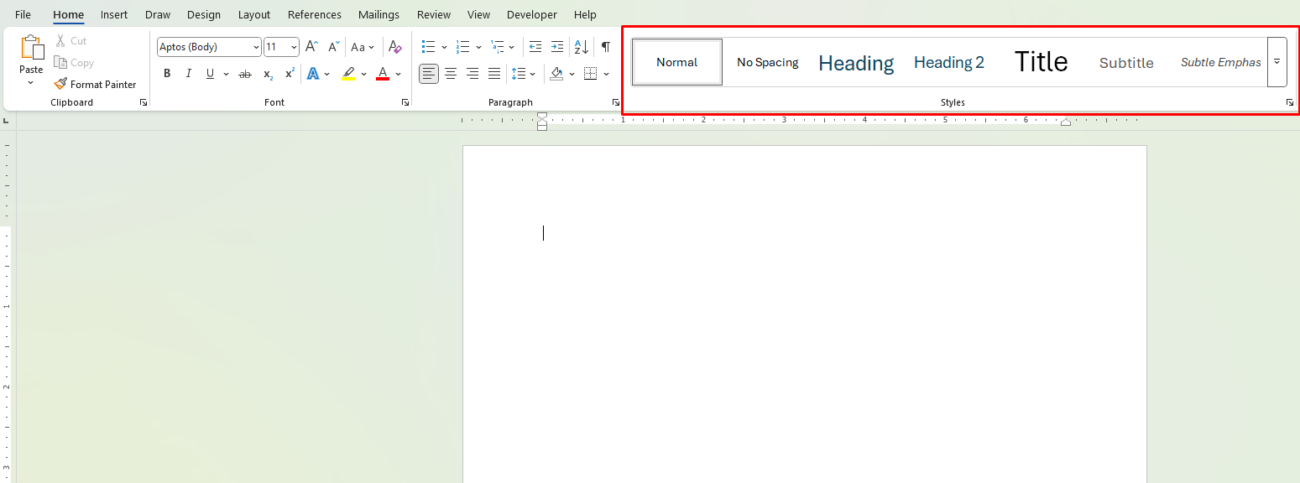
- Add Text: Type your text directly into the document. Use the Styles feature in the Home tab to apply headings, subheadings, and body text for a consistent design.
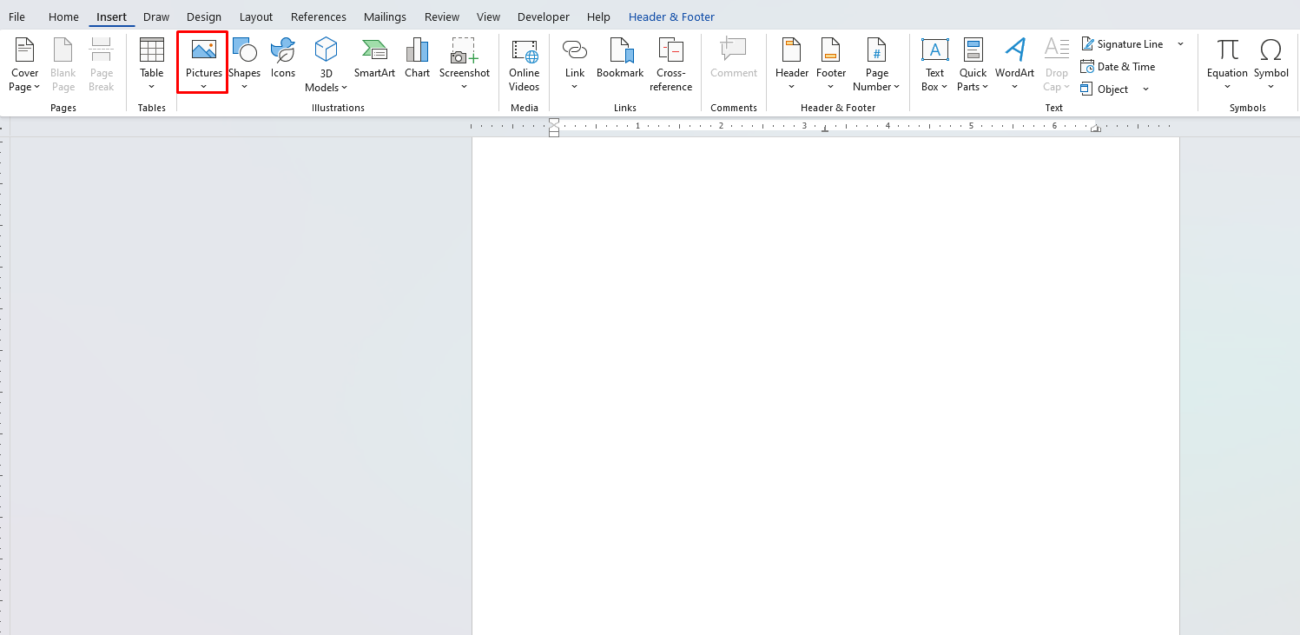
- Insert Images: To include images, go to the Insert tab, click on Pictures, and select images from your computer.
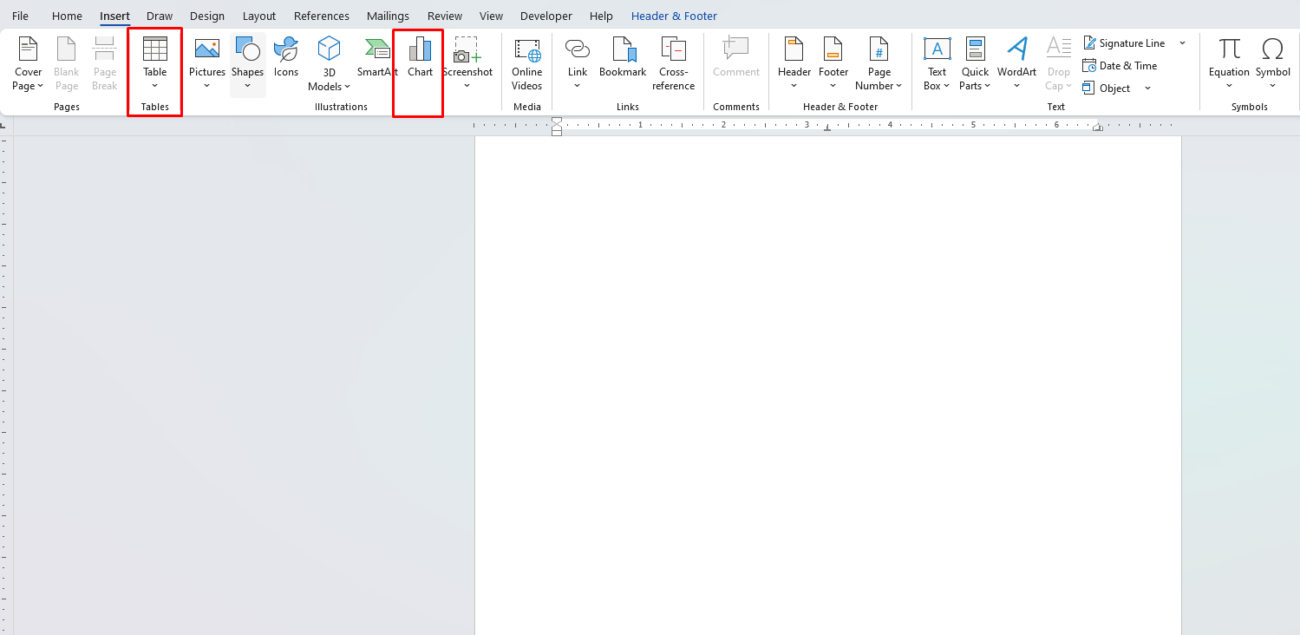
- Design Tables or Charts: If your booklet requires tables or charts, use the tools under the Insert tab to include them seamlessly.
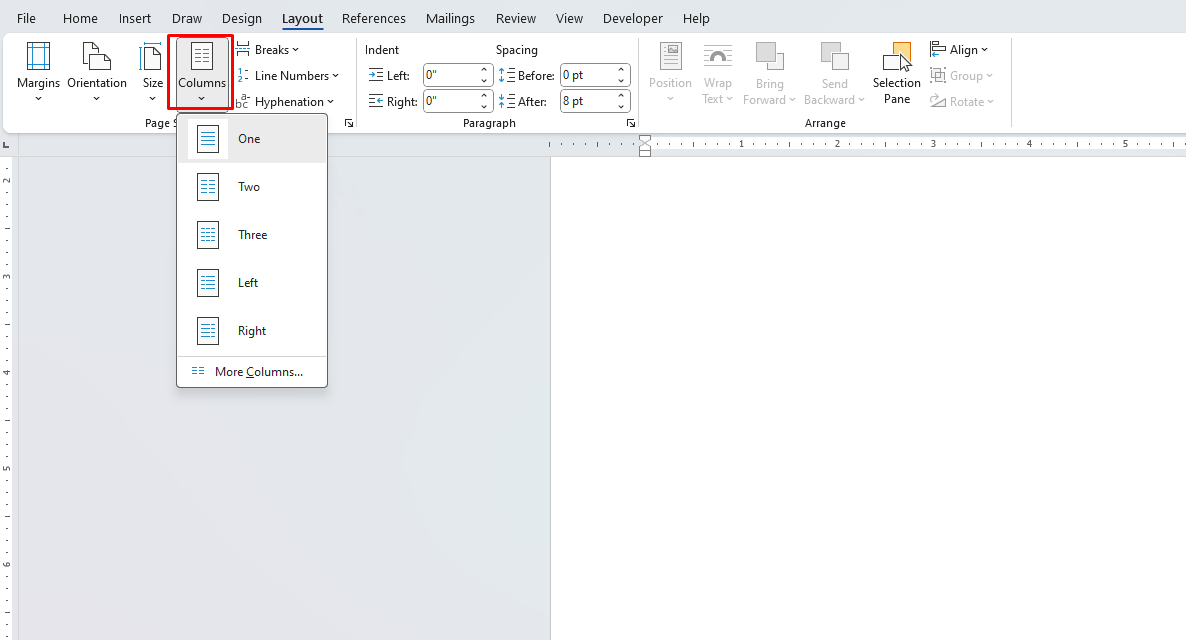
- Use Columns (Optional): If you want a newspaper-style layout, go to the Layout tab and click on Columns to divide the page into two or three sections.
Step 3: Format Your Booklet
Formatting ensures that your booklet is visually appealing and easy to read.
- Headers and Footers: Add headers and footers for page numbers, chapter titles, or other information. Go to the Insert tab, click Header or Footer, and customize them as needed.
- Font and Style: Use the Home tab to select fonts, adjust text sizes, and apply bold or italic styling.
- Spacing: Ensure your booklet has adequate spacing by adjusting line spacing in the Paragraph group under the Home tab.
Step 4: Preview Your Booklet
Before printing, preview your booklet to ensure everything is in the correct place.
- Go to the File tab and select Print.
- Use the print preview on the right side to check the booklet’s layout. Each page should appear in the correct order for printing and folding.
Step 5: Print Your Booklet
When you’re satisfied with the layout, it’s time to print your booklet.
- Go to the File tab and click Print.
- Under Settings, select Print on Both Sides. If your printer doesn’t support automatic duplex printing, choose Manually Print on Both Sides and follow the on-screen instructions to flip the paper.
- Make sure the Booklet option is properly reflected in the print preview.
- Click Print to produce your booklet.
Step 6: Assemble Your Booklet
After printing, fold the pages in half along the gutter. Staple them along the fold, or use a binding method of your choice, such as spiral binding or a folder.
Tips for Creating a Professional Booklet
- Use Templates: Microsoft Word offers pre-designed booklet templates. Search for “Booklet” in the New Document search bar to find customizable templates.
- Include a Cover Page: Design an eye-catching cover page using Word’s Cover Page feature under the Insert tab.
- Proofread Your Content: Double-check your booklet for any errors before printing.
- Save a PDF Version: Save your booklet as a PDF file to ensure consistent formatting, especially if sharing the file for printing at a professional print shop.
Buy the cheapest office keys online—affordable, reliable, and perfect for all your workplace needs!

