
How to Design Brochures in Word Like a Pro?
Microsoft Word may not be the first tool that comes to mind for designing brochures, but with the right techniques, you can create professional, eye-catching brochures in Word without the need for expensive design software. Whether you’re making a business brochure, event flyer, or product catalog, Word has the tools to help you achieve a polished look.
In this guide, we’ll walk you through the step-by-step process to design a stunning brochure in Word like a pro!
Step 1: Choose the Right Brochure Layout
Before you start designing, decide on the type of brochure you need:
- Bi-fold Brochure (One fold, four panels) – Great for product guides and business profiles.
- Tri-fold Brochure (Two folds, six panels) – Perfect for marketing materials and informational brochures.
How to Set Up a Brochure in Word:
- Open Microsoft Word and click File → New.
- In the search bar, type “Brochure” and browse available templates.
- Select a template or create a custom layout by clicking Blank Document.
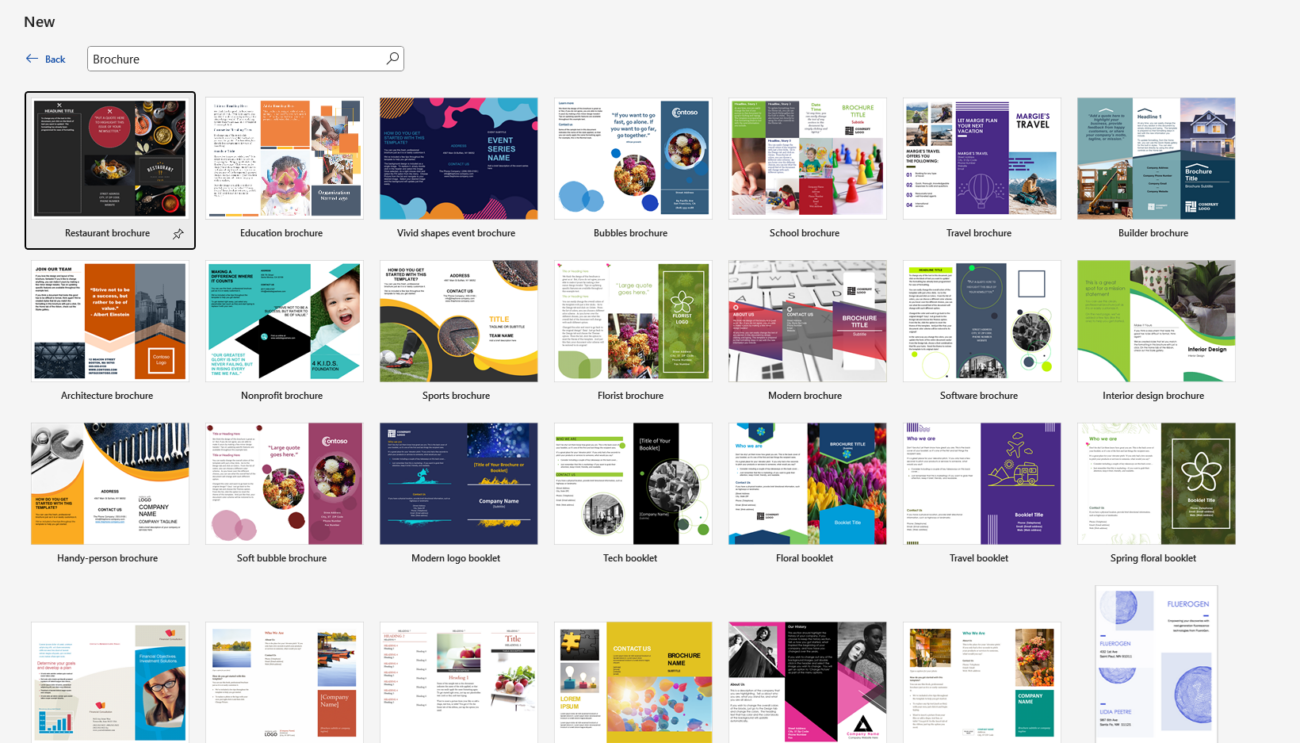
If you prefer to create a custom brochure, move to the next step!
Step 2: Set Up Page Orientation & Margins
To ensure your brochure folds properly, you need to adjust the page layout.
How to Change Page Orientation:
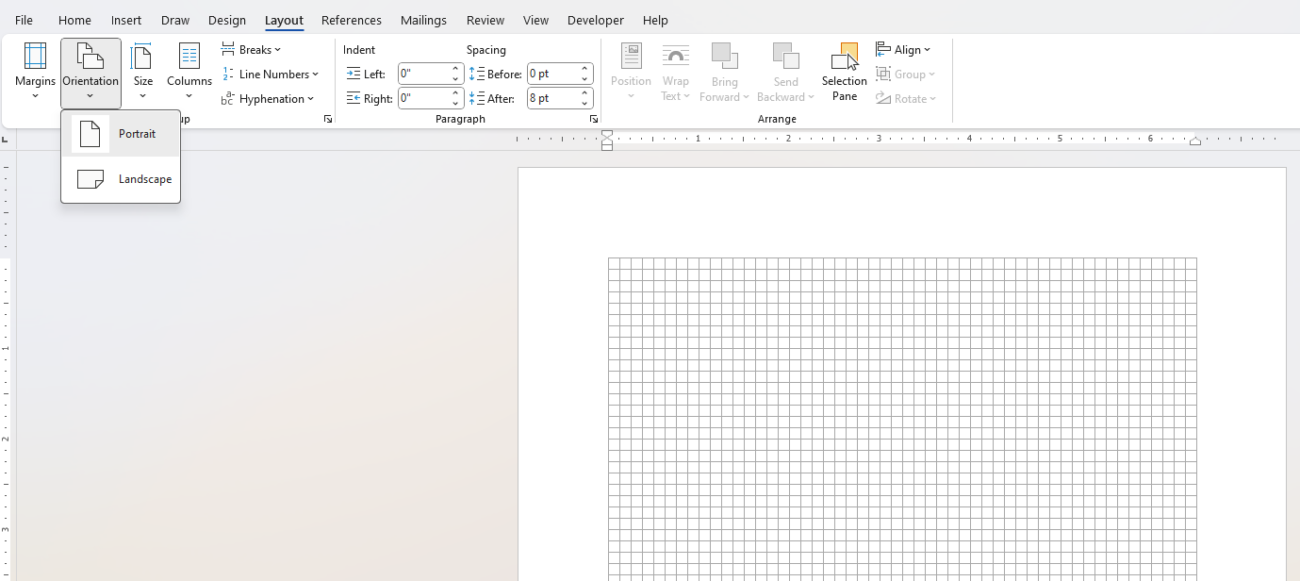
- Go to Layout → Orientation.
- Select Landscape for a traditional brochure style.
How to Set Margins for Printing:
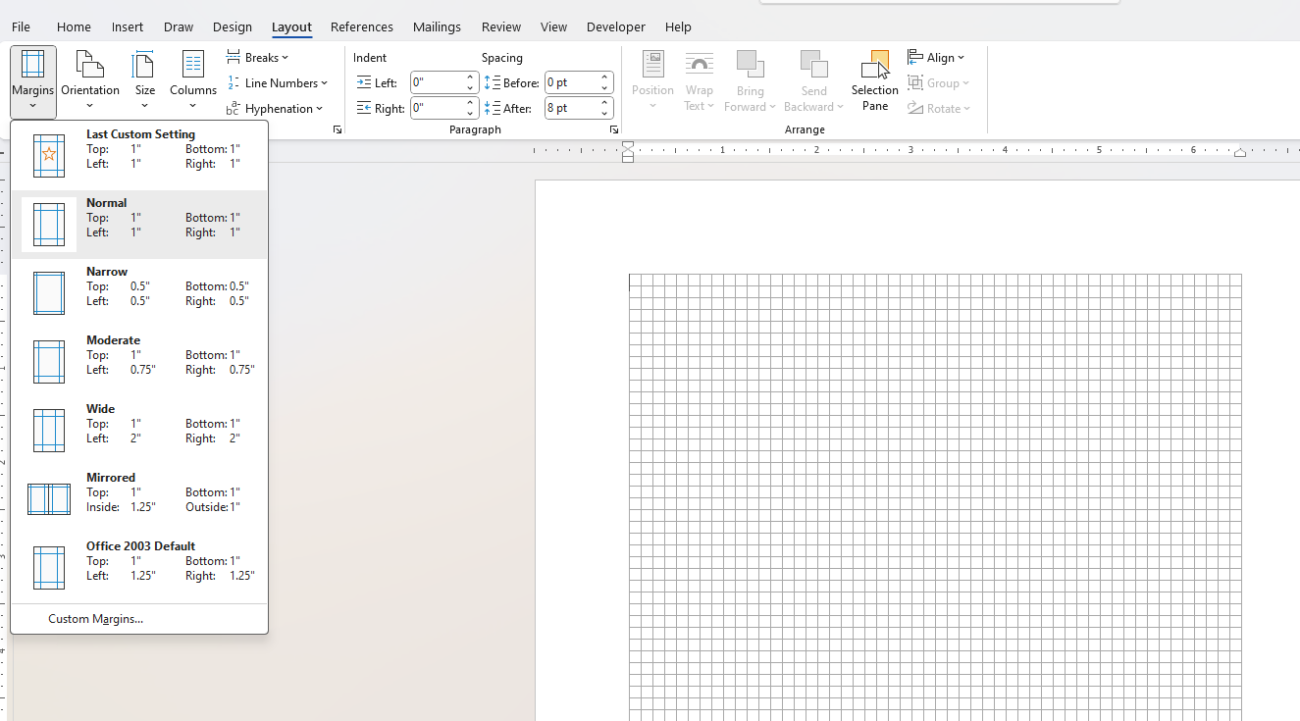
- Click Layout → Margins → Custom Margins.
- Set narrow margins (0.5 inches or less) to maximize space.
- Click OK.
Step 3: Create Brochure Columns for Folding
If you’re designing a tri-fold or bi-fold brochure, you’ll need to divide the page into columns.
How to Add Columns:
- Go to Layout → Columns.
- Choose Two for a bi-fold or Three for a tri-fold.
- Click More Columns, check Line Between (optional), and adjust spacing as needed.
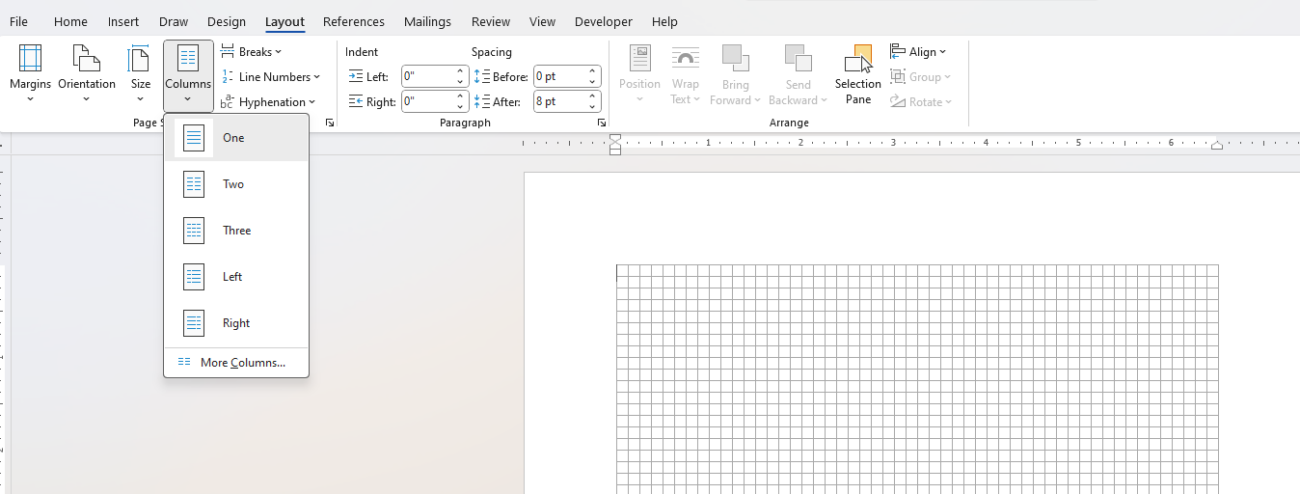
Now, your document is divided into panels where you can place text and images.
Step 4: Add a Background or Color Theme
To make your brochure visually appealing, add background colors, gradients, or images.
How to Add a Background Color:
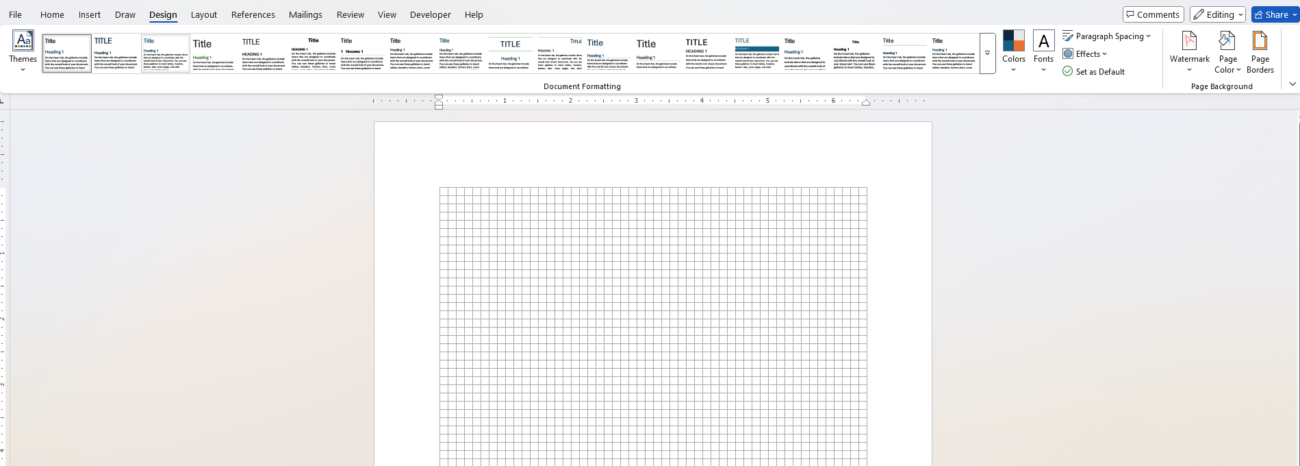
- Go to Design → Page Color.
- Select a solid color or click Fill Effects for gradients and textures.
How to Add a Background Image:
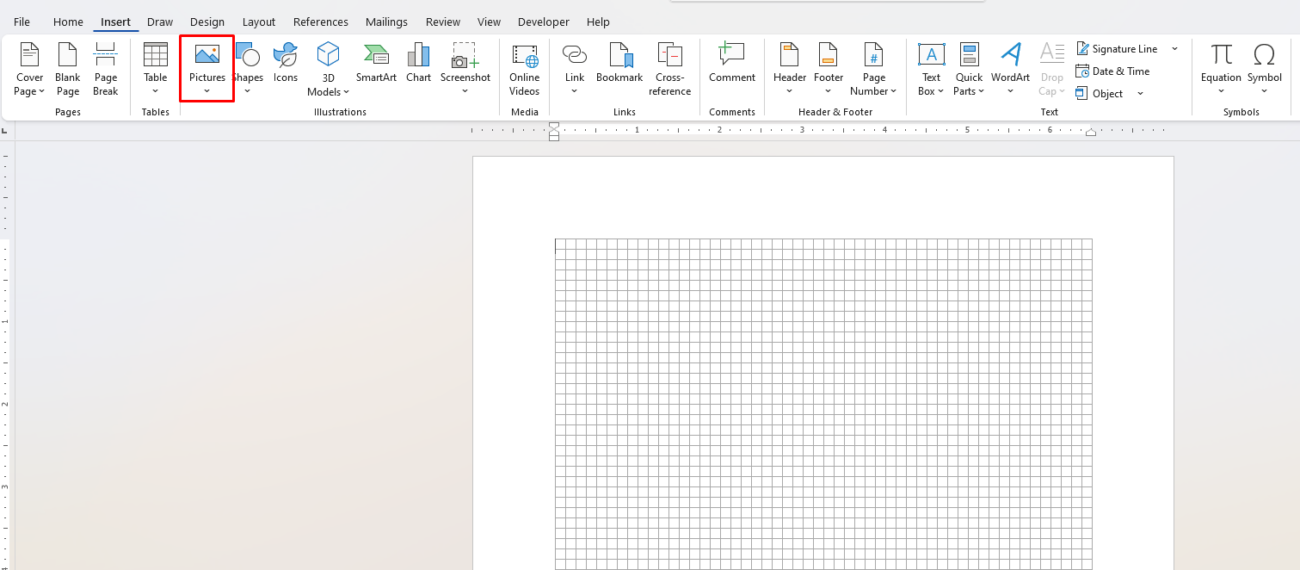
- Click Insert → Pictures to add a high-quality image.
- Resize it to cover the page and set Wrap Text → Behind Text.
- Adjust the transparency (Format Picture → Transparency) for a subtle effect.
Step 5: Insert and Format Text
Your brochure should be easy to read and well-organized. Use headings, subheadings, and bullet points to make the content digestible.
How to Add Text Boxes for Better Layout:
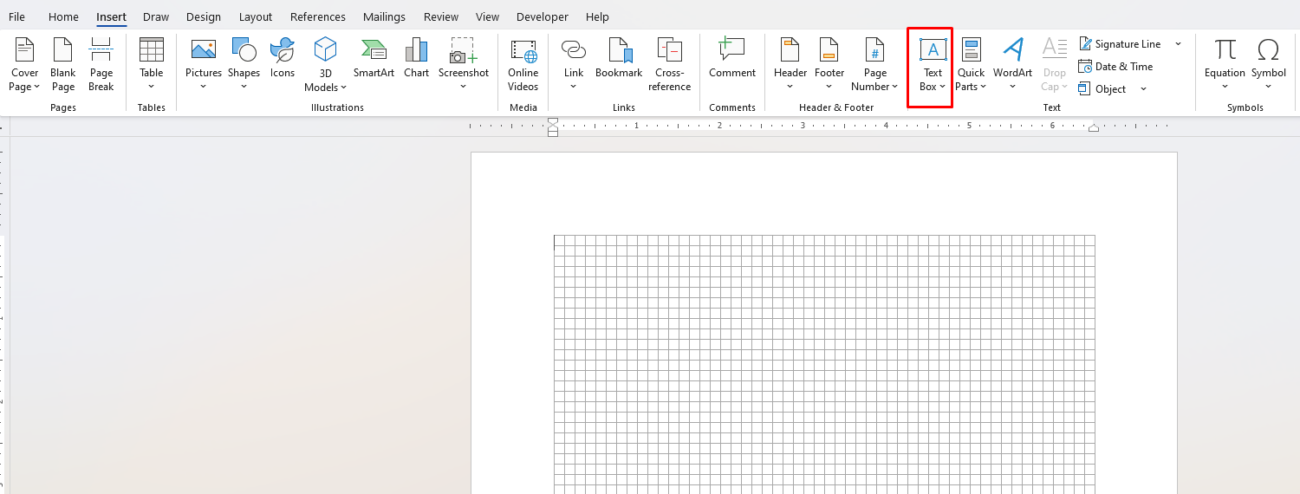
- Click Insert → Text Box → Draw Text Box.
- Place text boxes inside each column.
- Adjust font styles, sizes, and colors under the Home tab.
Best Font Combinations for Brochures:
- Title: Use a bold font like Montserrat, Arial Black, or Bebas Neue.
- Body Text: Keep it readable with Calibri, Times New Roman, or Open Sans.
🔹 Pro Tip: Keep fonts consistent throughout the brochure for a professional look!
Step 6: Add High-Quality Images & Icons
A brochure without visuals can look dull! Use high-quality images, icons, and logos to make it engaging.
How to Insert and Align Images:
- Click Insert → Pictures to add your images.
- Resize them proportionally by dragging the corners.
- Use Wrap Text → Square or Tight for precise placement.
How to Use Icons for a Modern Look:
- Go to Insert → Icons.
- Search for icons related to your content (e.g., phone, email, location).
- Resize and place them near contact details or headings.
🔹 Pro Tip: Use transparent PNG images to avoid messy backgrounds!
Step 7: Add Contact Information & Call-to-Action (CTA)
Your brochure should encourage action! Make sure to include:
✅ Company Name & Logo
✅ Website & Social Media Links
✅ Phone Number & Email
✅ Call-to-Action (e.g., “Call Now,” “Visit Us,” “Order Today”)
How to Insert a Hyperlink for Digital Brochures:
- Select the text (e.g., website link).
- Press Ctrl + K or go to Insert → Link.
- Enter the URL and click OK.
Now, readers can click the link directly in the digital version of your brochure!
Step 8: Save & Print Your Brochure
Once your brochure is ready, save it in the right format for sharing or printing.
How to Save as a Print-Ready PDF:
- Click File → Save As.
- Select PDF as the file type.
- Click Options and check High-Quality Printing.
- Click Save.
How to Print a Double-Sided Brochure:
- Click File → Print.
- Under Settings, choose Print on Both Sides (Flip on Short Edge).
- Select High-Quality Paper for the best results.
🔹 Pro Tip: If printing professionally, ask for glossy or matte-finish paper for a premium look!
Get genuine Office keys at the lowest prices—fast, secure, and hassle-free activation guaranteed! 🔑🚀

