How to Insert and Edit Tables in Microsoft Word?
Tables are one of the most useful features in Microsoft Word, allowing you to organize data, create schedules, and present information in a clear and structured way. Whether you’re creating a simple table or customizing it to match your document’s style, Word offers a range of tools to make this process seamless. Here’s a step-by-step guide on how to insert and edit tables in Microsoft Word.
Inserting a Table in Microsoft Word
Method 1: Using the Table Tool
- Open your Word document and place the cursor where you want the table to appear.
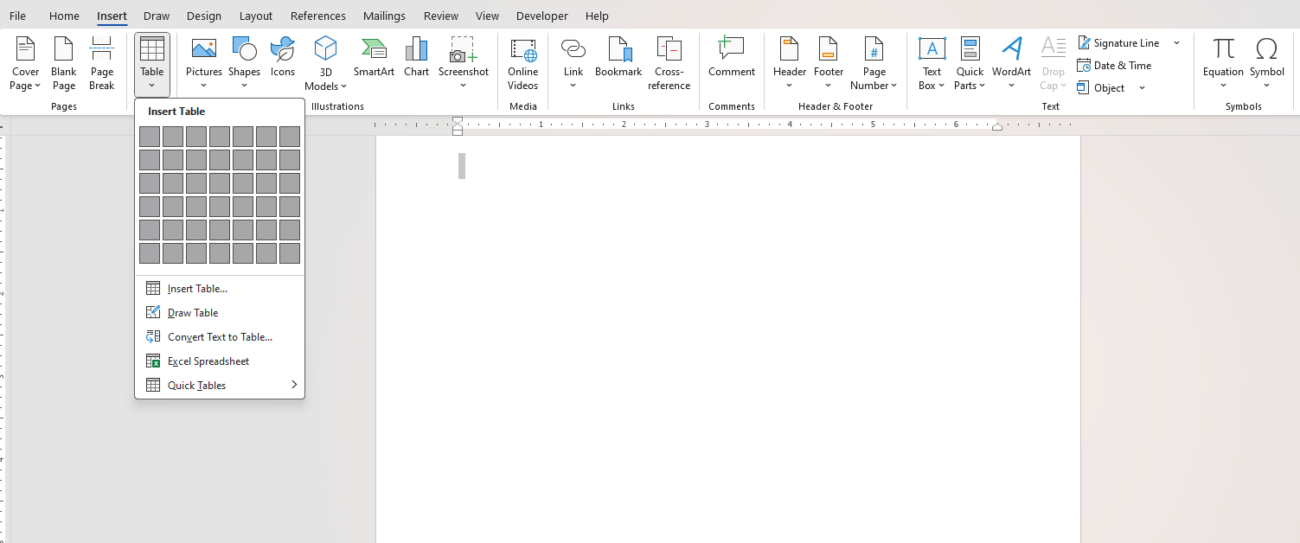
- Go to the Insert tab on the ribbon.
- Click on the Table button. A grid will appear, allowing you to choose the number of rows and columns for your table.
- Hover over the grid to select the desired dimensions, then click to insert the table.

Method 2: Using the Insert Table Dialog Box
- Follow the same steps to open the Insert tab.
- Click the Table button, then select Insert Table from the dropdown menu.
- In the dialog box, specify the number of columns and rows.
- Click OK to insert the table.
Method 3: Drawing a Table
- Navigate to the Insert tab and click Table.
- Select Draw Table from the dropdown.
- Use your cursor to draw the table structure manually. This method is useful for irregular or complex tables.
Editing Tables in Microsoft Word
Once you’ve inserted a table, you can easily modify its structure, layout, and appearance.
Adding or Removing Rows and Columns
- To add a row or column:
- Click inside the table where you want the change.
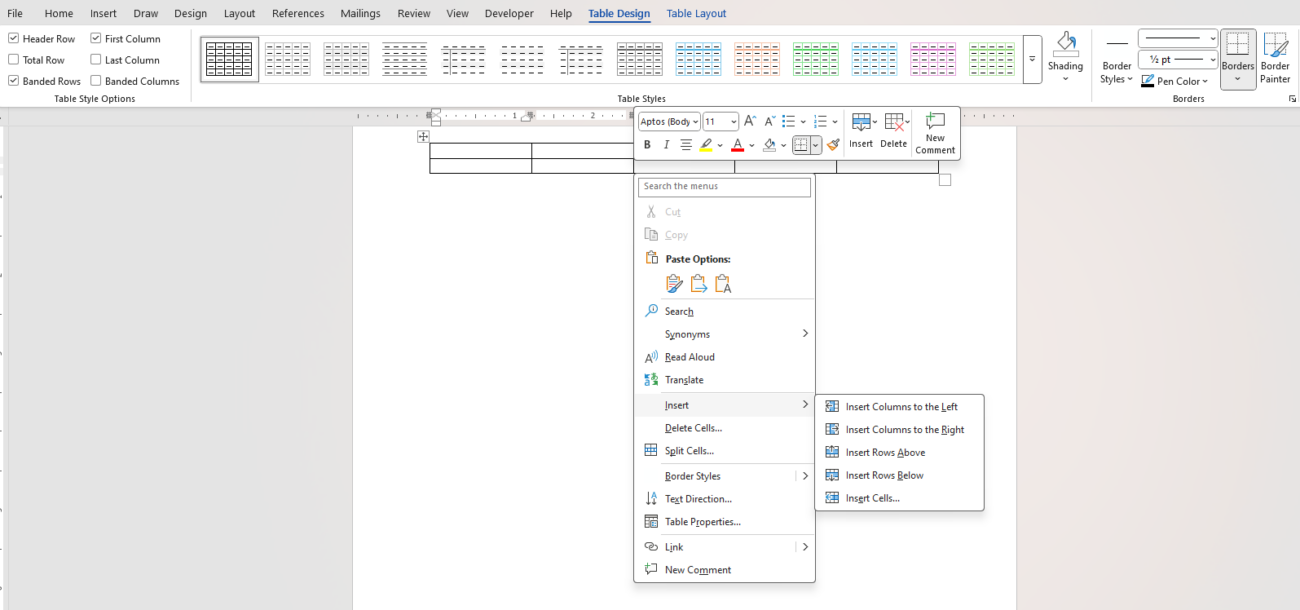
- Right-click and select Insert to add rows above, below, or columns to the left or right.
- To delete rows or columns:
- Highlight the row(s) or column(s) you want to remove.
- Right-click and select Delete Rows or Delete Columns.

Merging and Splitting Cells
- Merge Cells: Select the cells you want to combine, then right-click and choose Merge Cells.
- Split Cells: Click the cell you want to divide, right-click, and select Split Cells. Specify the number of rows and columns for the split.
Resizing Rows and Columns
- Hover over the border of a row or column until the resize cursor (a double-headed arrow) appears.
- Drag the border to adjust the size manually.
- For precise adjustments, go to the Table Layout tab and input exact measurements in the Cell Size group.
Formatting Tables in Word
Microsoft Word offers several formatting options to make your table visually appealing:
- Table Styles:
- Click anywhere in the table, then go to the Table Design tab.
- Choose from a variety of pre-designed styles that include shading, borders, and font formatting.

- Shading and Borders:
- Use the Shading button in the Table Design tab to change the background color of cells.
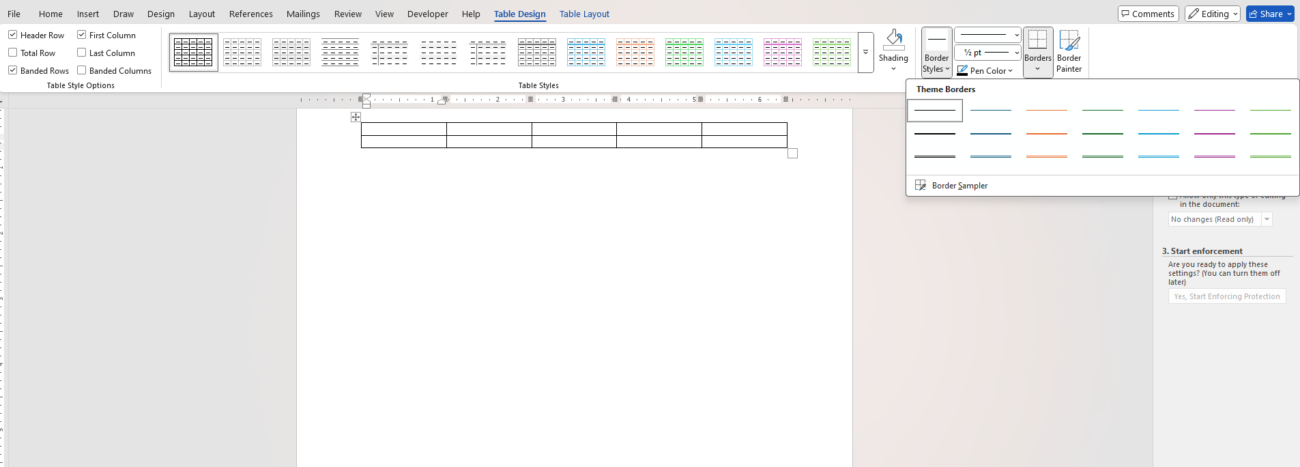
- Customize borders by clicking the Borders dropdown and selecting the desired style, thickness, and color.
- Text Alignment:
- Highlight the text within the table.
- Use the alignment tools in the Table Layout tab to adjust text placement horizontally and vertically.
- Sorting and Data Tools:
- To sort data, click anywhere in the column you want to organize, then go to the Table Layout tab and select Sort.
- Use the Repeat Header Rows option to ensure headers appear at the top of each page when your table spans multiple pages.
Visit our website to purchase the cheapest Office keys online and enjoy instant access to powerful productivity tools at a fraction of the cost!

