Creating an index for a Word document can help readers quickly navigate to specific topics or terms within your document. This guide will walk you through each step to create a well-organized index in Microsoft Word.
Step 1: Open Microsoft Word
- Launch Microsoft Word: Open the Microsoft Word application on your computer.
- Open Your Document or Create a New One: Click on
Filein the top-left corner, selectOpento choose an existing document, or clickNewto create a new document.
Step 2: Highlight Index Entries
- Select the Text: Navigate to the text you want to include in the index. Highlight the word or phrase that you wish to index.
- Mark Entry:
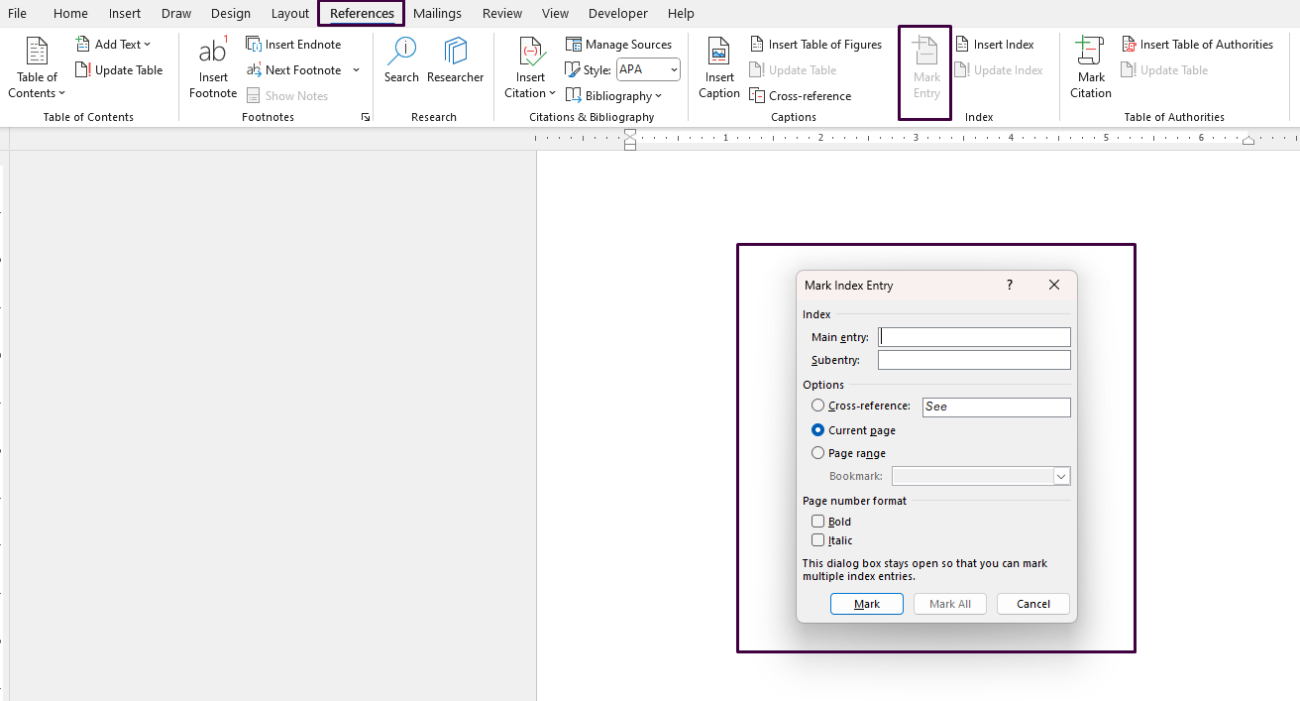
- Go to the
Referencestab in the ribbon at the top of the screen. - In the
Indexgroup, click onMark Entry.
- Go to the

Step 3: Mark Index Entry Dialog Box
- Define the Main Entry:
- In the
Mark Index Entrydialog box, you will see the selected text in theMain entryfield. You can edit this text if desired. - If you want this entry to be a subentry under a broader topic, enter the broader topic in the
Main entryfield, and then enter the specific term in theSubentryfield.
- In the
- Add Cross-Reference (Optional): To add a cross-reference, enter the reference text in the
Cross-referencefield. - Choose Page Range (Optional): If the entry covers a range of pages:
- Click on
Page range. - Select the bookmark that defines the range.
- Click on
- Mark the Entry:
- If this entry appears in multiple locations, click
Mark Allto index all occurrences of that text. - Click
Markto index only the selected occurrence.
- If this entry appears in multiple locations, click
- Close the Dialog Box: Click the
Closebutton to exit theMark Index Entrydialog box.
Step 4: Repeat for Additional Entries
- Navigate and Highlight Additional Entries: Move through your document, repeating steps 1 to 5 for every word or phrase you want to include in the index.
Step 5: Insert the Index
- Insert the Index Location: Click at the point in your document where you want to place the index, typically at the end of the document.
- Insert Index:
- Go to the
Referencestab in the ribbon. - In the
Indexgroup, clickInsert Index.
- Go to the
- Customize Index Appearance:
- In the
Indexdialog box, choose the format and style options for your index. - Select how many columns you want your index to have or leave it on auto to adjust the number of columns based on the page layout.
- Choose a format from the
Formatsdrop-down menu, such as Classic, Fancy, or Modern.
- In the
- Click OK: Click
OKto insert the index into your document.
Step 6: Update the Index
- Modify the Document: If you make further changes to your document, such as adding or removing indexed terms, you will need to update the index.
- Update Index:
- Click on the existing index in your document.
- Go to the
Referencestab and clickUpdate Indexin theIndexgroup to refresh the index entries and page numbers.
Looking for a budget-friendly way to get Microsoft Office? Check out our affordable Office keys and save big on premium software!


