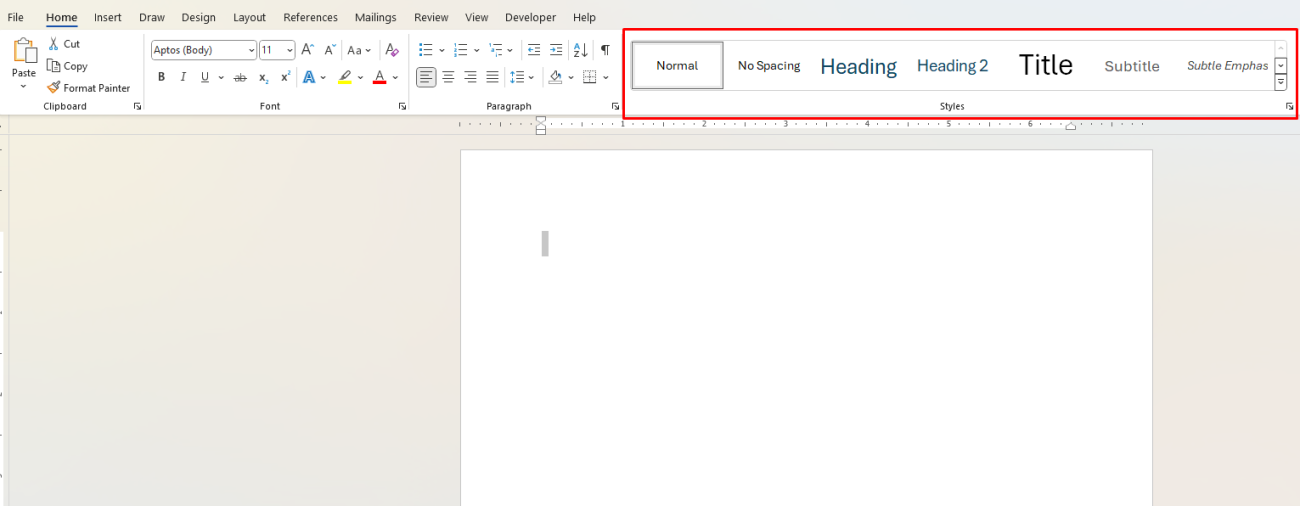
Microsoft Word Styles are predefined collections of formatting options that you can apply to text. They include font size, color, alignment, spacing, and more, all bundled into a single click. Instead of applying each of these individually, a style allows you to format text consistently with a single selection.
There are several types of styles, including:
- Paragraph Styles: Format an entire paragraph, including text alignment and line spacing.
- Character Styles: Format individual characters, such as font type or color.
- Table Styles: Define the appearance of tables, including cell borders and shading.
- List Styles: Customize bullet and numbering styles.
Using these styles effectively can make document formatting fast and uniform.

Why Use Styles?
Mastering styles offers multiple benefits:
- Consistency: Ensures that headings, body text, and lists look the same throughout your document.
- Time Efficiency: Apply complex formatting with one click instead of adjusting each attribute individually.
- Easy Navigation: When you use heading styles, you can navigate quickly through the document using the Navigation Pane.
- Automatic Updates: When you modify a style, every instance of that style in the document updates automatically.
These benefits make styles essential for anyone creating reports, resumes, proposals, or any formal documents.
How to Apply Styles in Word
Applying a style in Microsoft Word is easy. Here’s how:
- Highlight the text you want to format.
- Go to the Home tab on the Ribbon.
- In the Styles group, select a style, such as “Heading 1” or “Normal,” to apply it.
Word has a variety of built-in styles, but you can customize these or create new ones to suit your preferences.

Creating and Modifying Styles
Sometimes, the default styles don’t match your document’s needs, which is why it’s useful to create or modify styles. Here’s how:
- Go to the Styles group in the Home tab.
- Click on the small arrow in the corner of the Styles box to open the Styles Pane.
- Right-click on a style and select Modify to edit an existing style.
- To create a new style, click on New Style in the Styles Pane.
In the style settings, you can adjust font, color, alignment, spacing, and even add borders or shading. After saving, your custom style will be available for future use in your document.
Using the Styles Pane for Advanced Style Management
The Styles Pane is a more detailed way to manage styles, allowing you to view, create, modify, and delete styles.
- Open the Styles Pane by clicking on the small arrow at the bottom-right of the Styles group.
- This pane shows all styles currently applied in the document.
- Use the Options at the bottom to view recommended styles, all styles, or those in use in the document.
The Styles Pane offers you complete control over document styles and is particularly useful for longer documents where style management is essential.
Creating a Table of Contents Using Heading Styles
One of the most practical uses of styles is creating a Table of Contents (TOC) using heading styles. When you apply heading styles to your section titles, Word can generate a TOC automatically.
- Apply Heading 1, Heading 2, and other heading styles to the appropriate text.
- Place your cursor where you want the TOC to appear.
- Go to the References tab and click Table of Contents.
- Word will generate a TOC based on the heading styles.
Updating the TOC is easy, too. Simply right-click on it and choose Update Field whenever you make changes to your headings.
Creating and Using Style Sets
If you have specific style preferences that you want to use across multiple documents, consider creating a Style Set.
- Format a document with the styles you want.
- Go to Design > Style Set and select Save as a New Style Set.
- Name your style set and save it.
Now, you can apply this Style Set to other documents by going back to Design > Style Set and choosing your custom set.
Removing or Clearing Styles
Sometimes you need to remove styles from text. Here’s how:
- Select the text with the style you want to remove.
- Go to Home > Styles and click Clear All to reset the text to default formatting.
Clearing styles is helpful if you’re reformatting a document and want to start fresh.
Using Templates with Styles
Templates make it easy to use consistent styles across different documents. You can create your own template with customized styles:
- Open a new document and format it with the styles you want.
- Go to File > Save As and choose Word Template (.dotx) as the file type.
Your new template will be available whenever you create a new document, ensuring all documents maintain the same styling.
Tips for Style Consistency Across Documents
- Use the Organizer: The Style Organizer allows you to copy styles between documents. Go to File > Options > Add-ins to manage this.
- Set Default Styles: In the Styles Pane, select Set as Default for any style you want to keep in every document.
- Share Templates: If you work with a team, share templates to ensure that everyone uses the same styles for consistency.
Unlock the full potential of Microsoft Office with genuine Office keys, providing you with lifetime access to essential productivity tools like Word, Excel, and PowerPoint—all at an affordable price.


