When working with long documents in Microsoft Word, organizing content efficiently is essential for readability and ease of navigation. Whether you’re handling reports, dissertations, manuals, or other lengthy projects, these tips will help you structure your document seamlessly and manage it like a pro.
Use Heading Styles for Structure and Navigation
Using heading styles in Word helps create a clear structure in your document and simplifies navigation. Here’s how to apply them:
- Highlight the text you want to make a heading.
- Go to the Home tab and select a heading style (e.g., Heading 1, Heading 2).
- Use Heading 1 for main titles, Heading 2 for subsections, and so on.
Headings not only make your document look organized, but they also allow you to use Word’s Navigation Pane to move quickly between sections. To open the Navigation Pane, go to View > Navigation Pane.
Insert a Table of Contents
A Table of Contents (TOC) provides a snapshot of your document’s structure and allows readers to jump directly to sections. Here’s how to create one:
- Place your cursor where you want the TOC to appear.
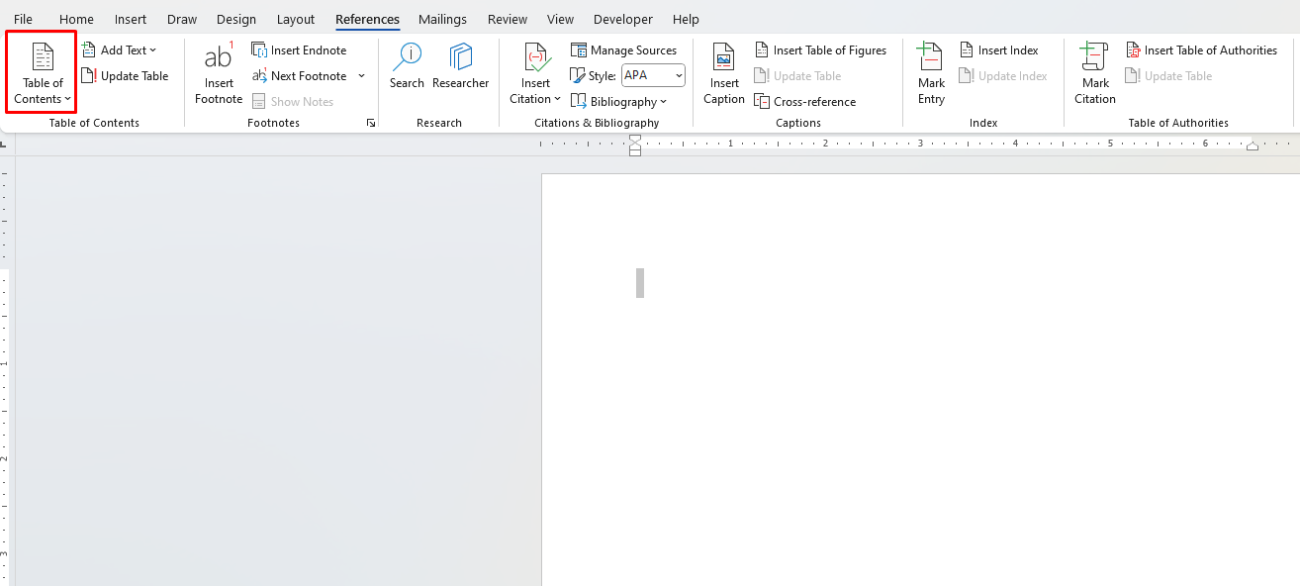
- Go to the References tab and select Table of Contents.
- Choose an automatic style to generate the TOC based on your headings.
When you add new sections, you can update the TOC by right-clicking on it and selecting Update Field. This is an essential tool for any long document, especially for reports or research papers.

Use the Navigation Pane for Easy Reordering
The Navigation Pane is invaluable for rearranging sections in your document without copy-pasting. After applying heading styles, your document’s headings will appear in the Navigation Pane. You can click and drag these headings to reorder sections effortlessly.
To enable it, go to View > Navigation Pane. You can then drag-and-drop headings to reorganize your document’s flow without disrupting the content itself.
Utilize the Outline View for Large-Scale Edits
The Outline View is perfect for getting an overview of your document’s structure and making large-scale adjustments. It allows you to collapse and expand sections, making it easier to focus on one part of your document at a time.
To access the Outline View:
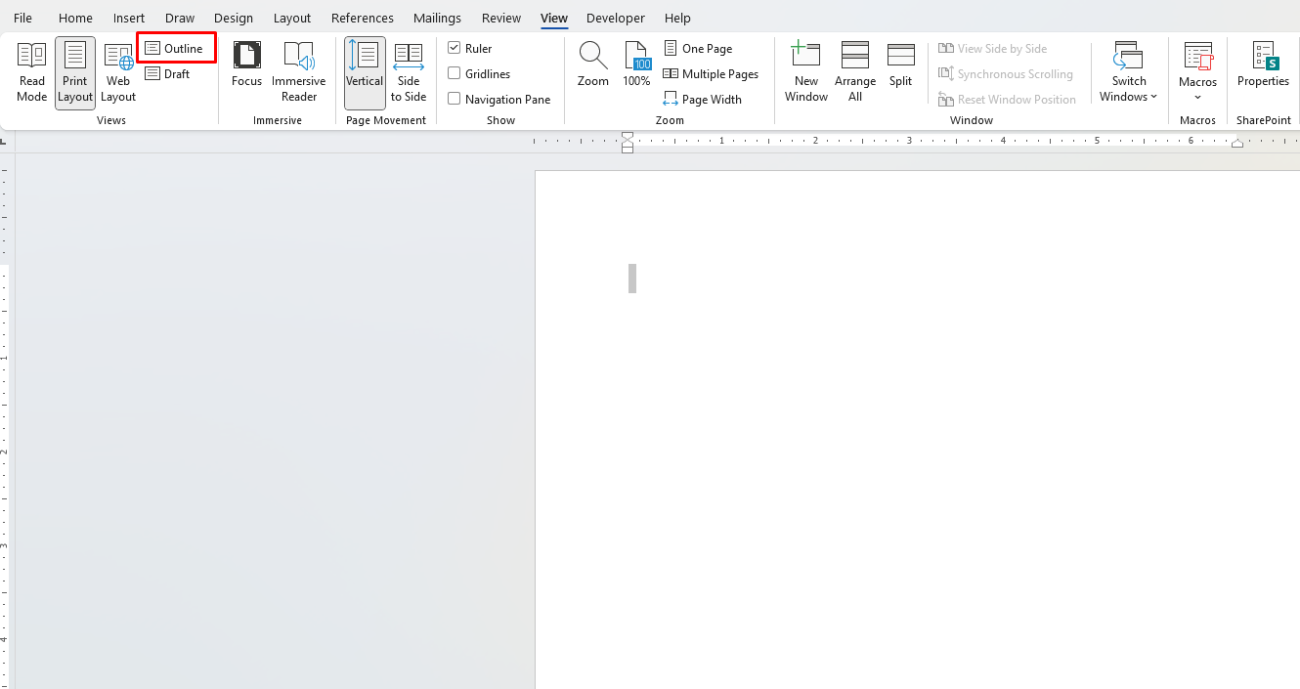
- Go to View > Outline.
- You can expand or collapse different levels of headings and drag sections to reorder them.
The Outline View also lets you hide or show certain text levels, making it easier to work on a high-level structure before diving into finer details.

Break Down Sections with Section Breaks
Section breaks give you control over formatting in different parts of your document. They’re especially useful for documents with distinct sections that require unique headers, footers, or page orientations.
To insert a section break:
- Place your cursor where you want the new section to begin.
- Go to Layout > Breaks and select the type of break you need, such as Next Page or Continuous.
Using section breaks effectively helps you manage complex formatting, such as switching from portrait to landscape pages within the same document.
Use Page Numbering and Headers/Footers
Headers, footers, and page numbers give your document a polished, professional look and make it easier to navigate. To set these up:
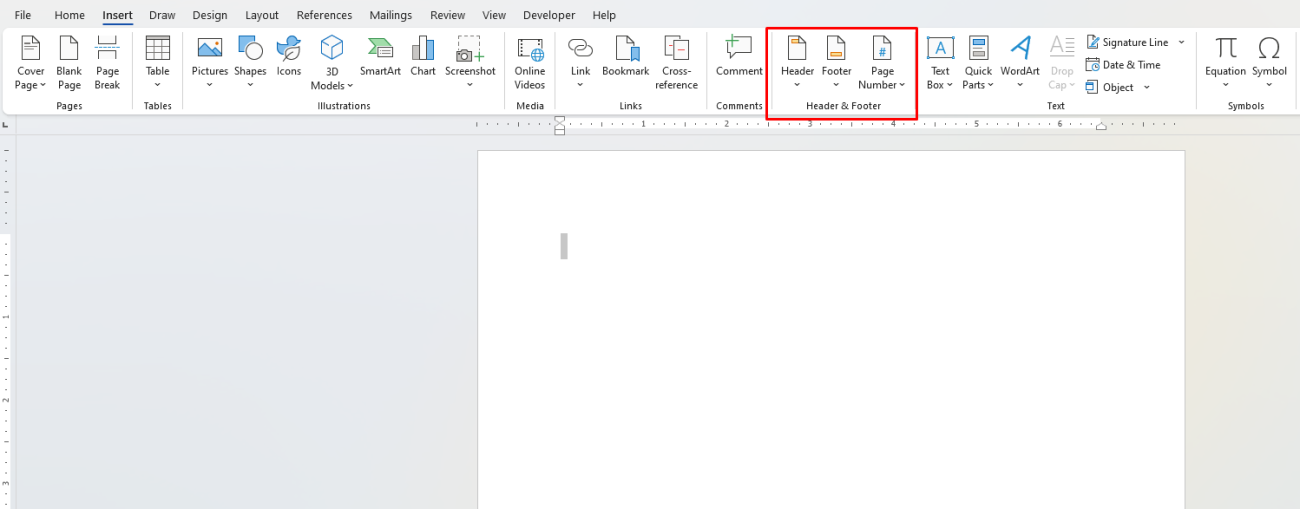
- Go to Insert > Header & Footer.
- Customize the header and footer for different sections if needed.
- Insert page numbers from Insert > Page Number.
You can also customize the numbering format or restart numbering in different sections—helpful for documents that have an introduction, body, and appendices.

Create Bookmarks for Quick Reference Points
Bookmarks allow you to mark specific points in a document for quick navigation. This feature is handy if you frequently revisit certain sections.
- Place your cursor at the point you want to bookmark.
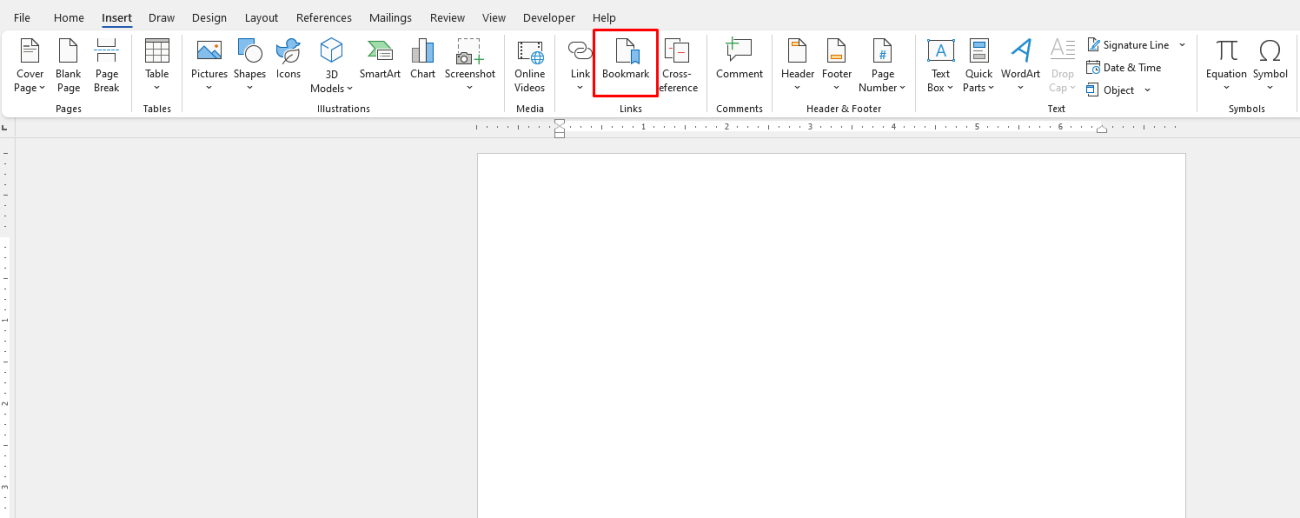
- Go to Insert > Bookmark and enter a name for the bookmark.
To navigate to a bookmark, go to Insert > Bookmark, select it, and click Go To. Bookmarks are a powerful tool for internal navigation, especially in long, detailed documents.

Use Cross-Referencing for Linked Content
Cross-references are hyperlinks to other parts of your document, like specific headings, tables, or figures. This is ideal for long documents where you want to direct readers to related sections.
- Go to Insert > Cross-reference.
- Choose the reference type (e.g., Heading, Figure, Table).
- Select the specific item you want to link to.
Cross-references update automatically if the referenced text or numbering changes, which helps maintain accuracy in your document’s internal links.
Leverage Quick Parts for Reusable Content
If your document includes repetitive content, like a disclaimer or specific phrases, save time by using Quick Parts. This feature allows you to create reusable content blocks.
- Highlight the text you want to save.
- Go to Insert > Text > Quick Parts > Save Selection to Quick Parts Gallery.
Now you can insert this saved content anywhere in your document by going to Insert > Quick Parts. This is a huge time-saver for long documents with recurring content.
Track Changes and Use Comments for Collaboration
If you’re collaborating on a document, Track Changes and Comments help keep feedback organized.
- Turn on Track Changes from the Review tab to keep a record of edits.
- Use New Comment to leave notes on specific sections.
These tools make it easy to see who made what changes and to discuss specific sections without altering the main content. It’s especially useful for team projects or documents that require approval from multiple people.
Unlock the full potential of Microsoft Office with genuine Office keys, providing you with lifetime access to essential productivity tools like Word, Excel, and PowerPoint—all at an affordable price.

