Microsoft Word’s Mail Merge feature is a powerful tool for creating personalized documents at scale. Whether you’re sending letters, labels, envelopes, or emails, Mail Merge allows you to quickly personalize each document with details like names, addresses, or other specific information without manually editing each one. This tutorial will guide you through each step of the Mail Merge process in Microsoft Word, so you can master this time-saving feature.
What is Mail Merge?
Mail Merge is a feature that lets you merge a single template document with a list of data to create personalized documents. For example, you could use Mail Merge to:
- Send a letter to multiple recipients with each person’s name and address.
- Create custom labels for bulk mailing.
- Generate personalized emails to a list of contacts.
Mail Merge pulls data from an external source, such as an Excel spreadsheet or Outlook contacts, and inserts it into placeholders in your Word document. This approach ensures accuracy and saves time by automating what would otherwise be a repetitive task.
Step 1: Prepare Your Data Source
Before you start, you need a data source containing the personalized information you want to include in your documents. This is usually an Excel spreadsheet, but it could also be an Outlook contacts list or an Access database. The key fields in your data source might include:
- First Name
- Last Name
- Address
- Email Address
- Custom Fields (like “Company” or “Product Purchased”)
Setting Up the Data Source in Excel:
- Open a new or existing Excel file.
- In the first row, label each column with the fields you’ll use (e.g., “First Name,” “Last Name,” “Address”).
- Fill in the corresponding information for each recipient in the rows below.
- Save your Excel file, making sure each column has a unique header and each row is populated.
Step 2: Start the Mail Merge in Word
Once your data source is ready, it’s time to set up the Mail Merge in Word. Here’s how to start:
- Open a new or existing Word document that you’ll use as your template.
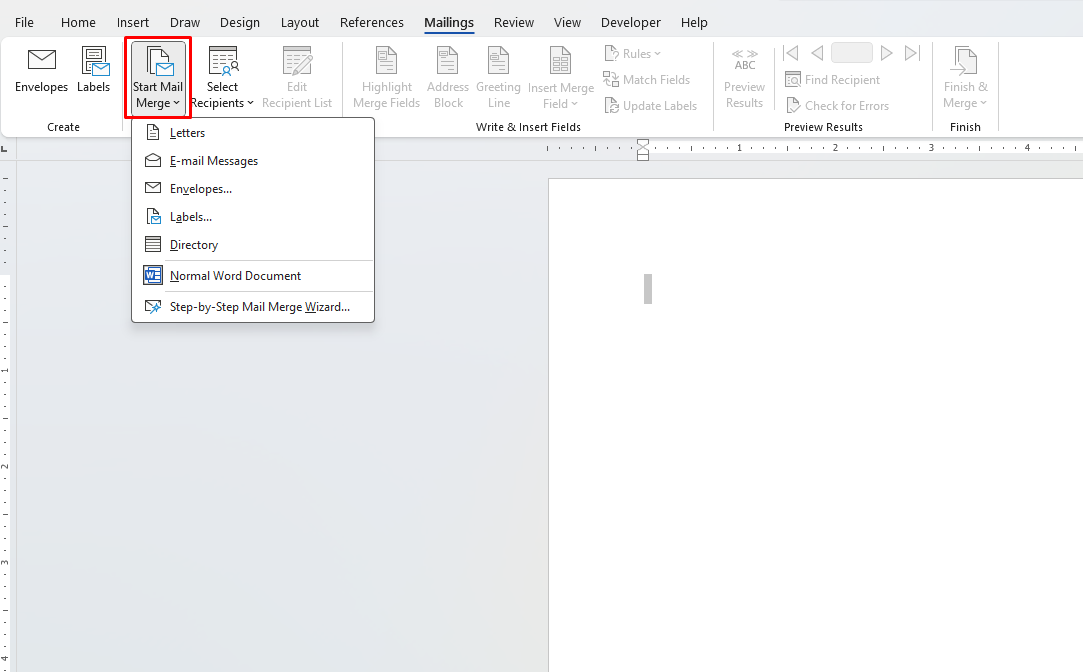
- Go to the Mailings tab on the Ribbon.
- Click on Start Mail Merge and choose the type of document you’re creating (e.g., Letters, E-mails, Labels, or Envelopes).
For this tutorial, let’s assume you’re creating personalized letters. Selecting Letters will create a document format that works well for this purpose.

Step 3: Connect the Data Source
Now, it’s time to connect your Word document to your data source (e.g., your Excel spreadsheet).
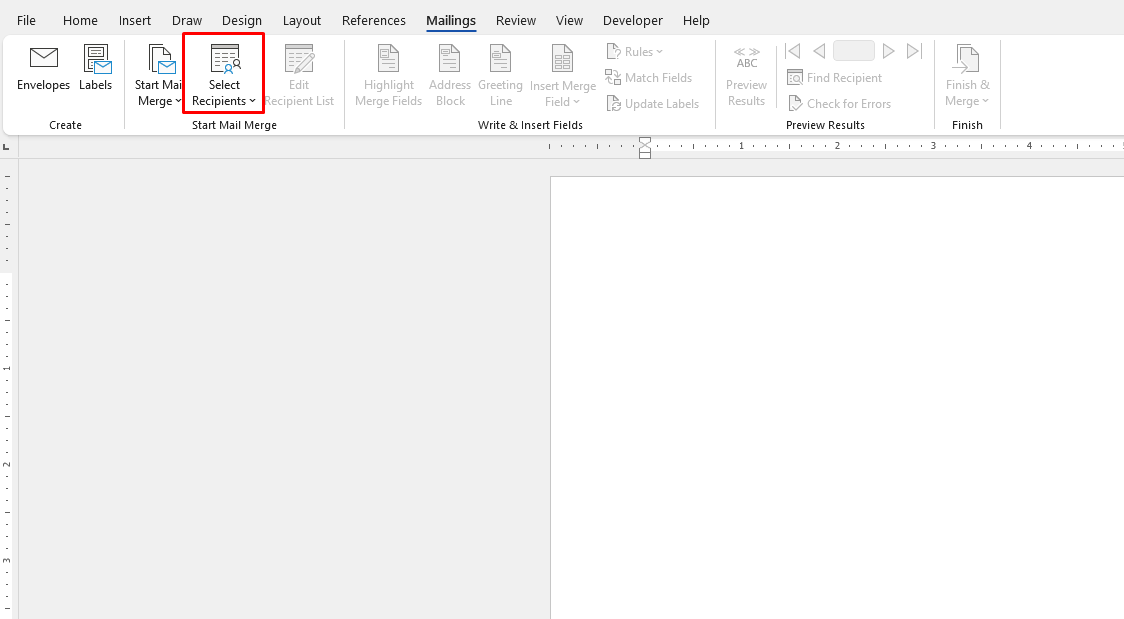
- Click on Select Recipients in the Mailings tab.
- Choose Use an Existing List and navigate to the Excel file you created.
- Select the appropriate sheet in the file (Excel files can have multiple sheets) and click OK.
You’ve now linked your Word document with the data source, so you can start inserting personalized information into your document.

Step 4: Insert Merge Fields
Merge fields are placeholders that will be replaced by the actual data from your Excel file. For instance, a merge field like <<First Name>> will display the recipient’s first name from your data source.
To add merge fields:
- Click where you want the personalized information to appear in your document.
- Go to the Mailings tab and select Insert Merge Field.
- Choose the field you want to insert (e.g., First Name, Last Name), and it will appear in your document as a placeholder.
Continue adding merge fields throughout your document as needed. Common fields include names, addresses, and other relevant information you want to personalize.
Step 5: Preview the Mail Merge
Before finalizing, preview the Mail Merge to make sure everything is working as expected. Here’s how:
- Go to the Mailings tab and click Preview Results.
- Use the arrows in the Mail Merge Preview group to scroll through each document and check that the fields are populated correctly.
This step helps you identify any issues with your data or formatting before you create the final documents.
Step 6: Complete the Merge
Once you’re satisfied with the preview, it’s time to complete the Mail Merge and generate the final documents.
- Go to the Finish & Merge option in the Mailings tab.
- Choose how you want to save or send your merged documents:
- Edit Individual Documents: Creates a new Word document with all the merged letters. This option is useful if you need to make individual edits or save the documents separately.
- Print Documents: Sends the merged documents directly to the printer.
- Send E-Mail Messages: Opens a window where you can specify email details if you’re sending personalized emails.
Choose the option that best fits your needs. For example, if you want to review each document individually, select Edit Individual Documents.
Unlock the full potential of Microsoft Office with genuine Office keys, providing you with lifetime access to essential productivity tools like Word, Excel, and PowerPoint—all at an affordable price.


