Create Interactive Checklists in Word Easily
Microsoft Word isn’t just for writing reports and documents—it’s also a great tool for creating interactive checklists in Word. Whether you need a to-do list, task tracker, project checklist, or shopping list, Word allows you to make fillable, interactive checkboxes that you can check off as tasks are completed.
Why Use Interactive Checklists in Word?
Using Word to create checklists offers several advantages:
✅ Customizable Layouts – You can format checklists however you like.
✅ Interactive Checkboxes – Click to check off completed tasks.
✅ Printable Versions – Easily print checklists for offline use.
✅ No Extra Software Needed – Works within Word without add-ons.
Method 1: Create a Simple Printable Checklist
If you just need a basic checklist for printing, follow these steps:
Step 1: Open a New Word Document
- Open Microsoft Word and create a new document.
Step 2: Insert a Bulleted List
- Go to the Home tab.
- Click the bullets dropdown (🔽 next to the bullets button).
- Select Define New Bullet.

Step 3: Add a Checkbox Symbol
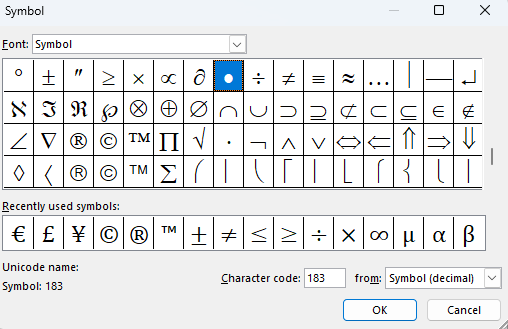
- Click Symbol → More Symbols.
- Choose Wingdings font.
- Scroll down and select a checkbox symbol (□).
- Click OK to insert it into your document.

🔹 Pro Tip: You can copy and paste the checkbox (□) before each item in your list.
Method 2: Create an Interactive Checklist with Clickable Checkboxes
If you want an interactive checklist where you can click to mark tasks as complete, you’ll need to use Word’s Developer tools.
Step 1: Enable the Developer Tab
The Developer tab isn’t visible by default, so you need to enable it:
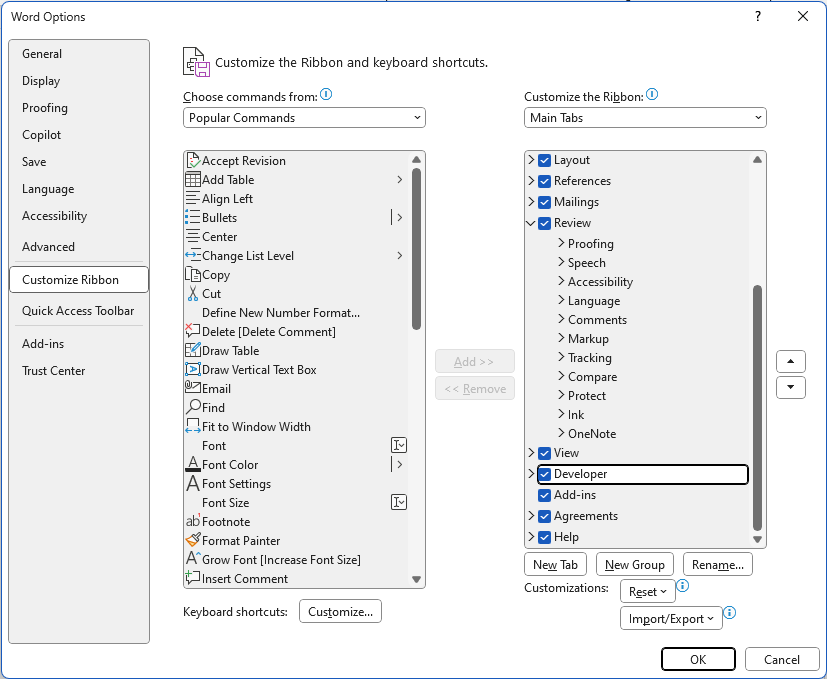
- Click File → Options → Customize Ribbon.
- In the right panel, check the box for Developer.
- Click OK—you’ll now see the Developer tab in the Word ribbon.

Step 2: Insert Checkboxes in Your List
- Type your checklist items in a list format.
- Place the cursor where you want a checkbox.
- Go to the Developer tab.
- Click Check Box Content Control (☑️).
- A clickable checkbox (☐) will appear—copy and paste it for other items.

Step 3: Customize the Checkbox Appearance (Optional)
- Click on a checkbox and select Properties.
- Change the default symbol to Wingdings to use a more stylized checkbox.
🔹 Pro Tip: Now, when you click the checkboxes in Word, they will toggle between checked (☑️) and unchecked (☐)!
Method 3: Use Tables for a Structured Checklist
For a more organized checklist, use a table.
Step 1: Insert a Table
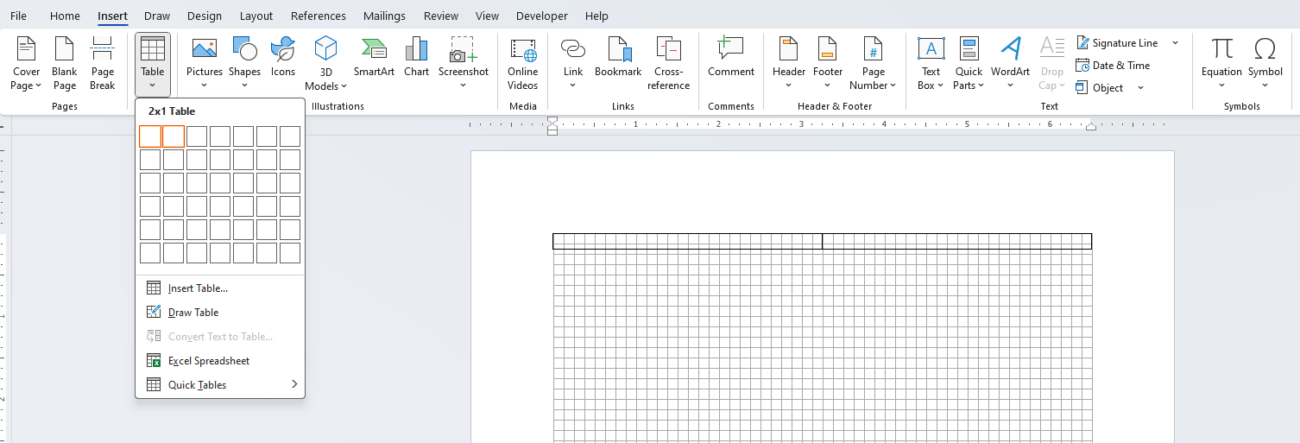
- Go to Insert → Table.
- Select 2 columns (one for checkboxes, one for tasks).
- Enter your checklist items in the second column.

Step 2: Add Interactive Checkboxes
- Follow Method 2 to add interactive checkboxes in the first column.
🔹 Pro Tip: Resize the first column to make the checkboxes align neatly!
Get the cheapest Office keys with instant delivery and full activation—save big on genuine Microsoft Office today!

