How do I Design and Customize Business Cards and Brochures in Microsoft Publisher?
Designing and customizing business cards and brochures in Microsoft Publisher allows you to create professional and visually appealing marketing materials that represent your brand effectively. Microsoft Publisher offers a wide range of tools and features specifically tailored for designing and customizing business cards and brochures, enabling you to create personalized and eye-catching designs. In this guide, we will explore how to design and customize business cards and brochures in Microsoft Publisher, equipping you with the skills to create impactful marketing materials that leave a lasting impression.
First impressions matter, especially when it comes to marketing materials. A well-designed business card or brochure can catch the attention of potential clients or customers, conveying your brand identity and message with clarity. Microsoft Publisher provides a user-friendly interface and a plethora of customization options, empowering you to create unique and professional designs that align with your business objectives.
Step 1: Launch Microsoft Publisher
- Open Microsoft Publisher on your computer.
- Either create a new document or open an existing one.
Step 2: Select the Template
- Click on the File tab in the Microsoft Publisher menu.
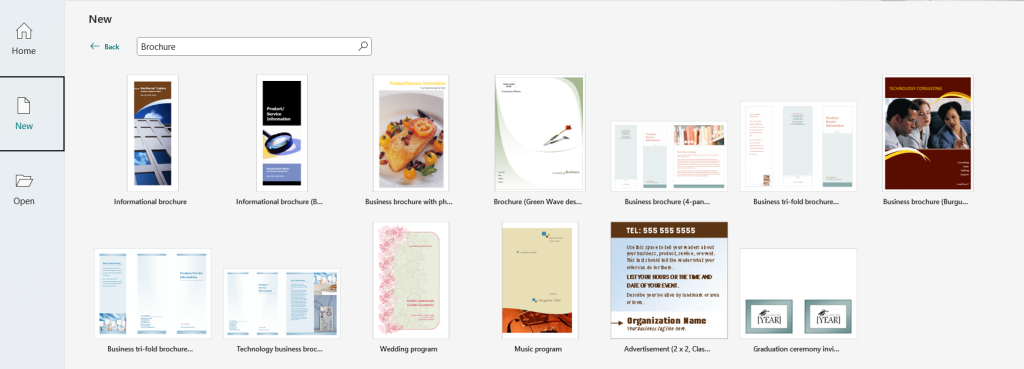
- Choose New and select a template that suits your needs.
- For business cards, search for “Business Card” templates.
- For brochures, search for “Brochure” templates.

Step 3: Customize the Design
- Modify the text and replace placeholder content with your own.
- To edit text, click on it and start typing.
- Customize fonts, colors, and sizes to match your branding.
- Select the text and use the formatting options in the toolbar.
Step 4: Add Images and Graphics
- Click on the Insert tab in the Microsoft Publisher menu.
- Select Pictures to add images from your computer.
- Browse for the desired image file and click Insert.
- To insert shapes, charts, or other graphics, use the “Shapes” or “Charts” options in the Insert tab.
Step 5: Arrange and Align Elements
- Click and drag elements to reposition them on the page.
- Use the Arrange options in the toolbar to align objects.
- Choose “Align Left,” “Align Right,” or “Align Center” to position elements precisely.
Step 6: Customize the Layout and Format
- To change the layout or format of the document, click on the Page Design tab.
- Explore different options, such as changing the page orientation, margins, or adding guides to assist with alignment.
Step 7: Save and Print
- Once you’re satisfied with the design, go to the File tab.
- Click on Save to save your document.
- To print, choose Print from the File tab and configure the print settings as per your requirements.
By following these steps, you can design stunning business cards and brochures using Microsoft Publisher. Take advantage of the templates, customization options, and intuitive interface to create visually appealing marketing materials for your business.
Discover the lowest prices for Microsoft Office on our website as we offer high-quality packages at unbeatable rates.

