How do I Track Changes and View Revisions in Microsoft Word?
When collaborating on a document or revising your own work, it’s important to keep track of edits and changes. Microsoft Word offers a powerful feature called Track Changes, which allows you to see who made changes, view revisions, and accept or reject edits. This tool is particularly useful for team projects, academic writing, or when receiving feedback from clients or colleagues.
In this step-by-step guide, you’ll learn how to turn on Track Changes, view revisions, and manage the edits in your Word document.
Step 1: Turn on Track Changes
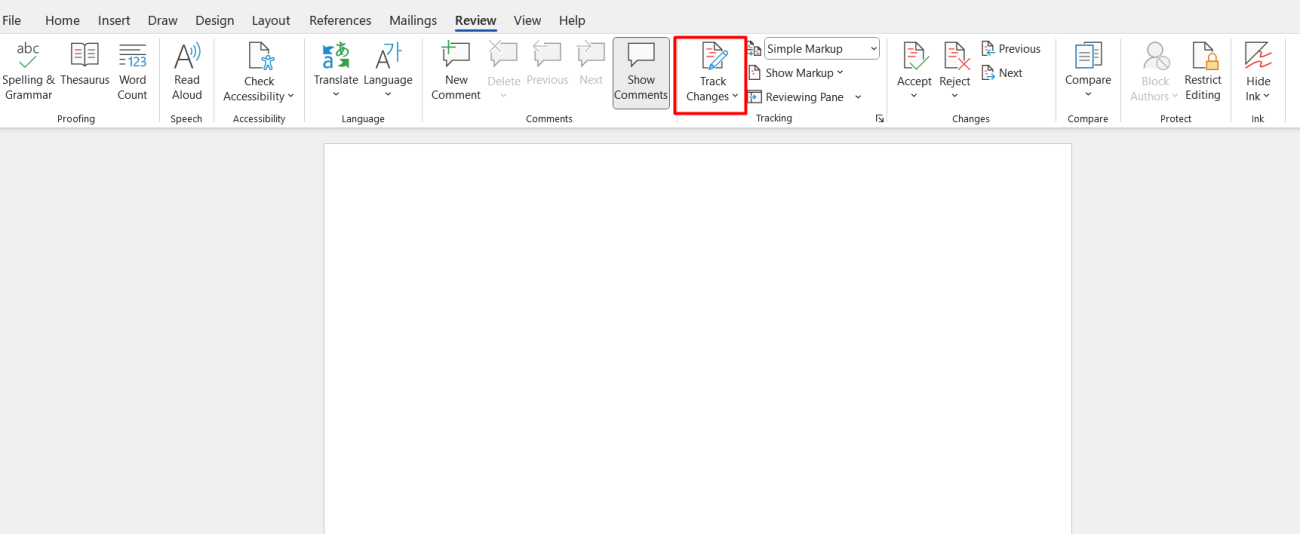
Open your Word document and go to the Review tab. In the “Tracking” group, click on Track Changes to enable it. Once enabled, Word will automatically track any edits made to the document, highlighting additions, deletions, and formatting changes.

Step 2: View and Navigate Changes
To see the changes, stay in the Review tab and click Show Markup. You can choose to view insertions, deletions, formatting changes, and comments. Use the Previous and Next buttons in the “Changes” group to move through the tracked changes in the document.
Step 3: Accept or Reject Changes
To accept or reject individual changes, click on the Accept or Reject buttons in the “Changes” group. You can handle changes one by one or select Accept All Changes or Reject All Changes from the dropdown for quicker processing.
Step 4: Turn off Track Changes
Once you’re done reviewing, click Track Changes again to turn it off, preventing further changes from being tracked.
Get Office Keys at the lowest prices available on our website and unlock all the tools you need for productivity and success!

