How can I Merge Shapes in PowerPoint?
Merging shapes in PowerPoint provides users with the flexibility to create custom shapes by combining multiple existing shapes. This feature enables users to create unique and visually appealing graphics, logos, diagrams, and more. Whether you want to create a custom icon, design an infographic, or simply enhance your slide aesthetics, merging shapes in PowerPoint can be a powerful tool. In this guide, we will explore the step-by-step process to merge shapes in PowerPoint, allowing users to unleash their creativity and design captivating and customized visuals.
The purpose of merging shapes in PowerPoint is to give users the ability to create more complex and customized shapes that cannot be achieved with individual shapes alone. By merging shapes, users can create more intricate designs, seamless compositions, and unique visuals that perfectly fit their presentation needs. PowerPoint offers a range of shape manipulation options, including combining shapes to create new forms, overlaying shapes to cut out specific areas, and subtracting shapes to remove sections.
Step 1: Open PowerPoint and select the desired slide
- Launch PowerPoint and open the presentation where you want to merge shapes.
- Navigate to the slide where the shapes are located.
Step 2: Insert or draw the shapes
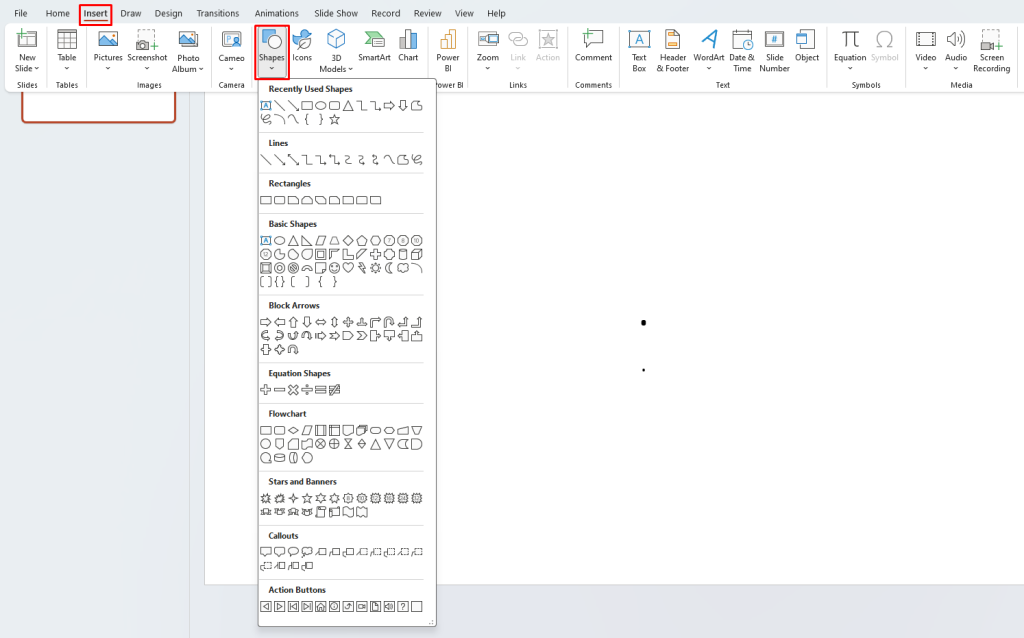
- Click on the “Insert” tab in the PowerPoint toolbar.
- Choose the shape you want to insert or draw using the “Shapes” dropdown menu.

Step 3: Arrange the shapes
- Click on the first shape you want to merge.
- Drag the shape to position it near the second shape.
Step 4: Select the shapes to be merged
- Hold the “Shift” key on your keyboard.
- Click on the first shape, followed by the second shape.
Step 5: Access the “Merge Shapes” tool
- Go to the “Format” tab in the PowerPoint toolbar.
- Locate the “Merge Shapes” tool in the Insert Shapes group.
Step 6: Choose the desired merging option
- Click on the “Merge Shapes” dropdown menu.
- Select the merging option that suits your needs, such as “Union,” “Combine,” “Intersect,” or “Subtract.”
Step 7: Preview and adjust the merged shape
- Observe the merged shape on your slide.
- Right-click on the merged shape and choose “Edit Points” to fine-tune the shape, if necessary.
Step 8: Save your merged shape
- Save your PowerPoint presentation to preserve the merged shape’s design.
- Consider grouping the merged shape to maintain its integrity during editing or movement.
This step-by-step guide has provided you with the necessary instructions to merge shapes effectively. By incorporating this technique into your slide design, you can enhance visual appeal, convey complex concepts, or simply add a touch of creativity to captivate your audience.
If you don’t have a PowerPoint license, our website offers a variety of options as part of the Office Suite. Whether you need cheap Office 2016 Key, cheap Office 2019 Key, or cheap Office 2021 Key, we have the version that suits your needs and requirements.

