How can I use the Section Feature to Organize Slides in PowerPoint?
Keeping your slides organized is crucial for maintaining a clear and coherent presentation. PowerPoint’s section feature allows you to divide your slides into different sections, making it easier to navigate and manage your content. In this step-by-step guide, we will show you how to use the section feature in PowerPoint to effectively organize your slides.
Step 1: Opening the Slide Sorter View:
- Open your PowerPoint presentation or create a new one.
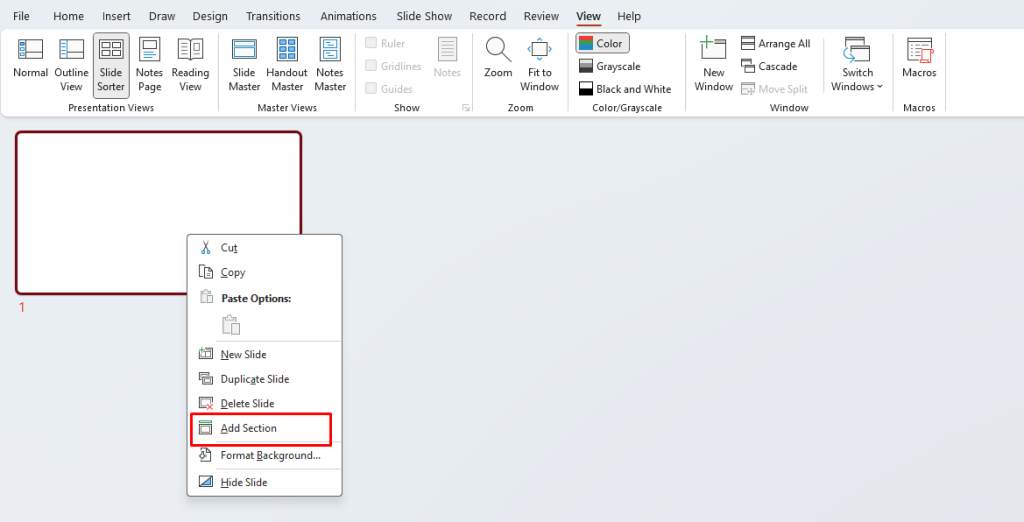
- Click on the “View” tab in the ribbon at the top of the screen.
- Select the “Slide Sorter” option to switch to the slide sorter view.

Step 2: Creating Sections:
- In the slide sorter view, you will see small thumbnails of your slides.
- To create a section, right-click on a slide where you want the section to begin.
- From the context menu, select “Add Section” and provide a name for the section.
- Repeat this process for each section you want to create in your presentation.

Step 3: Moving Slides into Sections:
- To move a slide into a section, click and drag the slide thumbnail to the desired section.
- You can also select multiple slides by holding the “Ctrl” key and clicking on the thumbnails, then drag them together into the appropriate section.
Step 4: Collapsing and Expanding Sections:
- As your presentation becomes more organized with sections, you can collapse or expand them for a better overview.
- To collapse a section, click on the small arrow next to the section name.
- This will hide the slides within the section, showing only the section name and the first slide.
- To expand a section, click on the small arrow again to reveal the slides within that section.
Step 5: Rearranging Sections:
- If you need to rearrange the sections, click and drag the section header to a new position in the slide sorter view.
- The slides within that section will move accordingly, maintaining their order within the section.
Step 6: Editing or Deleting Sections:
- To edit the name of a section, right-click on the section header and select “Rename Section.“
- Type the new name for the section and press “Enter” to save the changes.
- If you want to remove a section, right-click on the section header and select “Remove Section.“
- The slides within the section will be redistributed in the slide sorter view.
Step 7: Viewing Slide Sections:
- To navigate through the sections during your presentation, click on the “Slide Show” tab in the ribbon.
- Select “Section” from the “Navigation” group, and a drop-down menu will appear.
- From the drop-down menu, choose the section you want to start your presentation from.
By following the step-by-step instructions provided in this guide, you can create sections, move slides into sections, collapse or expand sections, rearrange sections, and edit/delete sections as needed.
Shop now on our website for the best prices on Microsoft Office and boost your productivity today!

