How do you Create a Table of Contents with Hyperlinks in Word?
Creating a table of contents (TOC) with hyperlinks in Microsoft Word can make your document more organized and easy to navigate. Follow this step-by-step guide to learn how to create a hyperlinked TOC in Word.
Step 1: Open Your Word Document
- Launch Microsoft Word:
- Open Microsoft Word on your computer.
- Open an Existing Document or Create a New One:
- To open an existing document, go to
File>Open, and select your file. - To create a new document, click on
Blank Document.
- To open an existing document, go to
Step 2: Apply Heading Styles to Your Document
- Highlight a Section Title:
- Click and drag to highlight the title or section you want to include in the TOC.
- Apply a Heading Style:
- Go to the
Hometab on the Ribbon. - Click on one of the heading styles (e.g.,
Heading 1,Heading 2, etc.) from theStylesgroup. - Repeat this process for every title or section you want to include in the TOC, using
Heading 1for main titles,Heading 2for sub-sections, and so on.
- Go to the
Step 3: Insert the Table of Contents
- Navigate to the Location for the TOC:
- Place your cursor at the position in your document where you want to insert the table of contents. Typically, this is at the beginning of the document.
- Insert the TOC:
- Go to the
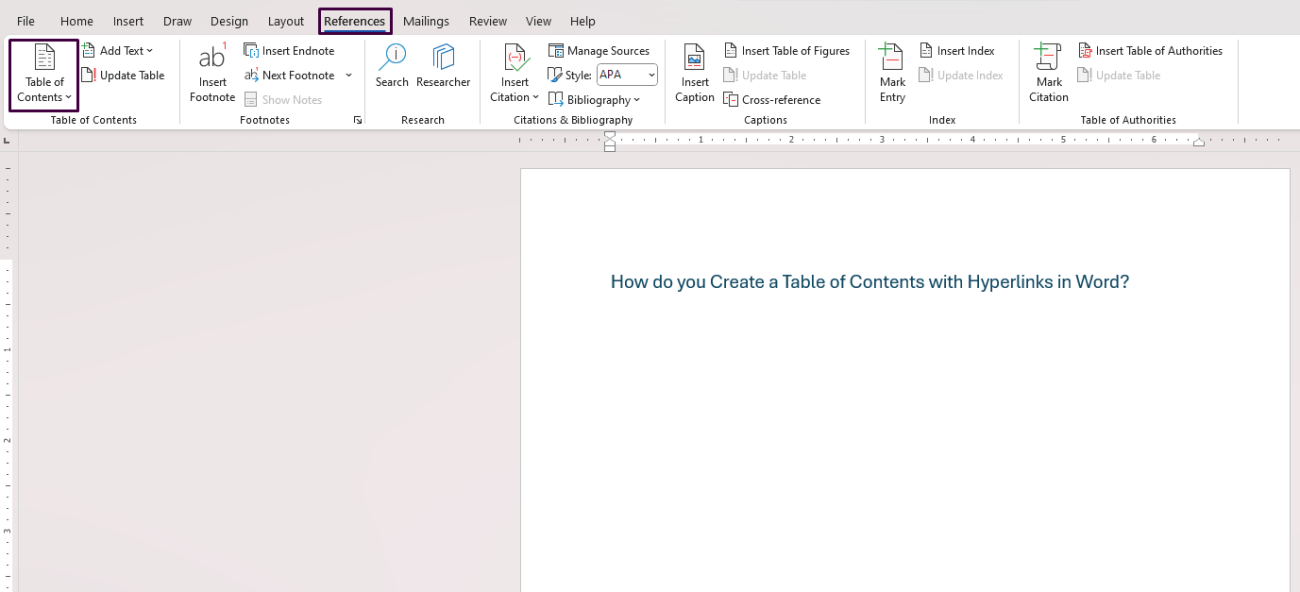
Referencestab on the Ribbon. - Click on the
Table of Contentsdropdown in theTable of Contentsgroup. - Choose a built-in automatic table from the list, such as “Automatic Table 1” or “Automatic Table 2.”
- Go to the

Step 4: Update Hyperlink Settings
- Ensure Hyperlinks are Enabled:
- By default, Word includes hyperlinks in the TOC. Make sure this feature is enabled.
- Right-click on the TOC and choose
Update Fieldto refresh the links if necessary whenever you make structural changes to your document.
Step 5: Customize the Table of Contents
- Open TOC Customization Options:
- Go to the
Referencestab and select theTable of Contentsdropdown again. - Click on
Custom Table of Contents….
- Go to the
- Adjust Settings:
- In the
Table of Contentsdialog box, you can modify various settings such as the number of levels to show, and whether to include page numbers. - Ensure that the
Show Page Numbersbox is checked if you want page numbers, and that theUse Hyperlinks Instead of Page Numbersbox is also checked.
- In the
- Apply Changes:
- Click
OKto apply your settings.
- Click

Step 6: Finalize and Save Your Document
- Review the TOC:
- Scroll through your document to ensure that the TOC appears correctly and that all hyperlinks work as expected.
- Save Your Document:
- Navigate to
File>Save As. - Choose a location, enter a file name, and click
Save.
- Navigate to
Get your Office Keys at the lowest prices available, ensuring unbeatable deals and maximum savings!

