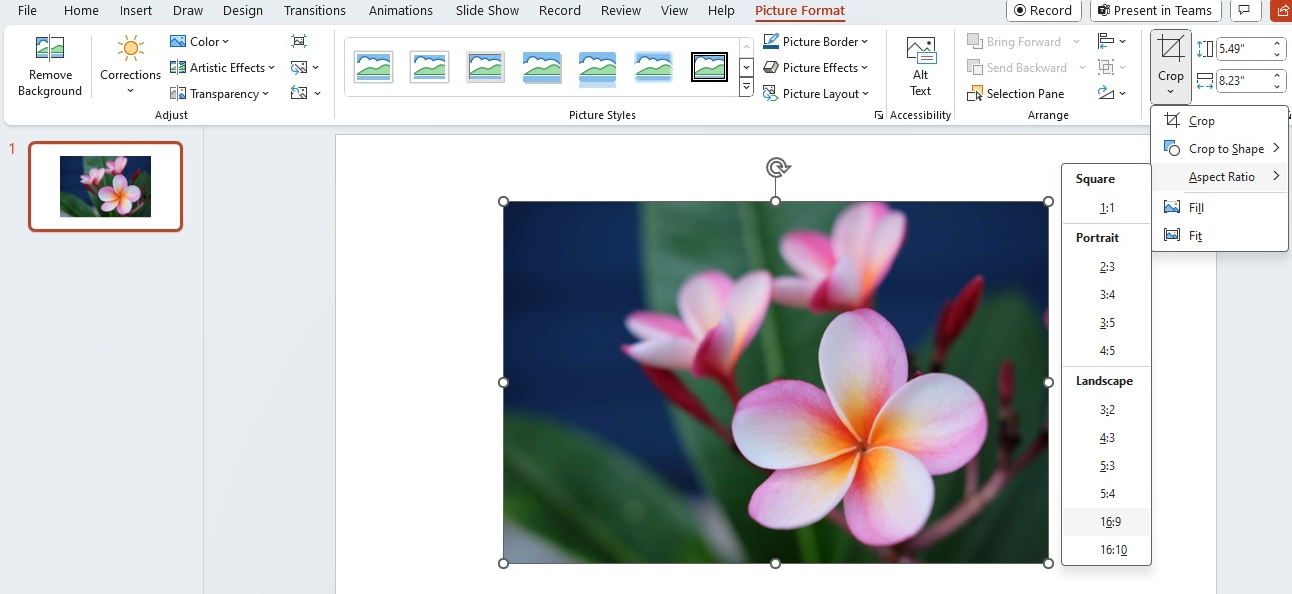
How do you Crop a Picture in Microsoft PowerPoint?
Cropping a picture in PowerPoint can help you focus on specific areas of an image and make your presentations more visually appealing. This guide provides step-by-step instructions to crop a picture in PowerPoint, complete with specific commands for each step.
Step 1: Open Your PowerPoint File
- Launch PowerPoint: Start Microsoft PowerPoint on your computer.
- Open a Presentation: Go to “File” > “Open” to locate and open an existing presentation or “File” > “New” to create a new presentation.
- Select a Slide: Click on the slide where you want to insert and crop a picture.
Step 2: Insert a Picture
- Click on “Insert”: Navigate to the top menu and click on the “Insert” tab.
- Select “Pictures”: Click the “Pictures” button in the ribbon. A dropdown menu will appear.
- Choose Picture Source: Select “This Device” to insert a picture from your computer or “Online Pictures” to insert an image from the web.
- Insert the Picture: Locate the image you want to use, click on it, and then click “Insert.”
Step 3: Select the Picture
- Click on the Picture: Simply click on the image you’ve inserted to select it. A border with small squares (handles) will appear around the picture.
Step 4: Open the Crop Tool
- Click on “Format”: With the picture selected, navigate to the “Picture Format” tab on the ribbon at the top.
- Select “Crop”: In the “Size” group, click on the “Crop” button. Small cropping handles will appear around the edges of your picture.

Step 5: Adjust the Cropping Area
- Use Cropping Handles: Click and drag the cropping handles on the corners or edges of the picture to adjust the cropping area.
- Move the Picture Inside Crop Area: To reposition the image within the cropping box, click and drag the picture itself.
- Fine-Tune the Crop: Continue adjusting the cropping handles until the desired portion of the image is highlighted.
Step 6: Apply the Crop
- Click Outside the Picture: To apply the crop, simply click anywhere outside of the picture. The parts of the image outside the cropping box will be removed.
- Check the Result: Ensure the cropped image looks the way you want on the slide.
Step 7: Save Your Presentation
- Save Your Work: Click “File” > “Save” or use the shortcut
Ctrl + Sto save your presentation with the cropped image. - Save As New Version: To keep the original presentation unaltered, use “File” > “Save As” to create a new version with your edited images.
Get genuine Office Keys at the lowest prices exclusively on our website – unbeatable deals for all your software needs!

