Adding hyperlinks to shapes in PowerPoint can make your presentations more interactive and dynamic. Whether you want to link to a website, another slide, or a document, this guide will walk you through the process step-by-step, giving you specific commands for each step.
Step 1: Open Your PowerPoint File
- Launch PowerPoint: Open Microsoft PowerPoint on your computer.
- Open a Presentation: Go to “File” > “Open” to locate and open an existing presentation or “File” > “New” to create a new one.
- Select a Slide: Click on the slide where you want to add a shape with a hyperlink.
Step 2: Insert a Shape
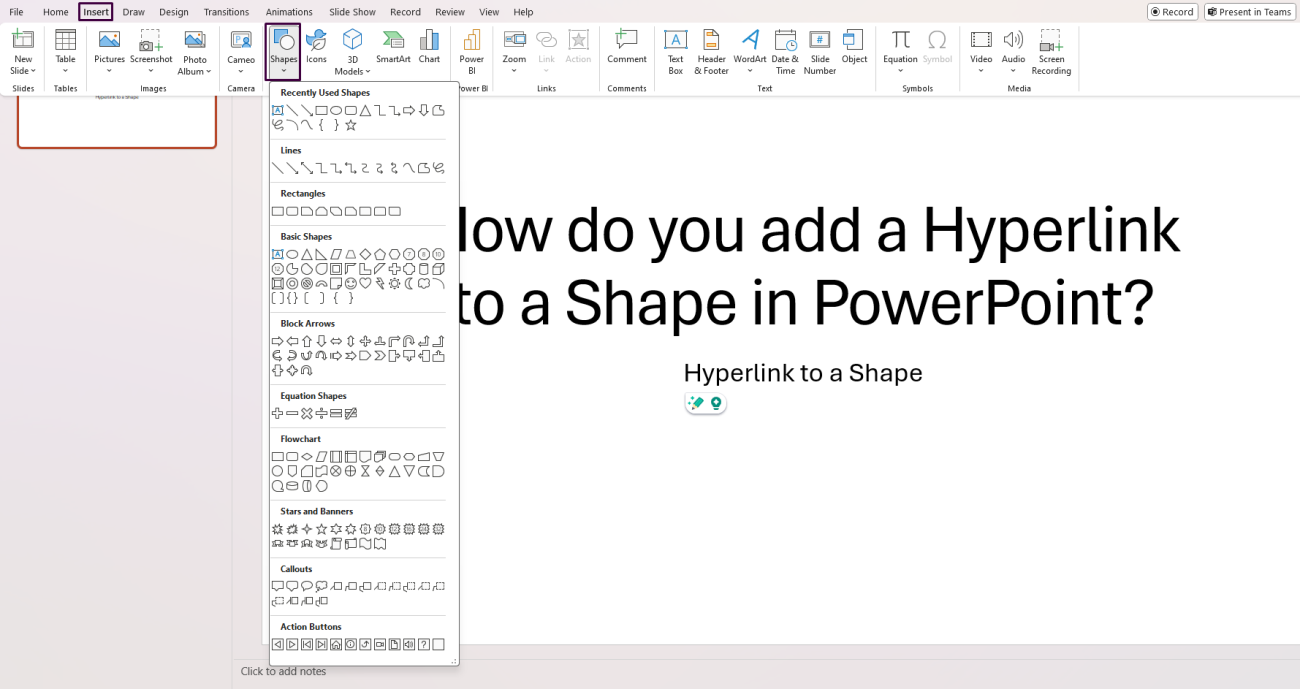
- Click on “Insert”: Navigate to the top menu and click on the “Insert” tab.
- Choose “Shapes”: In the ribbon, click on the “Shapes” button. A dropdown menu with various shape options will appear.
- Select a Shape: Click on the desired shape (e.g., rectangle, circle, arrow) from the dropdown menu.
- Draw the Shape: Click and drag on your slide to draw the shape.

Step 3: Select the Shape
- Click on the Shape: Simply click on the shape you’ve inserted to select it. The shape will now be surrounded by a border with small squares (handles).
Step 4: Open the Hyperlink Dialog
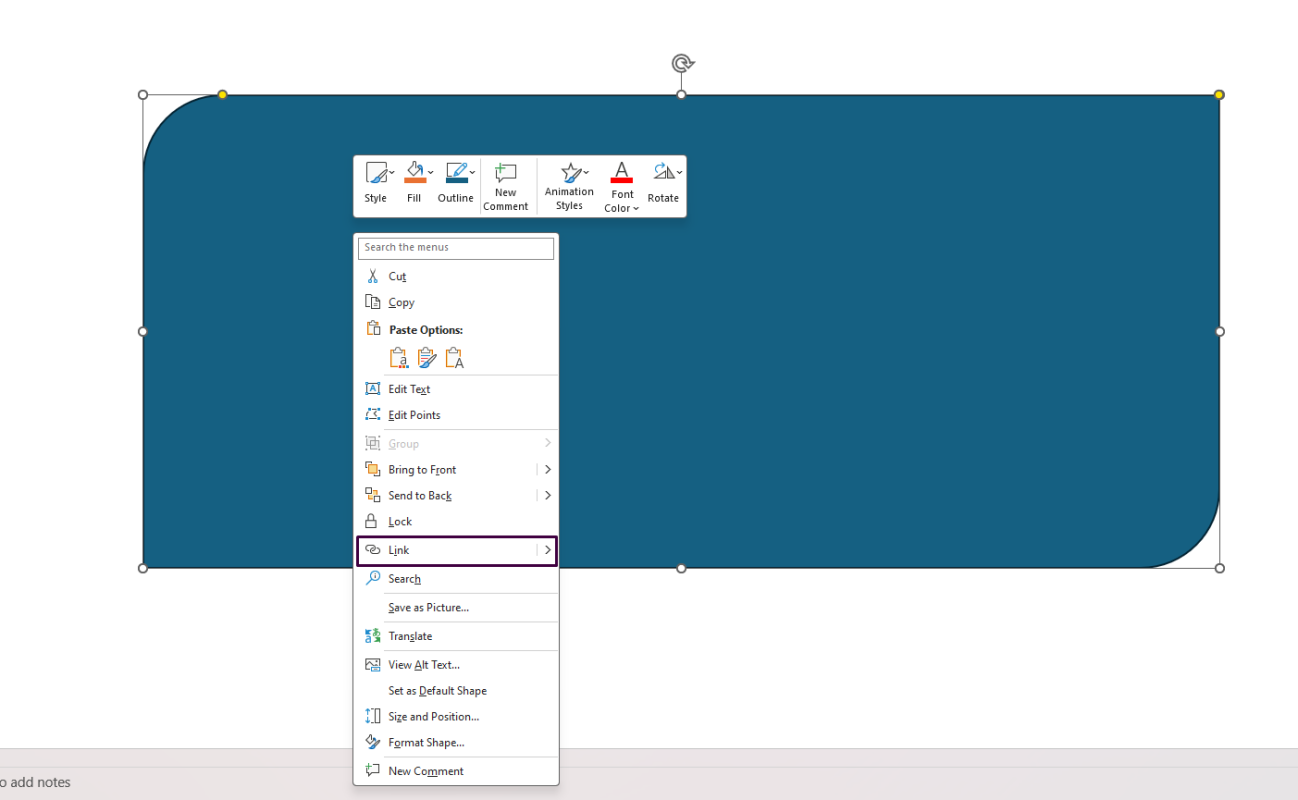
- Right-Click on the Shape: Right-click on the selected shape to open a context menu.
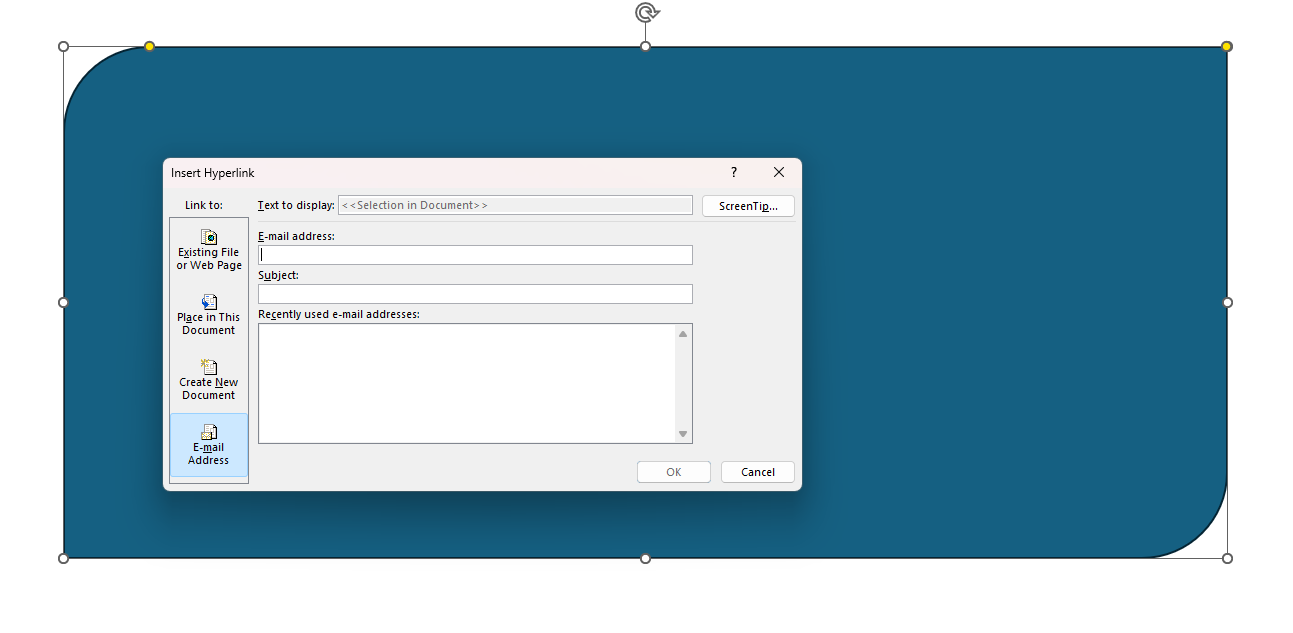
- Select “Link”: In the context menu, click on the “Link” option (it may be listed as “Hyperlink” depending on your version of PowerPoint). This will open the “Insert Hyperlink” dialog box.

Step 5: Add a Hyperlink
- Link to a Website:
- Address Field: In the “Address” field at the bottom of the dialog box, type or paste the URL of the website you want to link to.
- Link to Another Slide:
- Place in This Document: On the left side of the dialog box, click on “Place in This Document.”
- Select a Slide: A list of slides will appear. Click on the slide you want to hyperlink to.
- Link to an Email Address:
- E-mail Address: On the left side, click on “E-mail Address.”
- Enter Details: In the “E-mail address” field, input the email address, and specify a subject if desired.
- Link to an Existing File or Web Page:
- Existing File or Web Page: If you want to link to another document, click on “Existing File or Web Page.”
- Browse: Navigate to and select the file or document you want to link to.

Step 6: Confirm the Hyperlink
- Click “OK”: Once you’ve entered the hyperlink details, click the “OK” button in the “Insert Hyperlink” dialog box. Your shape will now be hyperlinked.
Step 7: Test the Hyperlink
- Start the Slide Show: Go to the “Slide Show” tab and click on “From Current Slide” to start the presentation from the current slide.
- Click the Shape: Click on the hyperlinked shape to test whether the link works as expected.
- Exit the Slide Show: Press
Escto exit the slide show mode.
Step 8: Save Your Presentation
- Save Your Work: Click “File” > “Save” or use the shortcut
Ctrl + Sto save your presentation with the new hyperlinked shape. - Save As New Version: If you wish to keep the original presentation unaltered, use “File” > “Save As” to create a new version with your edits.
Get genuine Office Keys at the lowest prices exclusively on our website – unbeatable deals for all your software needs!


