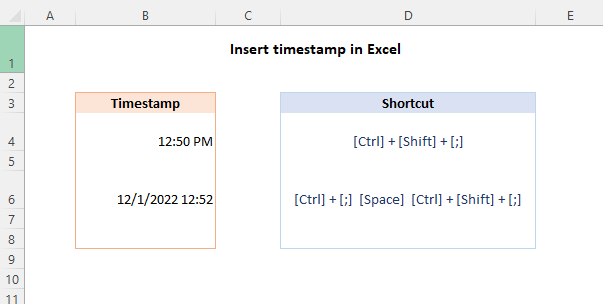
How do you Insert Timestamps in Excel?
Inserting timestamps in Excel can be incredibly useful for tracking data entries, updating logs, or simply organizing your workflow. Whether you’re managing a project, recording an event, or maintaining a schedule, knowing how to auto-insert timestamps can save you a lot of time and effort. In this guide, we’ll walk you through the steps to insert timestamps in Excel using various methods – manually, with keyboard shortcuts, and using formulas.
Method 1: Inserting a Static Timestamp Manually
A static timestamp does not change once it’s entered. Here’s how to insert one:
Step-by-Step Instructions
- Open your Excel workbook and select the cell where you want to insert the timestamp.
- Press
Ctrl + ;(semicolon) on your keyboard to insert the current date. - Press
Ctrl + Shift + ;(semicolon) to add the current time to the same cell.These commands will produce a static timestamp such as 10/11/2023 14:35. - Combine both static date and time in one cell:
Press `Ctrl + ;` followed by `Space`, then `Ctrl + Shift + ;`.

Method 2: Inserting a Dynamic Timestamp Using Formulas
Unlike static timestamps, dynamic timestamps will update automatically whenever the workbook is recalculated. You can use formulas to achieve this.
Step-by-Step Instructions
- Open your Excel workbook and select the cell where you want to insert the timestamp.
- Insert the current date using the
TODAYfunction:=TODAY() - To insert the current date and time, use the
NOWfunction:=NOW() - To insert a specific format for the timestamp, you can combine functions using
TEXT:=TEXT(NOW(), "mm/dd/yyyy hh:mm:ss")Note: Remember that these functions update each time the worksheet is recalculated or opened.
Method 3: Using VBA (Visual Basic for Applications) for Automatic Timestamps
If you need timestamps to be inserted automatically when data is entered into a cell, VBA provides a powerful way to automate this.
Step-by-Step Instructions
- Press
Alt + F11to open the VBA editor. - Insert a new module by selecting
Insert > Module. - Copy and paste the following code into the module:
Private Sub Worksheet_Change(ByVal Target As Range) Dim TimestampRange As Range Dim TimestampColumn As Integer TimestampColumn = 2 ' This denotes column B; change it as required. Set TimestampRange = Intersect(Target, Me.Columns(1)) ' This denotes column A; change it as required. If Not TimestampRange Is Nothing Then If Target.Value <> "" Then Cells(Target.Row, TimestampColumn).Value = Now Else Cells(Target.Row, TimestampColumn).ClearContents End If End IfEnd Sub - Close the VBA editor to return to your Excel workbook.
- Whenever you now enter data into column A, the corresponding cell in column B will be automatically populated with the current timestamp.
Get the cheapest Office Keys here and unlock all the premium features for a fraction of the cost!

