Time-Saving Tips for Managing Word Styles and Templates
Microsoft Word is a powerful tool, but many users don’t fully utilize its features to save time. One of the most effective ways to streamline your document creation process is by mastering Word styles and templates. These tools allow for consistency, speed, and ease when creating professional-looking documents. Here are some time-saving tips for managing Word styles and templates:
1. Create and Use Custom Styles
Word’s built-in styles (Heading 1, Heading 2, Normal, etc.) are handy, but customizing styles to fit your specific needs can save you a lot of time. Instead of manually formatting each heading or paragraph, create your own styles. For example, if you often use specific font sizes, colors, or line spacing, you can set these preferences in a custom style.
How to create custom styles:
- Select the text with the formatting you want.
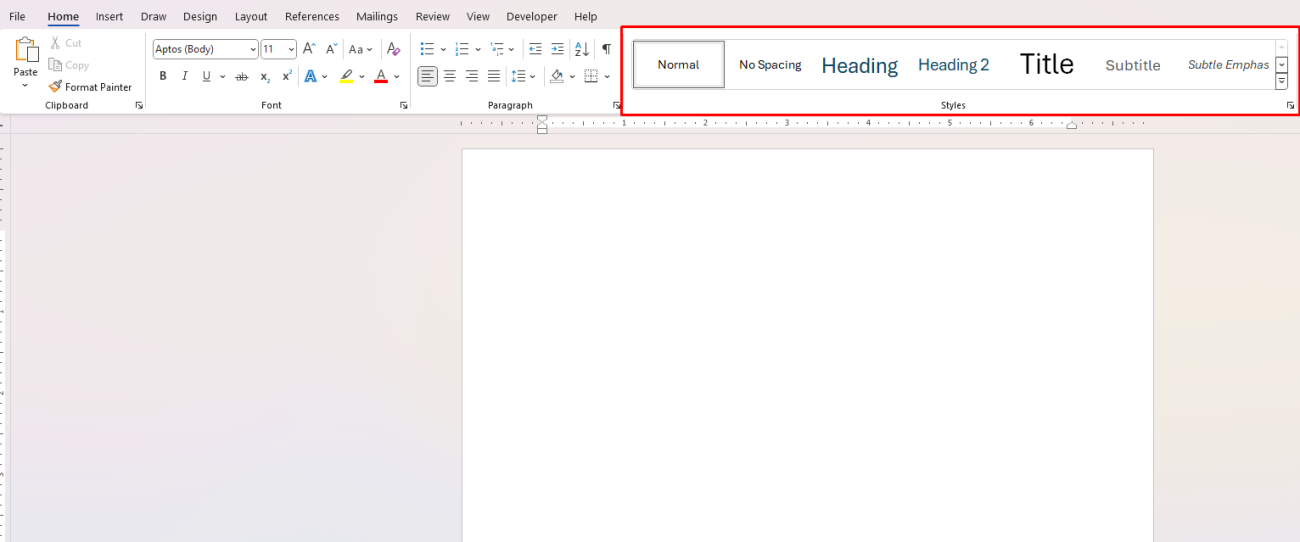
- Go to the Home tab and click Styles.
- Click the small arrow in the bottom right corner of the Styles group to open the Styles pane.
- Click New Style, name it, and choose the desired settings.
With your custom styles in place, you can apply them instantly, ensuring consistent formatting across your entire document.

2. Use Templates for Common Documents
If you create similar types of documents often—whether reports, proposals, or newsletters—save time by creating a template. Templates allow you to store common elements such as logos, headers, footers, and table formats, so you don’t need to start from scratch every time.
How to create a template:
- Design your document with all the elements you frequently use.
- Go to File > Save As.
- Choose Word Template (.dotx) from the dropdown menu.
- Save it in a location you can easily access.
Now, whenever you need to create a new document, simply open the template, and all your pre-designed elements will be ready to go.

3. Leverage Style Sets for Consistency Across Documents
If you work with multiple documents that need to have the same look and feel, using Word’s Style Sets can save time. A Style Set is a collection of predefined styles that you can apply to a document for uniform formatting.
How to apply a Style Set:
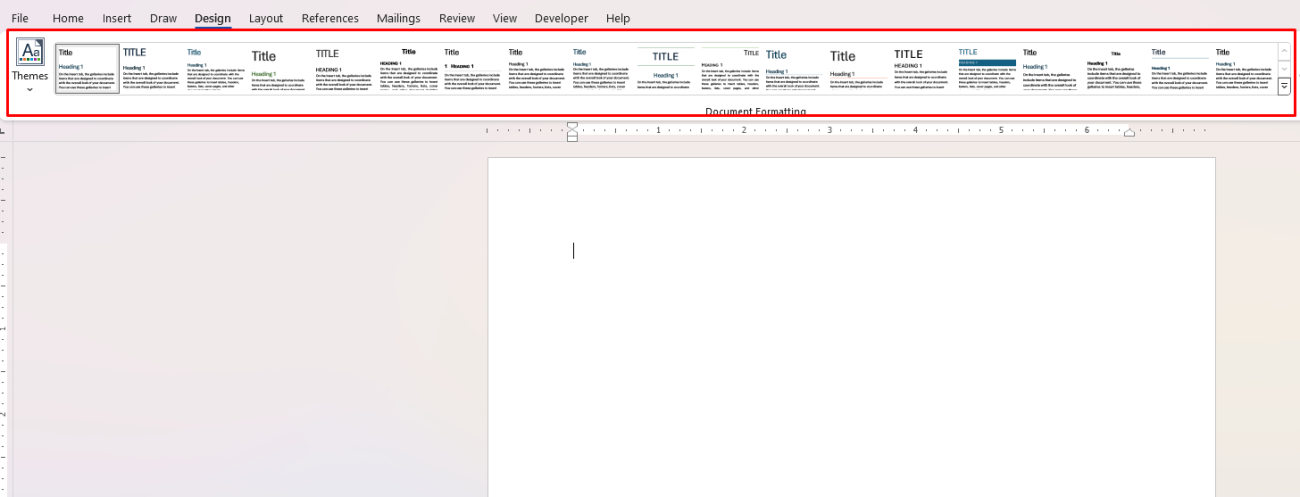
- Go to the Design tab.
- In the Document Formatting group, you’ll find several style sets.
- Choose the one that best fits your needs and apply it to your document.
This ensures that every heading, paragraph, and list item follows the same style, making your documents look cohesive and polished.

4. Modify Templates for Different Projects
Instead of creating a new template for each project from scratch, consider modifying an existing template. This saves you time by retaining the elements you need while allowing for specific tweaks, such as changing the color scheme, logo placement, or layout style.
How to modify a template:
- Open the template you want to modify.
- Make any necessary changes to the layout, fonts, colors, or other elements.
- Save the updated template with a new name, so it’s ready for your next project.
This approach saves you from reformatting your documents each time you start a new project.
5. Master Keyboard Shortcuts for Styles
Applying styles can be done more quickly with keyboard shortcuts. Instead of manually selecting styles from the ribbon, use the following shortcuts to switch between styles:
- Ctrl + Alt + 1: Apply Heading 1
- Ctrl + Alt + 2: Apply Heading 2
- Ctrl + Shift + N: Apply Normal style
By learning these shortcuts, you can quickly switch between styles without taking your hands off the keyboard, boosting your productivity.
6. Utilize the Quick Style Gallery
The Quick Style Gallery provides fast access to your most used styles, allowing you to apply formatting in one click. You can customize this gallery to display the styles you use most often.
How to add styles to the Quick Style Gallery:
- Click the small arrow in the Styles group to open the Styles pane.
- Right-click on the style you want to add, then click Add to Quick Style Gallery.
This feature eliminates the need to navigate through menus to find the styles you need, saving you time and effort.
7. Use Content Controls for Consistency in Forms
If you frequently create forms or documents that require users to fill in information, using Content Controls can save time. These allow you to pre-set areas where users can enter text, check boxes, or select options without affecting the document’s overall layout.
How to use Content Controls:
- Go to the Developer tab (if it’s not visible, you can enable it in the Word options).
- In the Controls group, choose the content control type you need (e.g., text box, check box).
- Add these controls to the document, and users can fill them out without disrupting the formatting.

8. Set Up Default Templates for New Documents
If you always want new documents to open with your preferred template, set a default template. This eliminates the need to manually select your template every time you start a new document.
How to set a default template:
- Save your template in the Templates folder (usually found in the File Explorer under Documents > Custom Office Templates).
- When you create a new document, Word will automatically use this template, speeding up your workflow.
Get cheap Office Keys at unbeatable prices—quality and affordability in one simple solution!

