Experiencing internet connectivity problems on Windows 11 can be frustrating, especially in a world where staying connected is essential. Fortunately, Windows 11 offers built-in tools and troubleshooting steps to quickly identify and resolve these issues. Here’s a comprehensive guide to help you get back online.
1. Check Your Network Connection
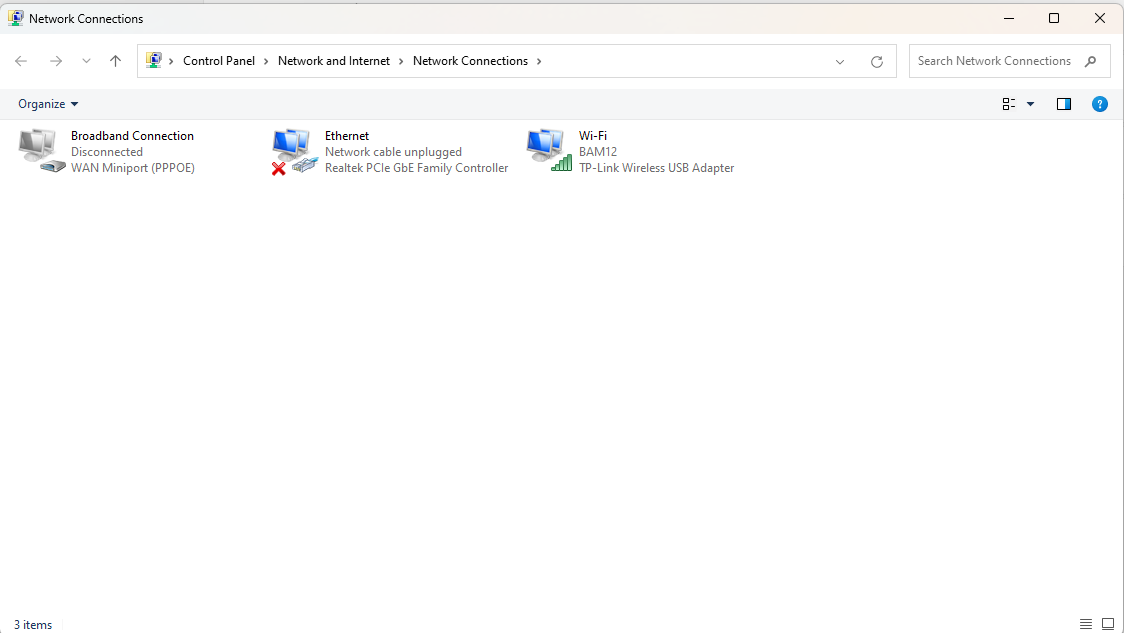
Start by verifying your network status:
- Wi-Fi Issues: Ensure your device is connected to the correct network and that the Wi-Fi toggle is enabled.
- Wired Connections: If you’re using an Ethernet cable, make sure it’s securely plugged into both your computer and the router.
- Test your connection by opening a webpage or running a speed test to confirm the problem.

2. Restart Your Router and Device
Sometimes, a simple restart can solve connectivity issues:
- Power off your router or modem for 30 seconds and then turn it back on.
- Restart your Windows 11 device by going to Start > Power > Restart.
- Reconnect to your network to see if the issue is resolved.
3. Use the Built-In Troubleshooter
Windows 11 features a powerful troubleshooter to diagnose network problems:
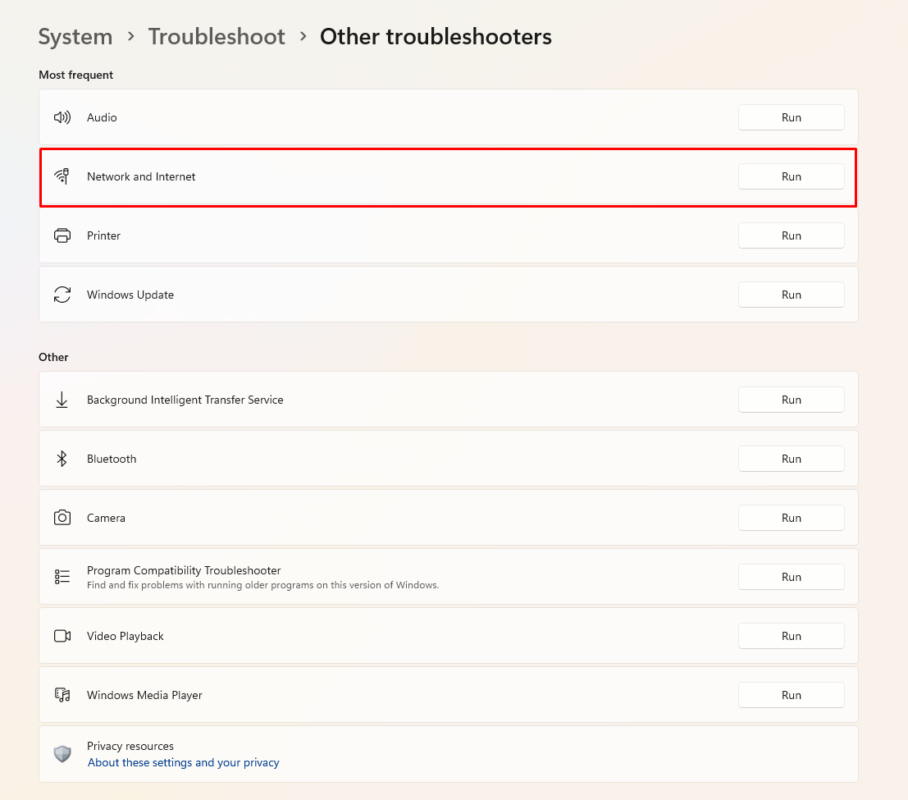
- Open Settings (Win + I).
- Navigate to System > Troubleshoot > Other Troubleshooters.
- Under the Network and Internet section, click Run next to the troubleshooter.
Follow the on-screen instructions to identify and resolve the issue automatically.

4. Update Your Network Drivers
Outdated or corrupted drivers can cause connectivity problems:
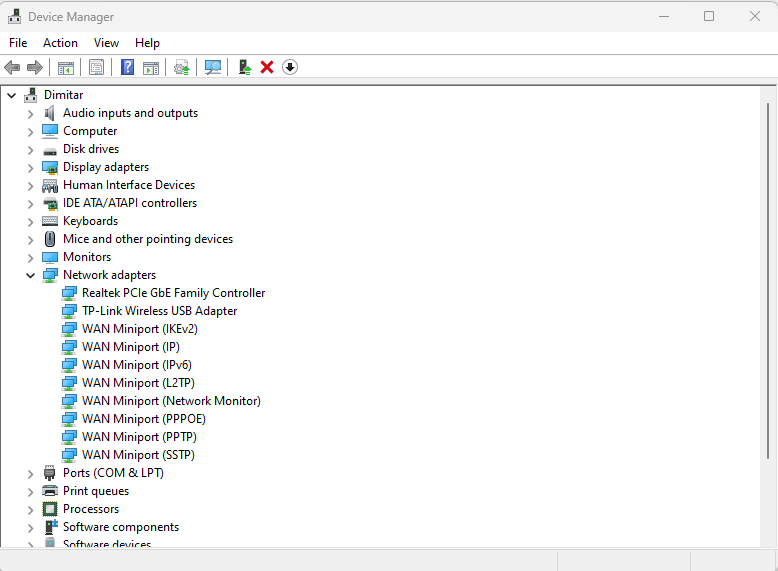
- Right-click the Start button and select Device Manager.
- Expand Network adapters and find your network device.
- Right-click the device and choose Update driver.
- Select Search automatically for drivers to update to the latest version.

5. Reset Your Network Settings
If the issue persists, resetting your network settings can help:
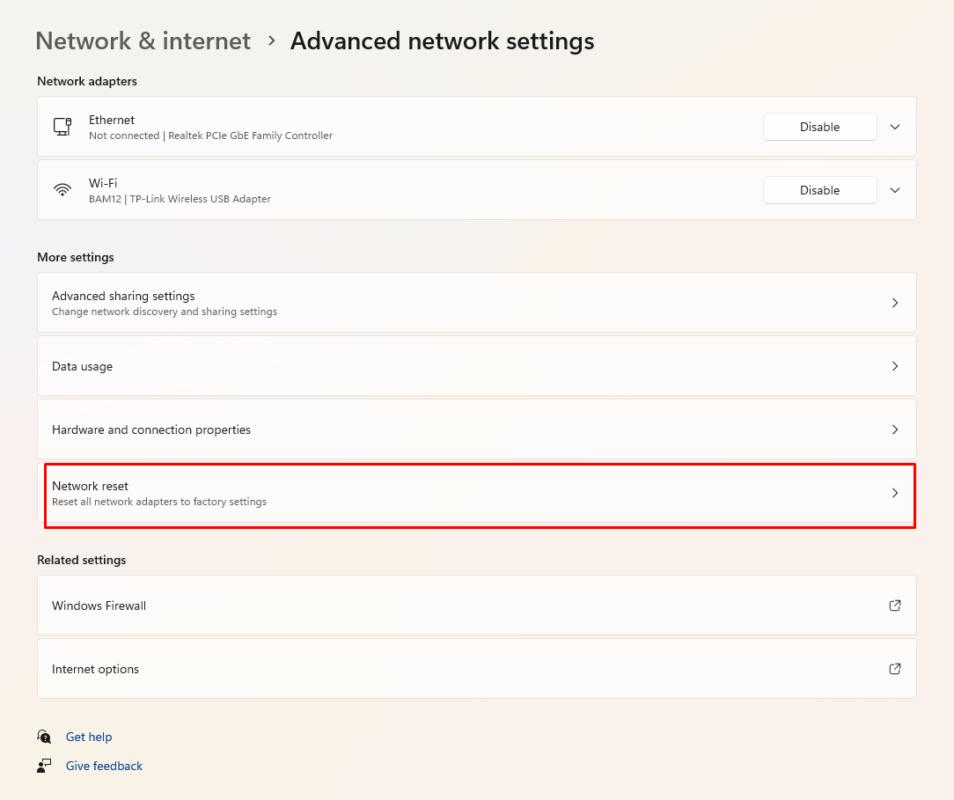
- Open Settings and go to Network & Internet.
- Scroll down and select Advanced network settings.
- Under More settings, choose Network reset.
- Click Reset now and restart your device when prompted.

6. Verify Your DNS and IP Settings
Incorrect DNS or IP configurations can disrupt connectivity:
- Open Settings and navigate to Network & Internet > Wi-Fi (or Ethernet, depending on your connection).
- Select Edit next to IP settings.
- Ensure the settings are set to Automatic (DHCP) unless specified by your ISP.
- Test switching to a public DNS, such as Google’s (8.8.8.8 and 8.8.4.4), for better connectivity.
7. Disable VPNs and Firewalls Temporarily
VPNs or overly aggressive firewalls can block internet access:
- Disable your VPN and check if the internet works without it.
- Temporarily turn off your firewall via Settings > Privacy & Security > Windows Security > Firewall & network protection. Remember to enable it afterward for security.
Get the cheapest Windows 11 keys today and enjoy seamless activation and premium features at an unbeatable price!

