In today’s fast-paced work environment, efficiency is key. Microsoft Excel offers a powerful feature known as macros that can help you automate repetitive tasks, streamline workflows, and save valuable time. Whether you’re a seasoned Excel user or a beginner, understanding how to create and use macros can significantly enhance your productivity. This guide will walk you through the basics of Excel macros, how to create them, and best practices for using them effectively.
What Are Macros?
Macros are a series of commands and instructions that you can group together to automate a specific task in Excel. By recording a macro, you can perform complex sequences of operations with just a single click, eliminating the need to perform those tasks manually each time.
Why Use Macros?
- Efficiency: Automate repetitive tasks, saving you time and effort.
- Consistency: Ensure that tasks are performed the same way each time, reducing the risk of errors.
- Complex Tasks: Execute complex sequences of commands that would be time-consuming to do manually.
Enabling the Developer Tab
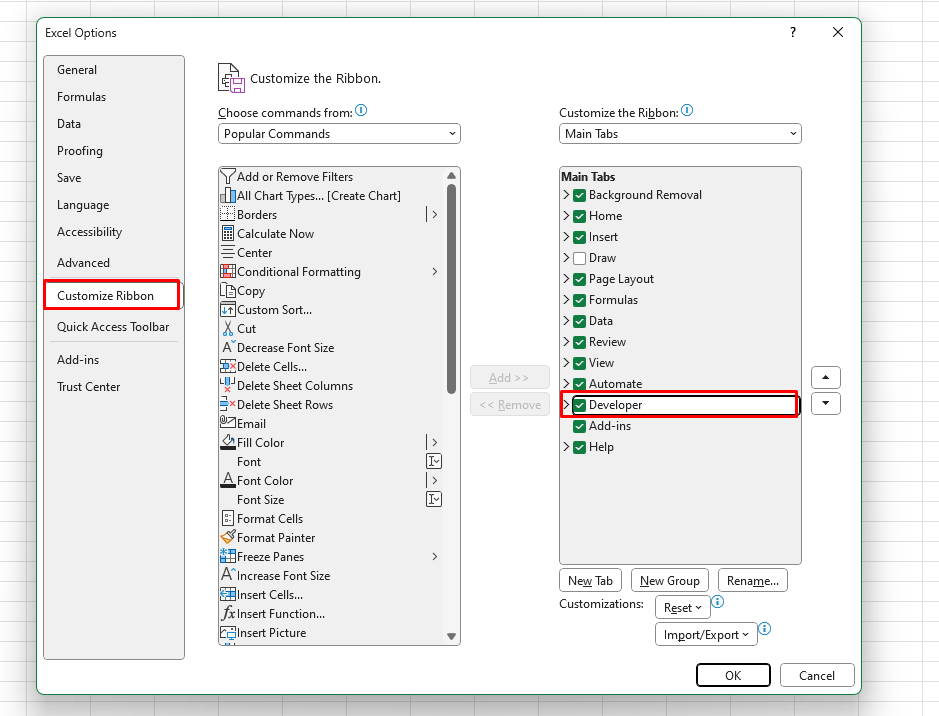
Before you can create or manage macros, you need to enable the Developer tab in Excel, as it’s not visible by default.
- Open Excel.
- Go to File > Options.
- Select Customize Ribbon.
- In the right panel, check the box for Developer.
- Click OK.

Recording a Macro
Recording a macro is one of the easiest ways to create one. Here’s how to do it:
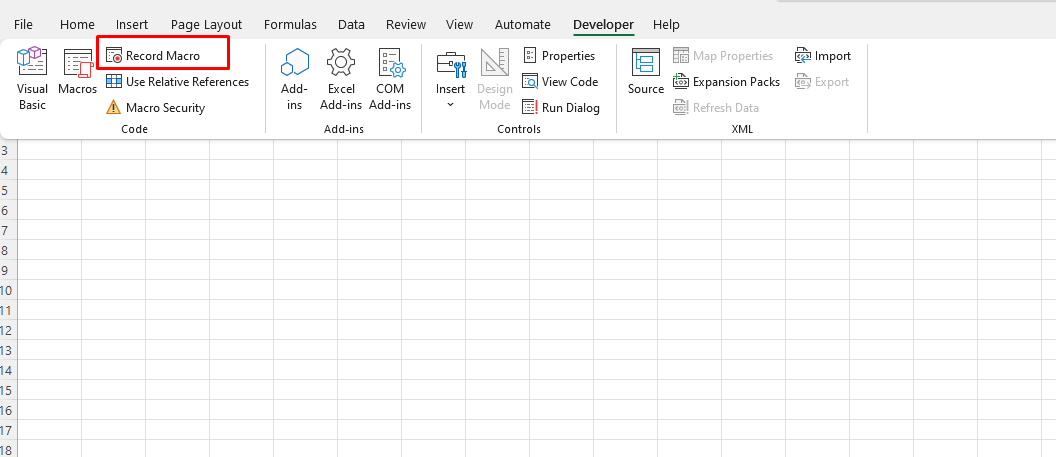
- Go to the Developer Tab: Click on the Developer tab in the Ribbon.
- Select Record Macro:
- Click on Record Macro. A dialog box will appear.
- Name Your Macro:
- Enter a name for your macro (avoid spaces and special characters).
- Assign a Shortcut Key (Optional):
- You can assign a keyboard shortcut for easy access.
- Choose Where to Store the Macro:
- You can store it in the current workbook, a new workbook, or your personal macro workbook.
- Click OK:
- The macro recording begins, and you’ll see a small icon in the toolbar indicating that recording is in progress.
- Perform Your Task:
- Carry out the steps you want to automate (e.g., formatting cells, entering formulas).
- Stop Recording:
- Once done, go back to the Developer tab and click Stop Recording.

Running a Macro
To run the macro you just created:
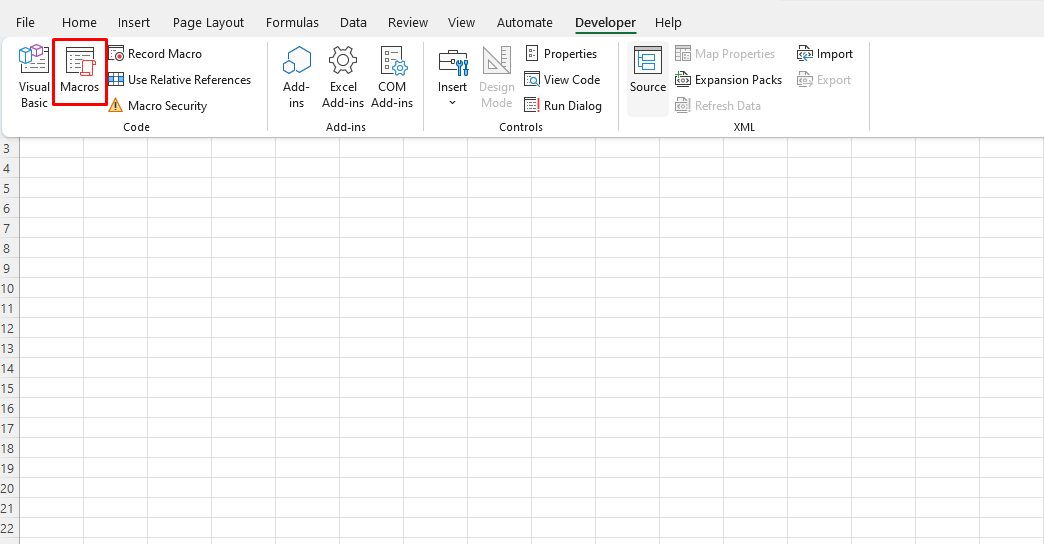
- Go to the Developer Tab.
- Click on Macros.
- Select the macro you want to run from the list.
- Click Run.
Alternatively, if you assigned a shortcut key, you can simply use that to execute the macro.

Editing Macros in VBA
For more advanced users, you can edit the macro’s code directly in VBA (Visual Basic for Applications).
- Open the Developer Tab.
- Click on Visual Basic to open the VBA editor.
- In the left pane, find your macro under Modules.
- Double-click the module to view and edit the code.
Editing in VBA allows for more complex automation and customization of your macros.
Best Practices for Using Macros
- Document Your Macros: Always comment on your VBA code to explain what each section does. This will help you and others understand the functionality later.
- Test Your Macros: Before using a macro in a live environment, test it on a sample dataset to ensure it works as intended.
- Use Relative References: If you plan to run the macro on different datasets, consider using relative references. This allows the macro to adapt to the active cell, making it more flexible.
- Backup Your Work: Always save a backup of your workbook before running macros, especially those that make changes to data.
- Avoid Excessive Use: While macros can automate many tasks, over-relying on them can make your workbook complex and harder to manage. Use them judiciously.
Get affordable, genuine Office Keys to unlock the full range of Microsoft Office features at a fraction of the usual cost.


