Creating a header or footer with a different first page is a common formatting requirement for academic papers, reports, or any document that requires a title page. In Microsoft Word, a header or footer typically includes information such as page numbers, date, author name, document title, or other relevant details. However, for documents with a separate cover or title page, users may want to display different header/footer content or suppress the header/footer altogether on the first page. In this guide, we will explore step-by-step instructions on how to insert a header or footer with a different first page in Microsoft Word, providing users with greater control over their document formatting.
Microsoft Word offers several options for creating a header/footer with a different first page. Users can choose to have a blank header/footer on the first page, display different content, or insert a page number that starts with a specific number. Word provides useful features such as section breaks, which allow users to set different headers or footers for different sections of the document. By applying section breaks and modifying the header/footer settings for each section, users can easily create a document with a header/footer that varies depending on the page or section.
Step 1: Launch Microsoft Word and Open your Document:
- Open Microsoft Word on your computer.
- Open the document in which you want to insert a header or footer with a different first page.
Step 2: Access the Header or Footer Section:
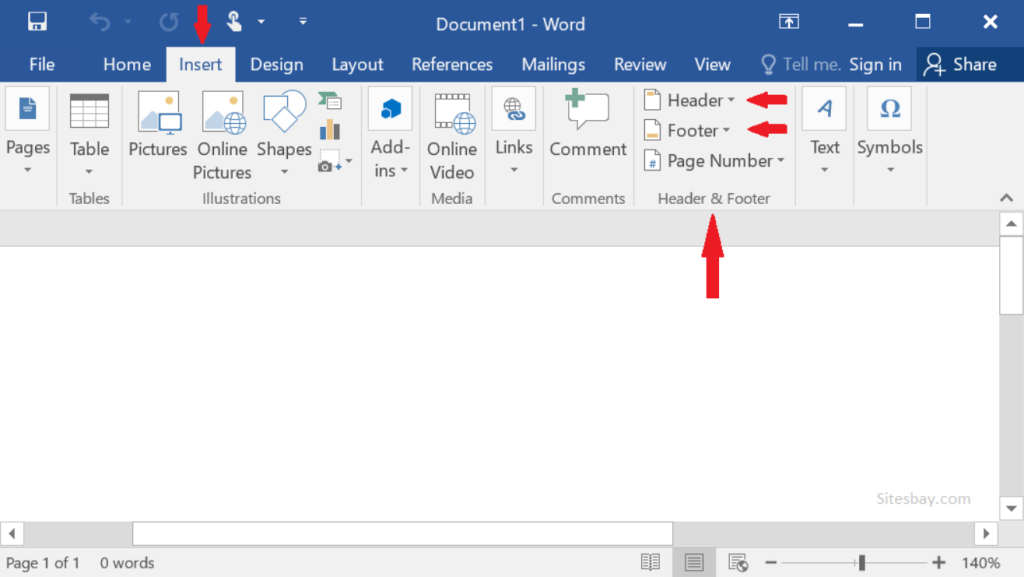
- Navigate to the “Insert” tab in the menu bar at the top of the screen.
Step 3: Insert a Header or Footer:
- Click on the “Header” or “Footer” button in the “Header & Footer” section.
- Choose either “Edit Header” or “Edit Footer” from the drop-down menu.

Step 4: Activate the Different First Page Option:
- In the Header/Footer Design tab that opens, check the box labeled “Different First Page.”
- This option allows you to create a separate header or footer for the first page of your document.
Step 5: Design the Header or Footer for the First Page:
- Add text, images, or other elements to create the header or footer for the first page.
- Use the formatting options available in the Header/Footer Design tab to customize the appearance.
Step 6: Move to the Next Page:
- Click on the “Go to Header & Footer” button in the Navigation group.
- Alternatively, you can simply move your cursor to the next page of your document.
Step 7: Design the Regular Header or Footer:
- Create the header or footer for the remaining pages, excluding the first page.
- Customize the design using the available formatting options.
Step 8: Finalize and Save the Document:
- Review your document to ensure the header or footer with a different first page is correctly inserted.
- Save your document to preserve the layout and settings.
Congratulations! You have successfully inserted a header or footer with a different first page in Microsoft Word. By following these steps, you can maintain a consistent layout throughout your document while adding a personalized touch to the first page.
Get the best deal on Microsoft Office with the lowest price available on our website today and start boosting your productivity!

