Named ranges in Microsoft Excel provide a convenient and efficient way to manage and refer to specific cells, ranges, or formulas within a workbook. By assigning names to cells or ranges, you can simplify complex formulas, improve the readability of your spreadsheets, and easily update references when needed. In this guide, we will explore how to create and update named ranges in Microsoft Excel, equipping you with the skills to streamline your data management and enhance your Excel workflow.
Working with large datasets or complex formulas in Excel can sometimes become overwhelming, especially when dealing with multiple cell references. Named ranges offer a solution by allowing you to assign a meaningful name to a specific cell or range, making it easier to refer to them in formulas and conduct calculations. In addition, named ranges can be beneficial when working with dynamic data or when sharing spreadsheets with collaborators.
Step 1: Select the Cells to Name
- Open your Excel workbook and select the cells that you want to name.
- You can select a single cell, multiple cells, or an entire range of cells.
Step 2: Create a Named Range
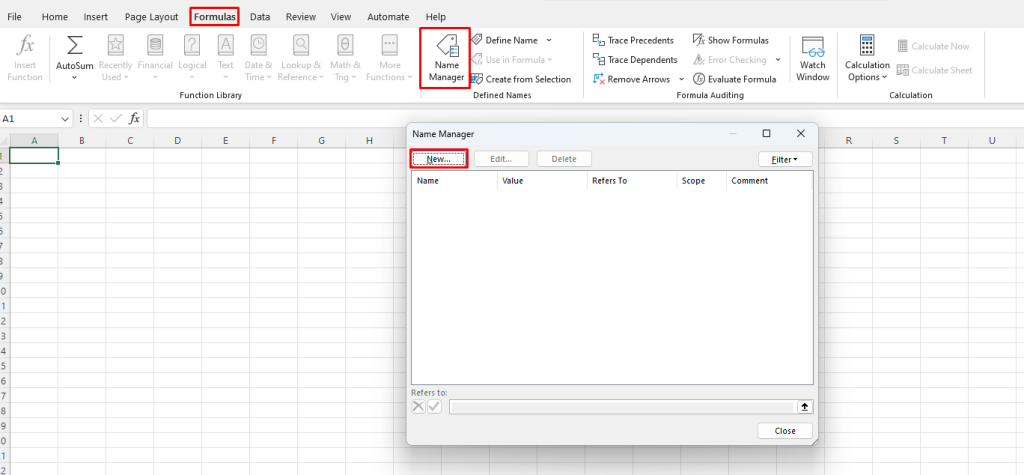
- With the cells selected, go to the Formulas tab in the top menu.
- Click on the Name Manager button, and a new window will open.
- In the Name Manager window, click on the New button located on the right side.
- In the New Name window, enter a name for the range in the Name: field.
- In the Refers to: field, confirm that the correct cell or cell range is displayed.
- Click OK to create the named range.

Step 3: Use the Named Range in Formulas
- With the named range created, you can refer to it in formulas using its name.
- For example, if you named a range “Expenses,” you can use it in a formula like
=SUM(Expenses)instead of entering the cell range like=SUM(A1:A10). - The named range will automatically update if you add or remove cells within the range.
Step 4: Update a Named Range
- To update a named range, go to the Formulas tab and click on Name Manager.
- Select the named range you want to update from the list and click on the Edit button.
- In the Edit Name window, you can rename the range or update its cell range.
- Click OK to save the changes.
Step 5: Delete a Named Range
- To delete a named range, go to the Formulas tab and click on Name Manager.
- Select the named range you want to delete from the list and click on the Delete button.
- Click OK to confirm the deletion.
By following these simple steps, you can create and manage named ranges in Microsoft Excel, making it easier to work with your data and formulas. Save time and enhance your productivity by leveraging this powerful feature of Excel.
Discover the lowest prices for Microsoft Office on our website as we offer high-quality packages at unbeatable rates.

